
The Heel to Toe Tack
Technique / Wing Foil
Just when you thought you could relax and possibly rest on your laurels. Content in the knowledge that you have built up quite a box of tricks, bursting with gybes, a cheeky tack, pumping and ducking. Well, we’re going to burst that rightfully smug bubble and set you yet another challenge. Not quite the Crypton Factor, but the heel-to-toe tack is yet another wing foiling treat. Yes, it is admirably stylish, and you know what’s coming, it’s also hugely practical. Just as the toe to heel, it’s a tack so that you won’t lose any ground in your transition. What’s even better is that not all of us can ride toe side in both directions. If this is you, then you’ll find it a shed load simpler to learn this tack from your heels to your preferred toe side!
OK, sales job done. What about the practicalities? You still need one good toe side. If you’re going to exit smoothly, get the power back on and stay up on the foil, you need a solid toe side. Assuming you do, there are four interlocking phases to get dialled to make this bad boy yours: wing lift, carve, timing for hand swap, and exit. We’ll have a look at these as we go through the move. And just before we do, it’s worth noting that although the set-up and wing lift are similar, albeit in a different stance, to the toe-to-heel tack, the carve and timing are very different.
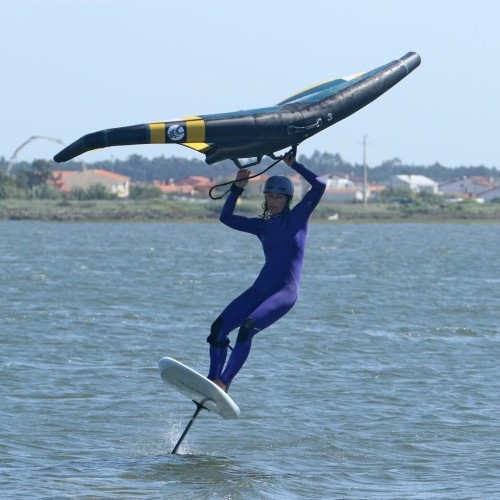
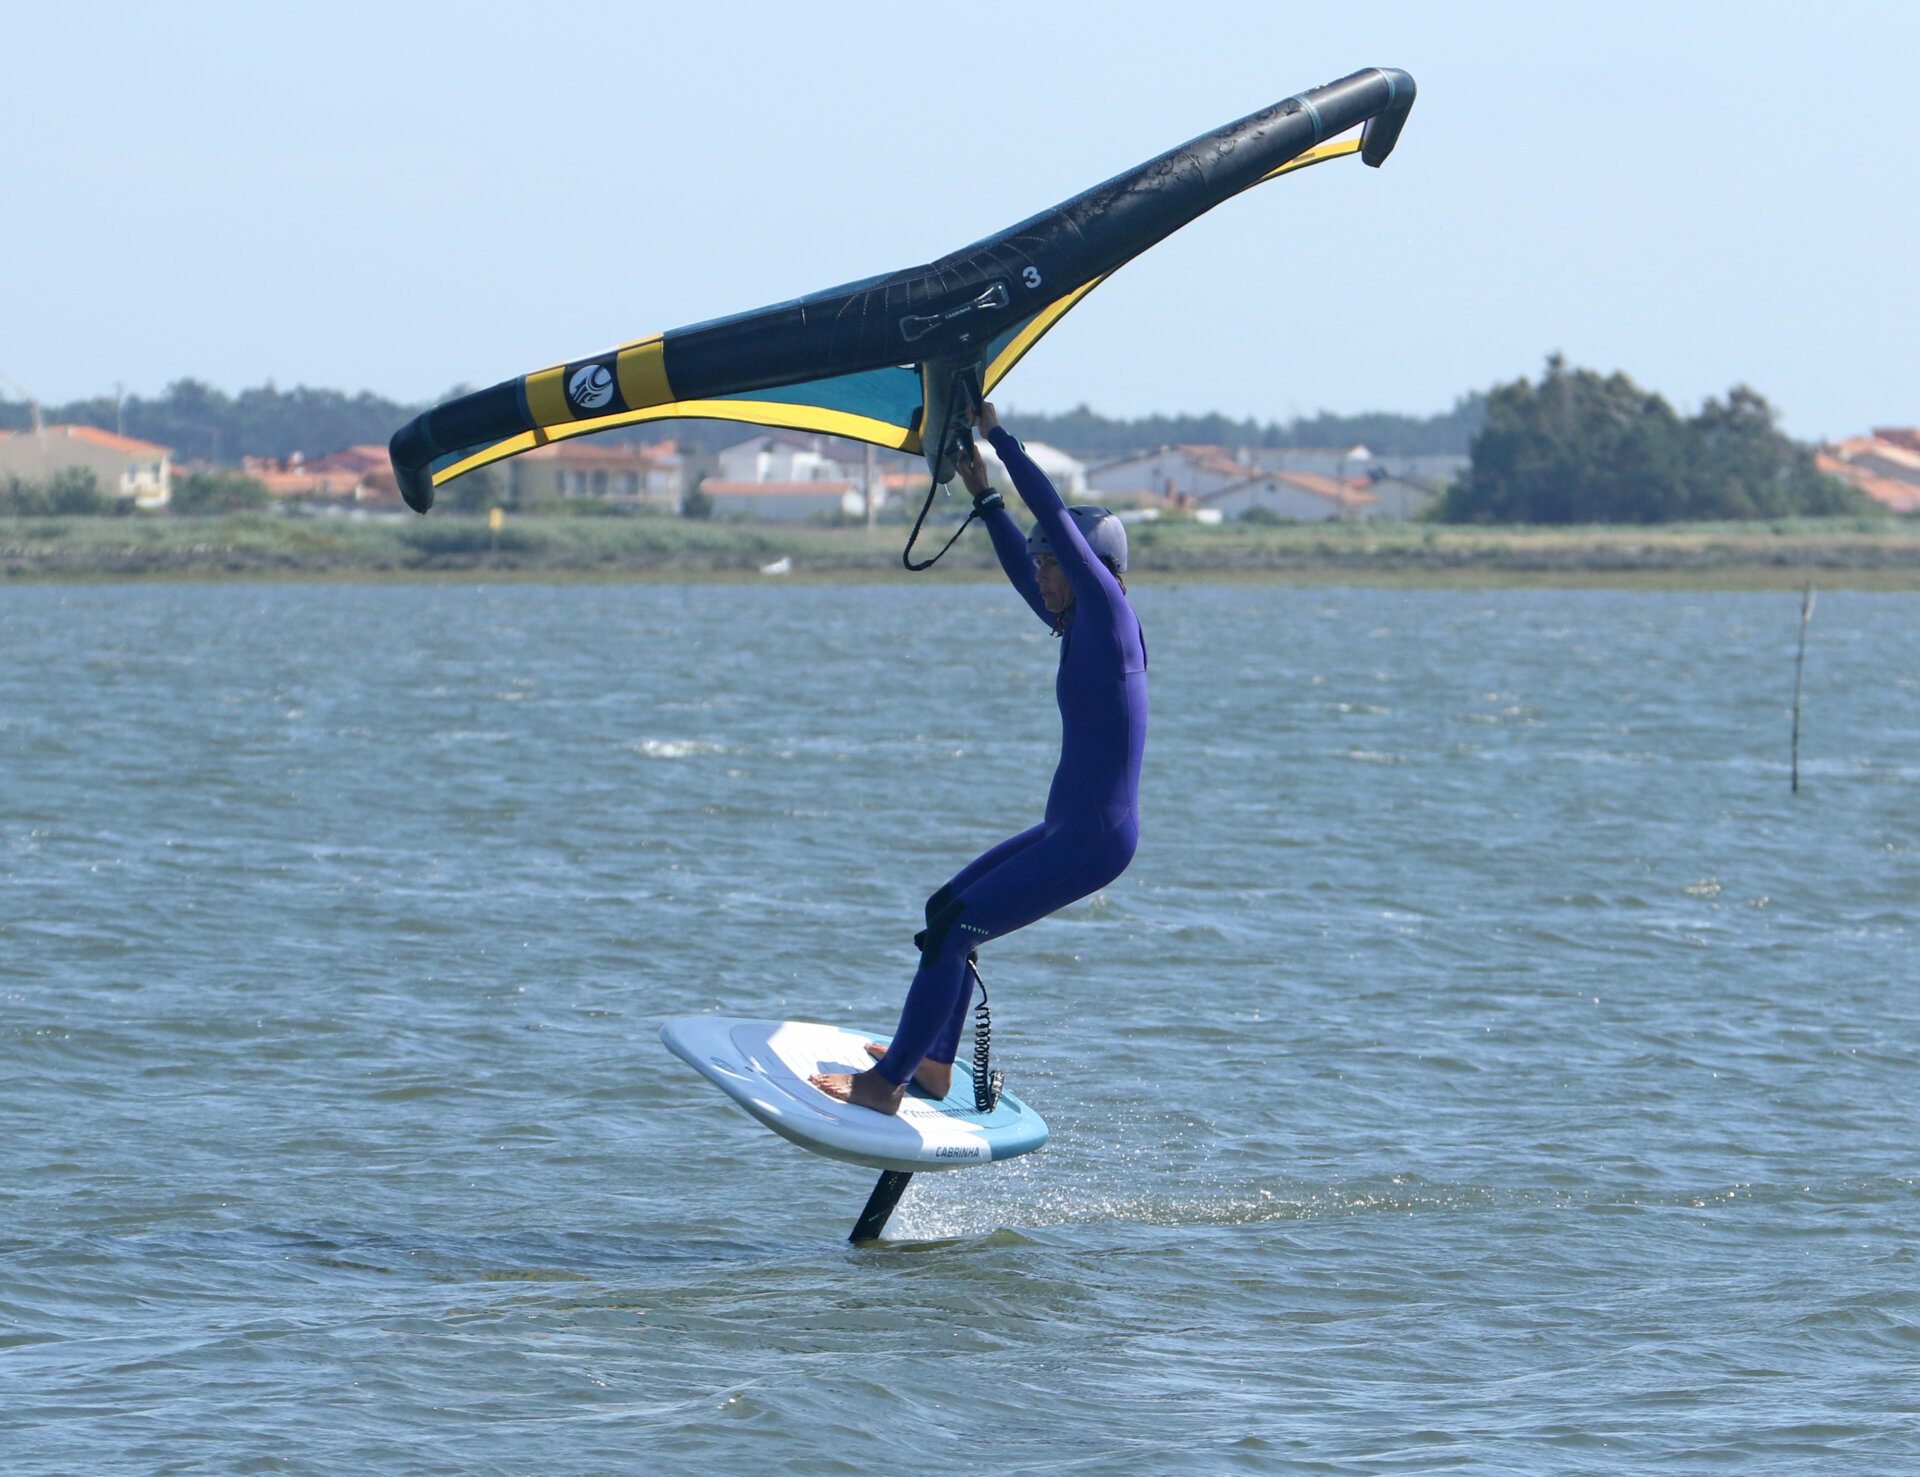
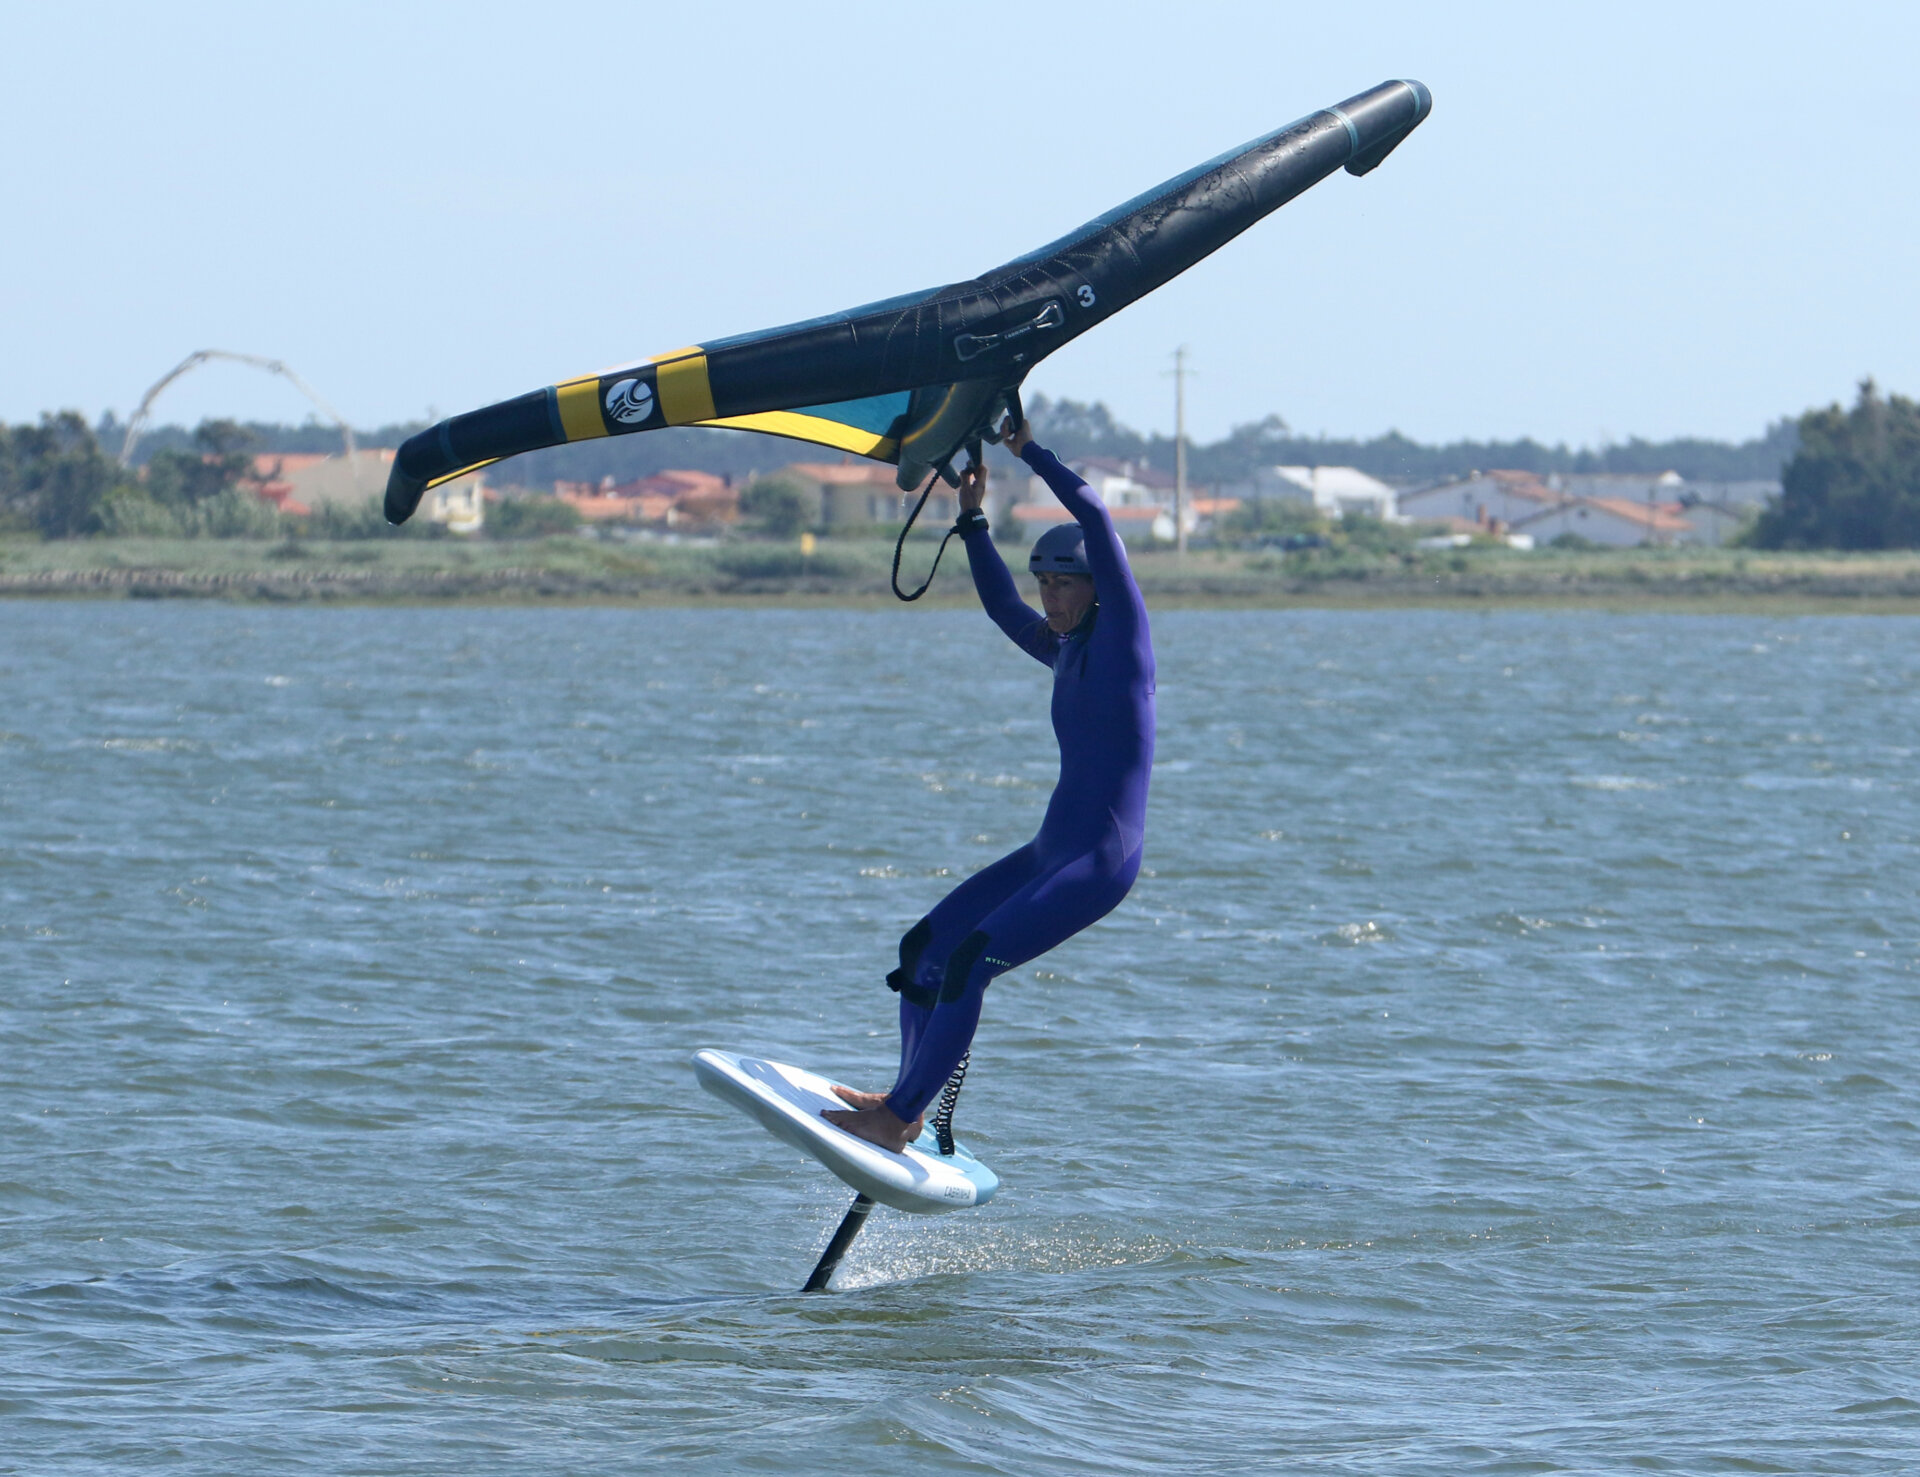
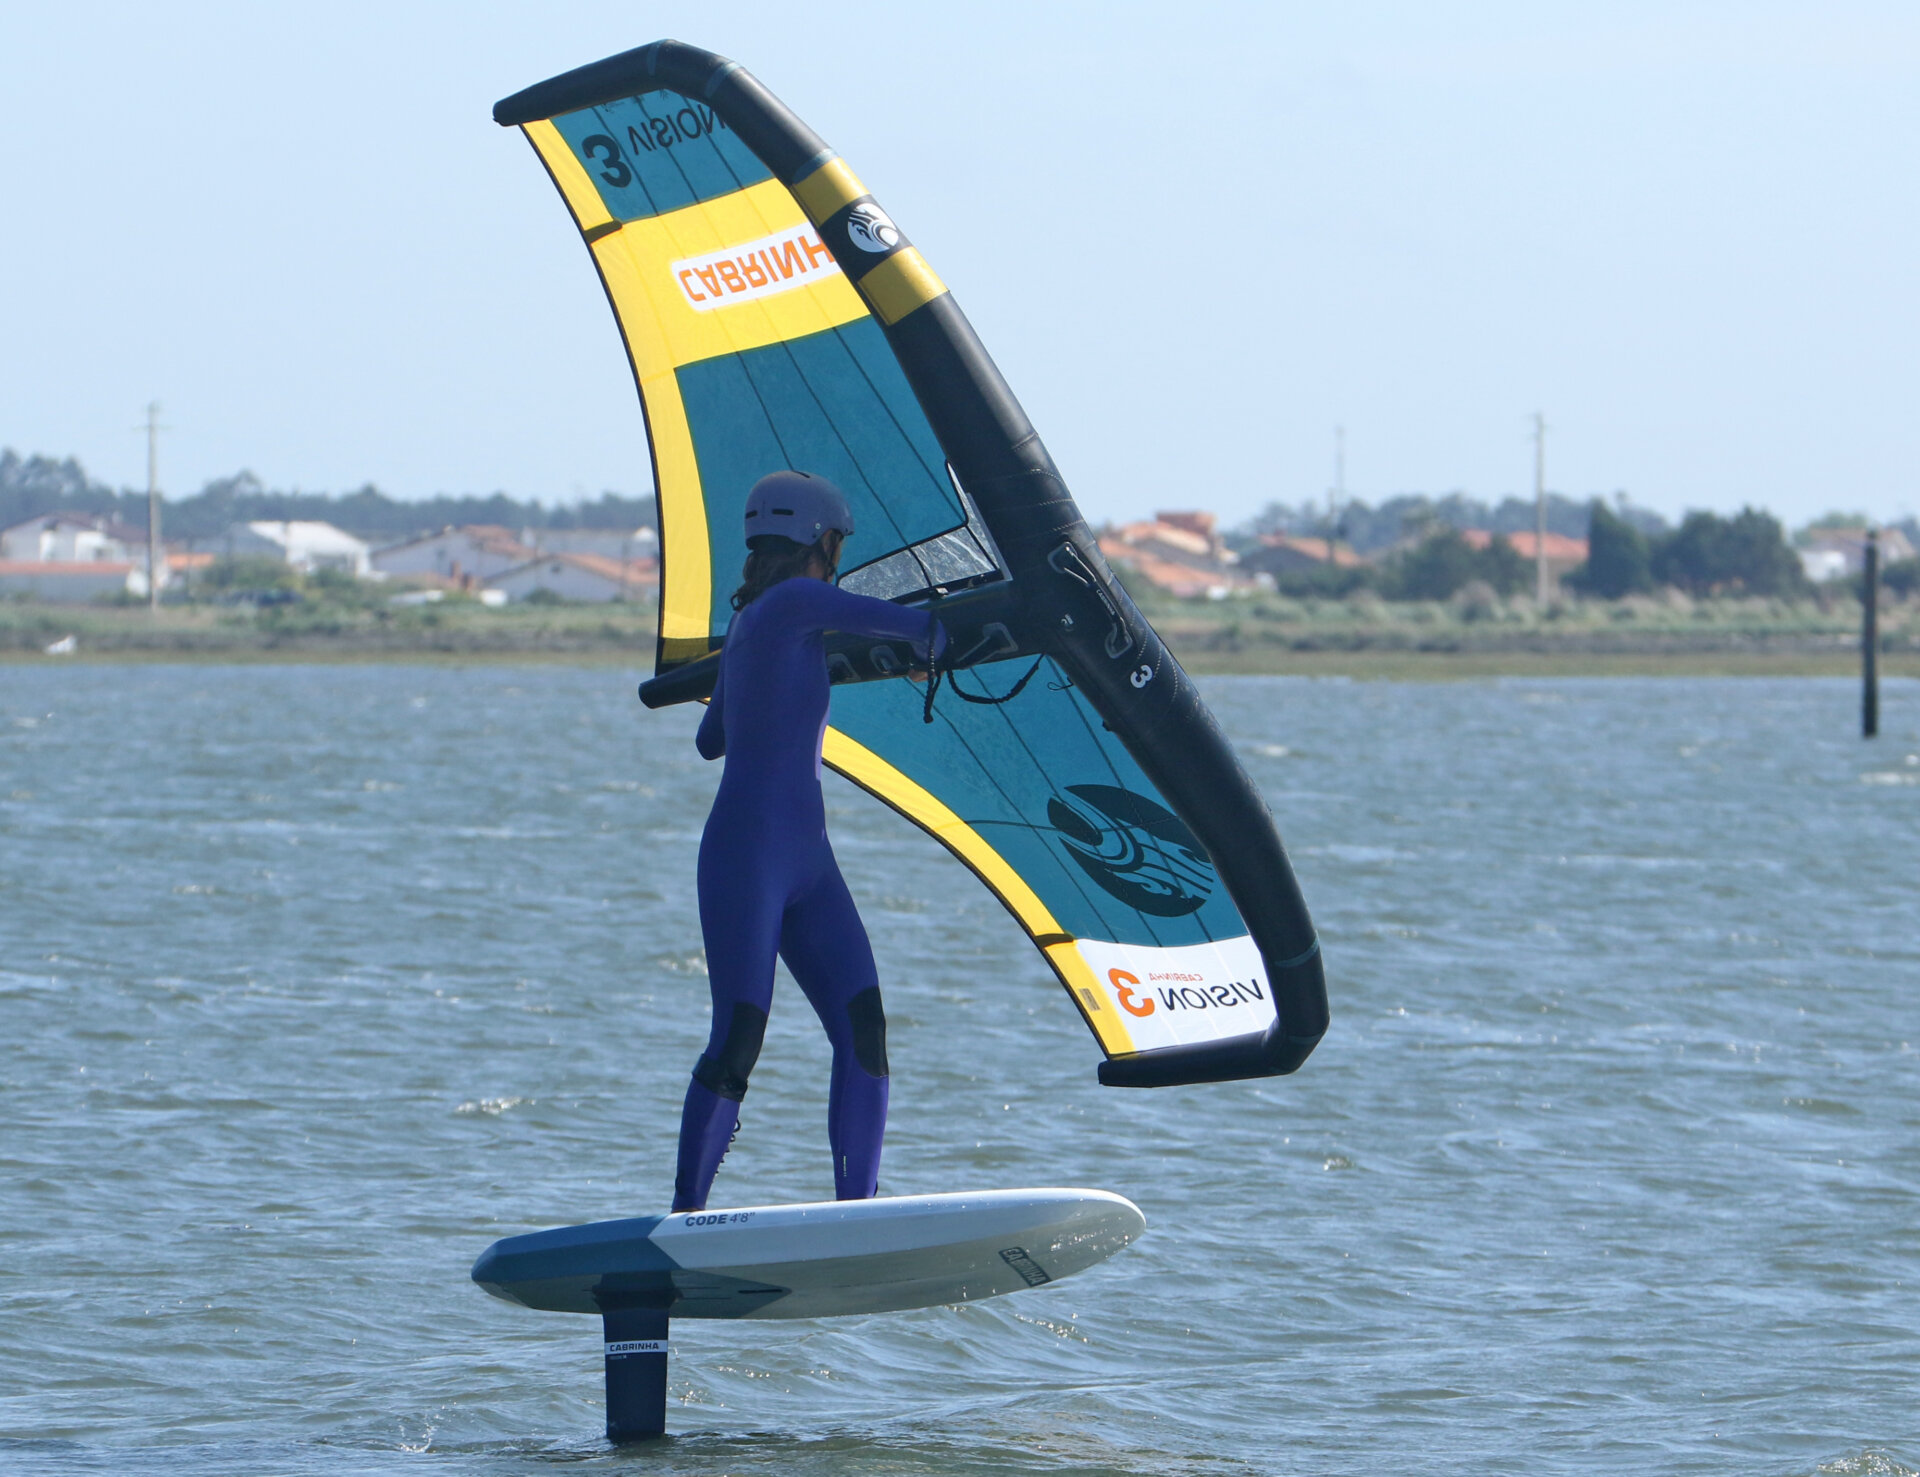
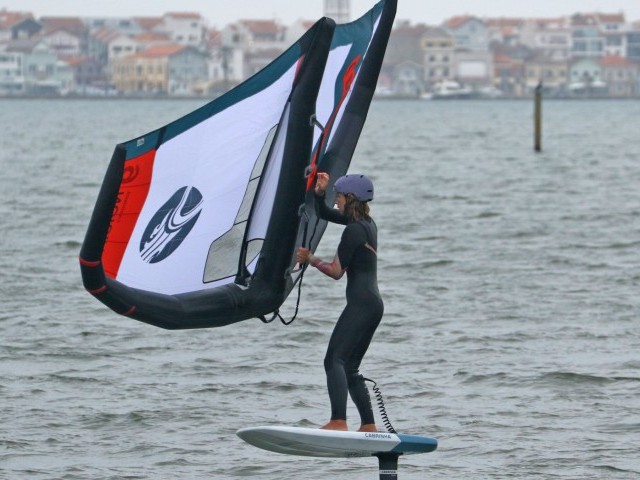
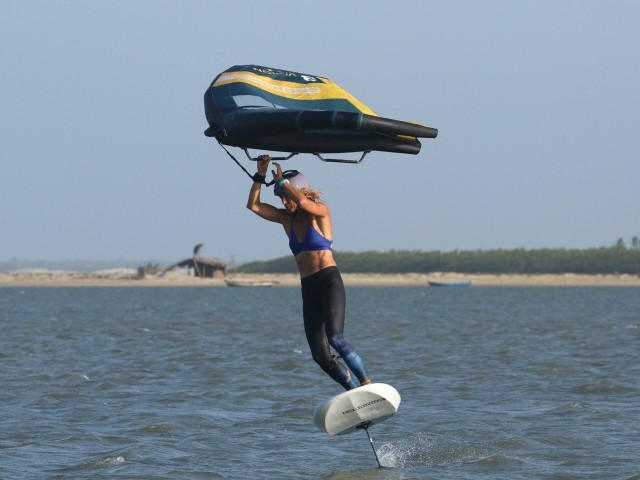
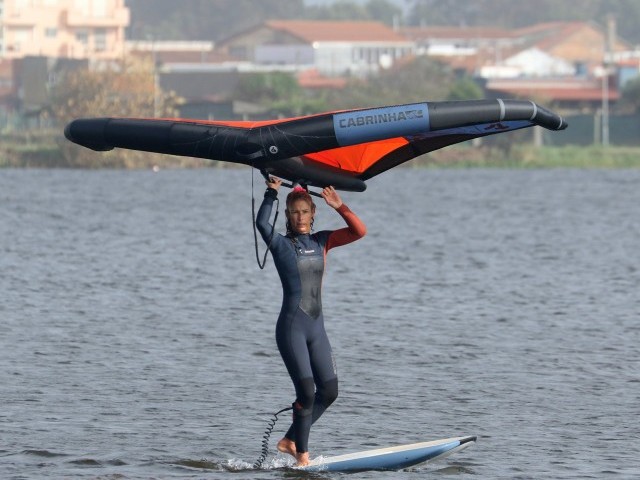
Approach – Momentum Pic A
During a tack, you’re turning upwind, which is only possible if you get rid of power. For this reason, as you can’t use the wing to drive you upwind, you will need some board speed, giving you enough momentum and glide to carry you through until you can get the power back on. This is also connected to how you’ll carve, so you’ll have the following check:
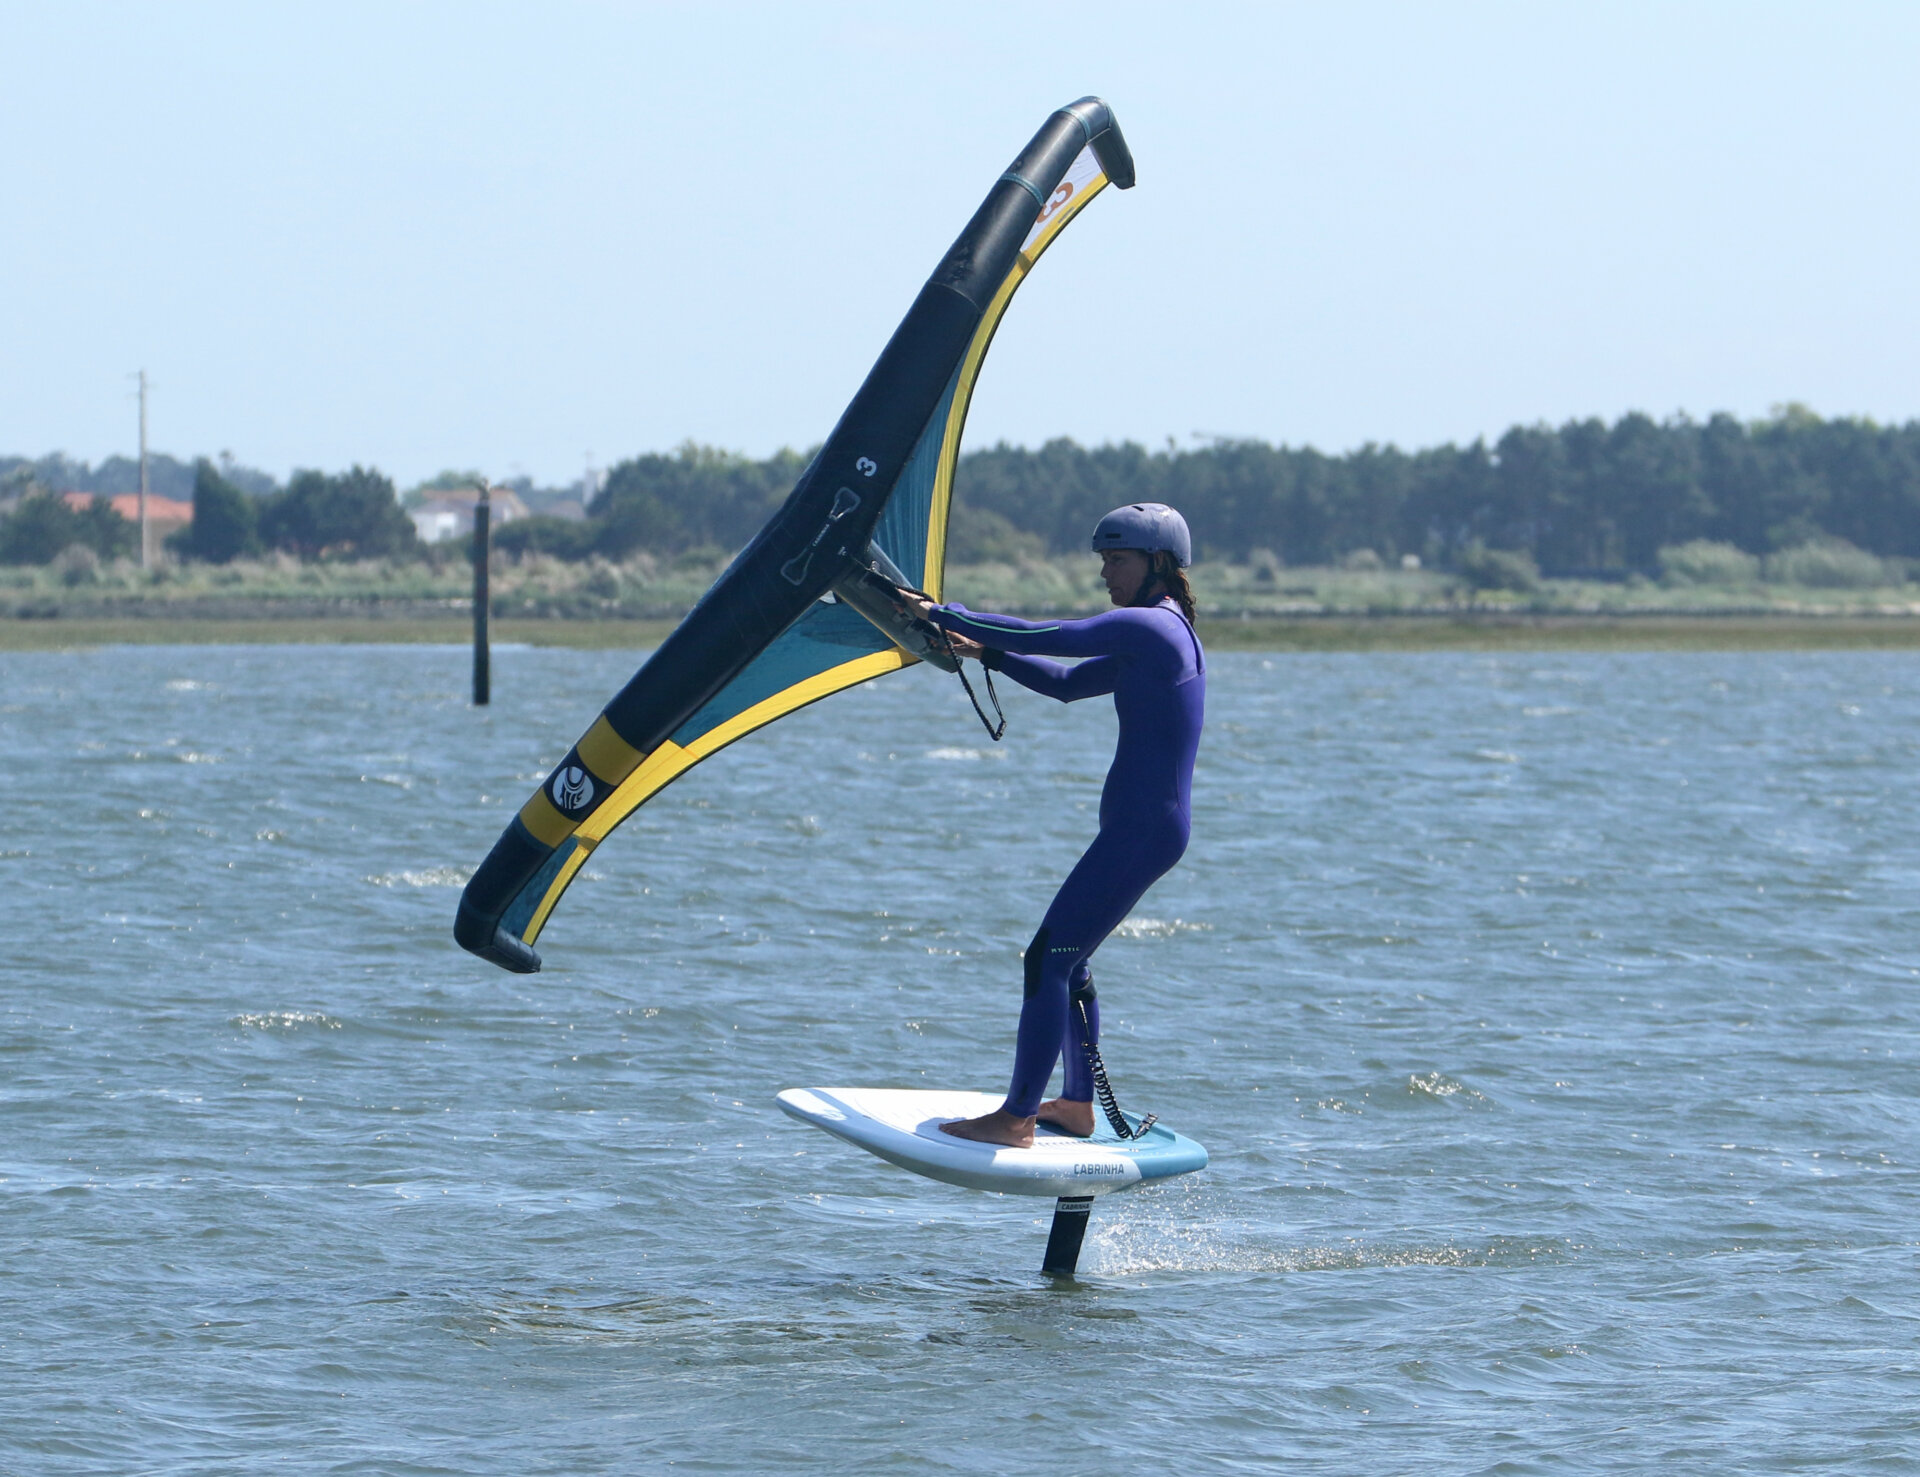
- Direction of Travel. You should be winging upwind but not too close to the wind. This way, you can keep speed and build momentum. Keep the wing low and sheeted in for maximum drive, while trying to support yourself on your legs. This will get you ready for the wing lift, balanced on the board.
- Weight-centred. Make sure you’re standing equally on both feet, so the foil is trimmed from nose to tail. This way, you can keep your balance when you depower the wing and keep the foil trimmed as you carve. This is particularly important when carving up heel side as you’ll naturally tend to favour driving off the back foot.
- Dynamic Offset Stance. Think about how you’d like to exit into your default toe-side stance. Placing your back foot a tad further across and pointing slightly forward will help when you exit, and having your front foot slightly outboard will help you carve off both feet. Last but not least, you can move your back foot forward slightly. This will compensate for too much back foot pressure during the carve and will help you trim the board and foil once you exit.
- Hand position. This will vary from wing to wing and also depend on wind strength. However, you need room to swap hands, and you will be exiting the toe side. This is not a must, but if you can leave space behind your front hand, you can swap into a more wing forward toe side hand position.
Over to the photo. Karine is riding gently upwind, sheeted in for speed with her wing low. Her feet are offset, and her back foot has inched up the board. She’s holding her front handle forward and checking that the coast is clear. Game on!
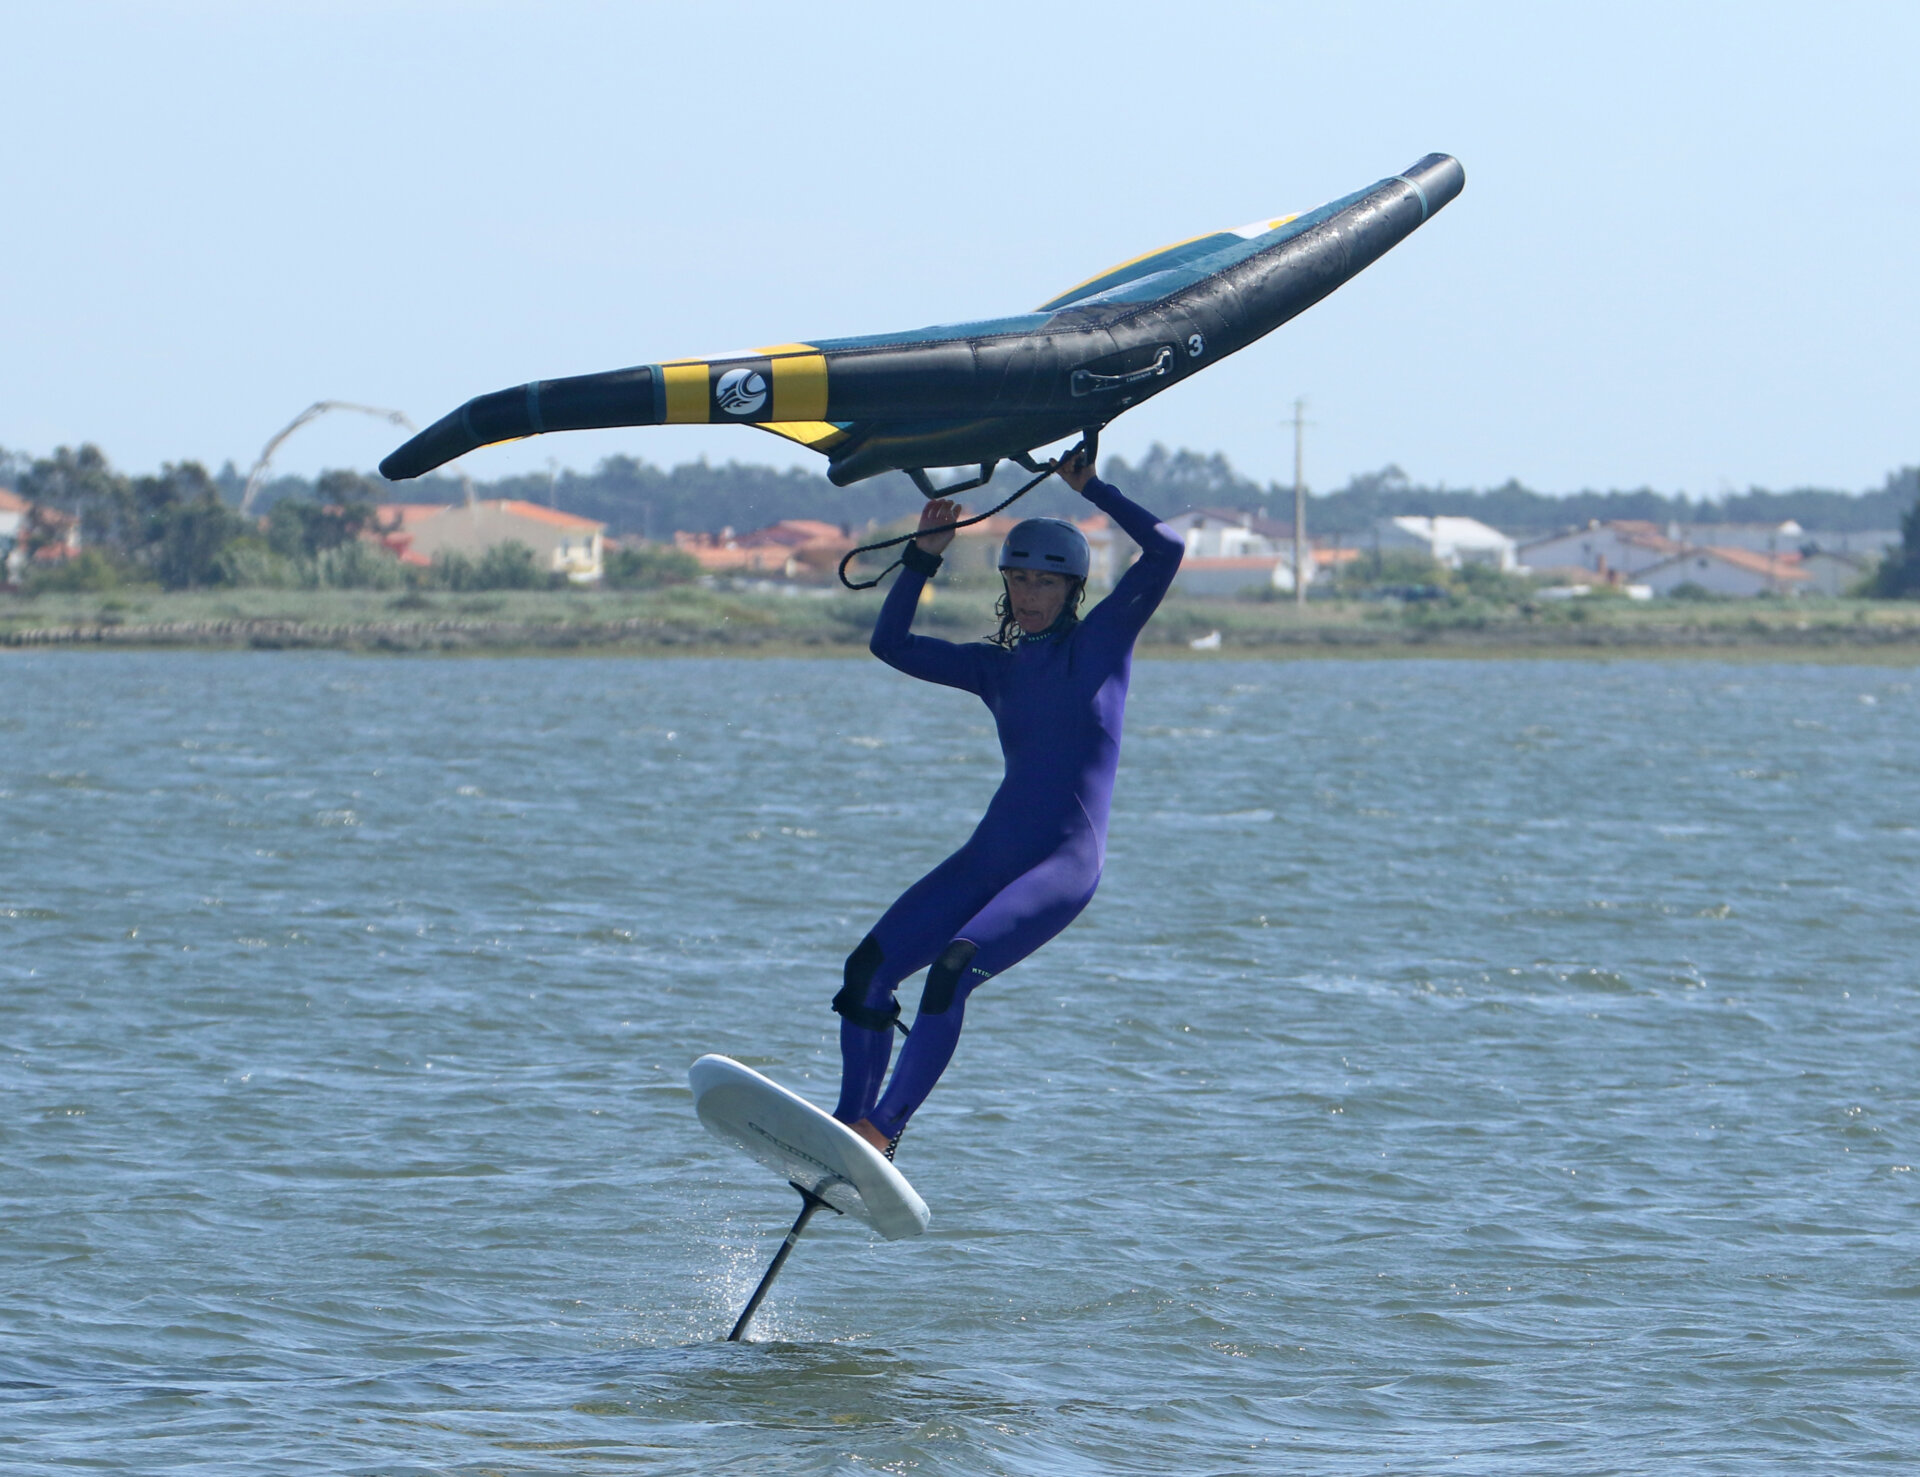
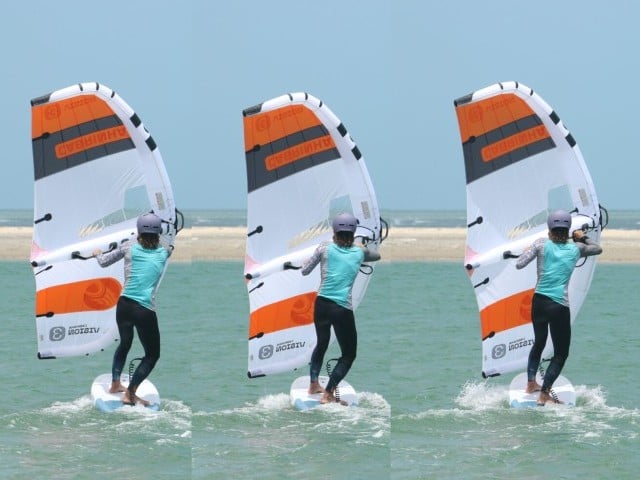
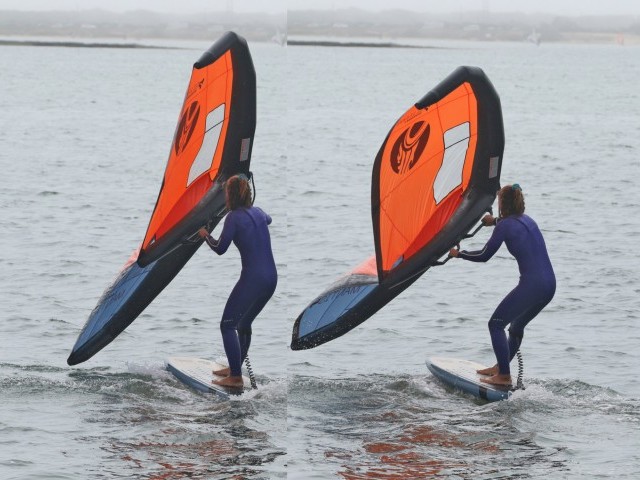
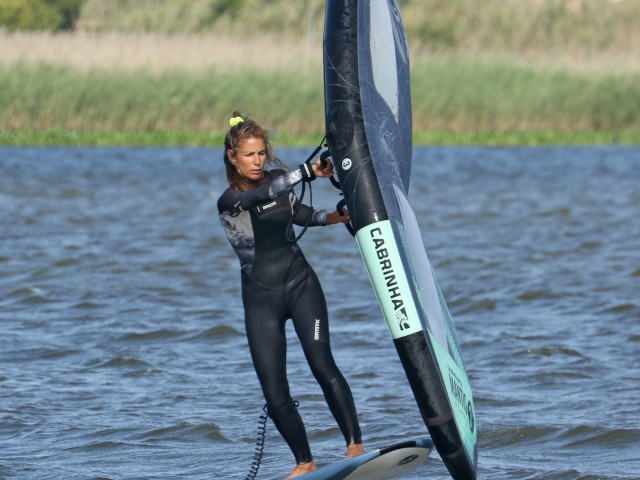
Wing Lift Pic B.
The way you lift your wing will have a massive influence on your success rate. You’ll carve upwind, so you cannot afford to hold any opposing, downwind pull. This means lifting the wing around the side of its window, rather than steering it straight up. This will take longer, so give yourself time. You want to sheet out gently so that the wing can fly forward as you guide it up.
Looking at Karine in the mini-sequence, riding from right to left, you can see how she gently sheets the wing out, turning her shoulders as she does so, while steering the wing gradually up, tracing the edge of the window. This enables her to stay balanced on her feet and allows her to drop her weight and carve into the wind as there is no downwind pull from the wing.
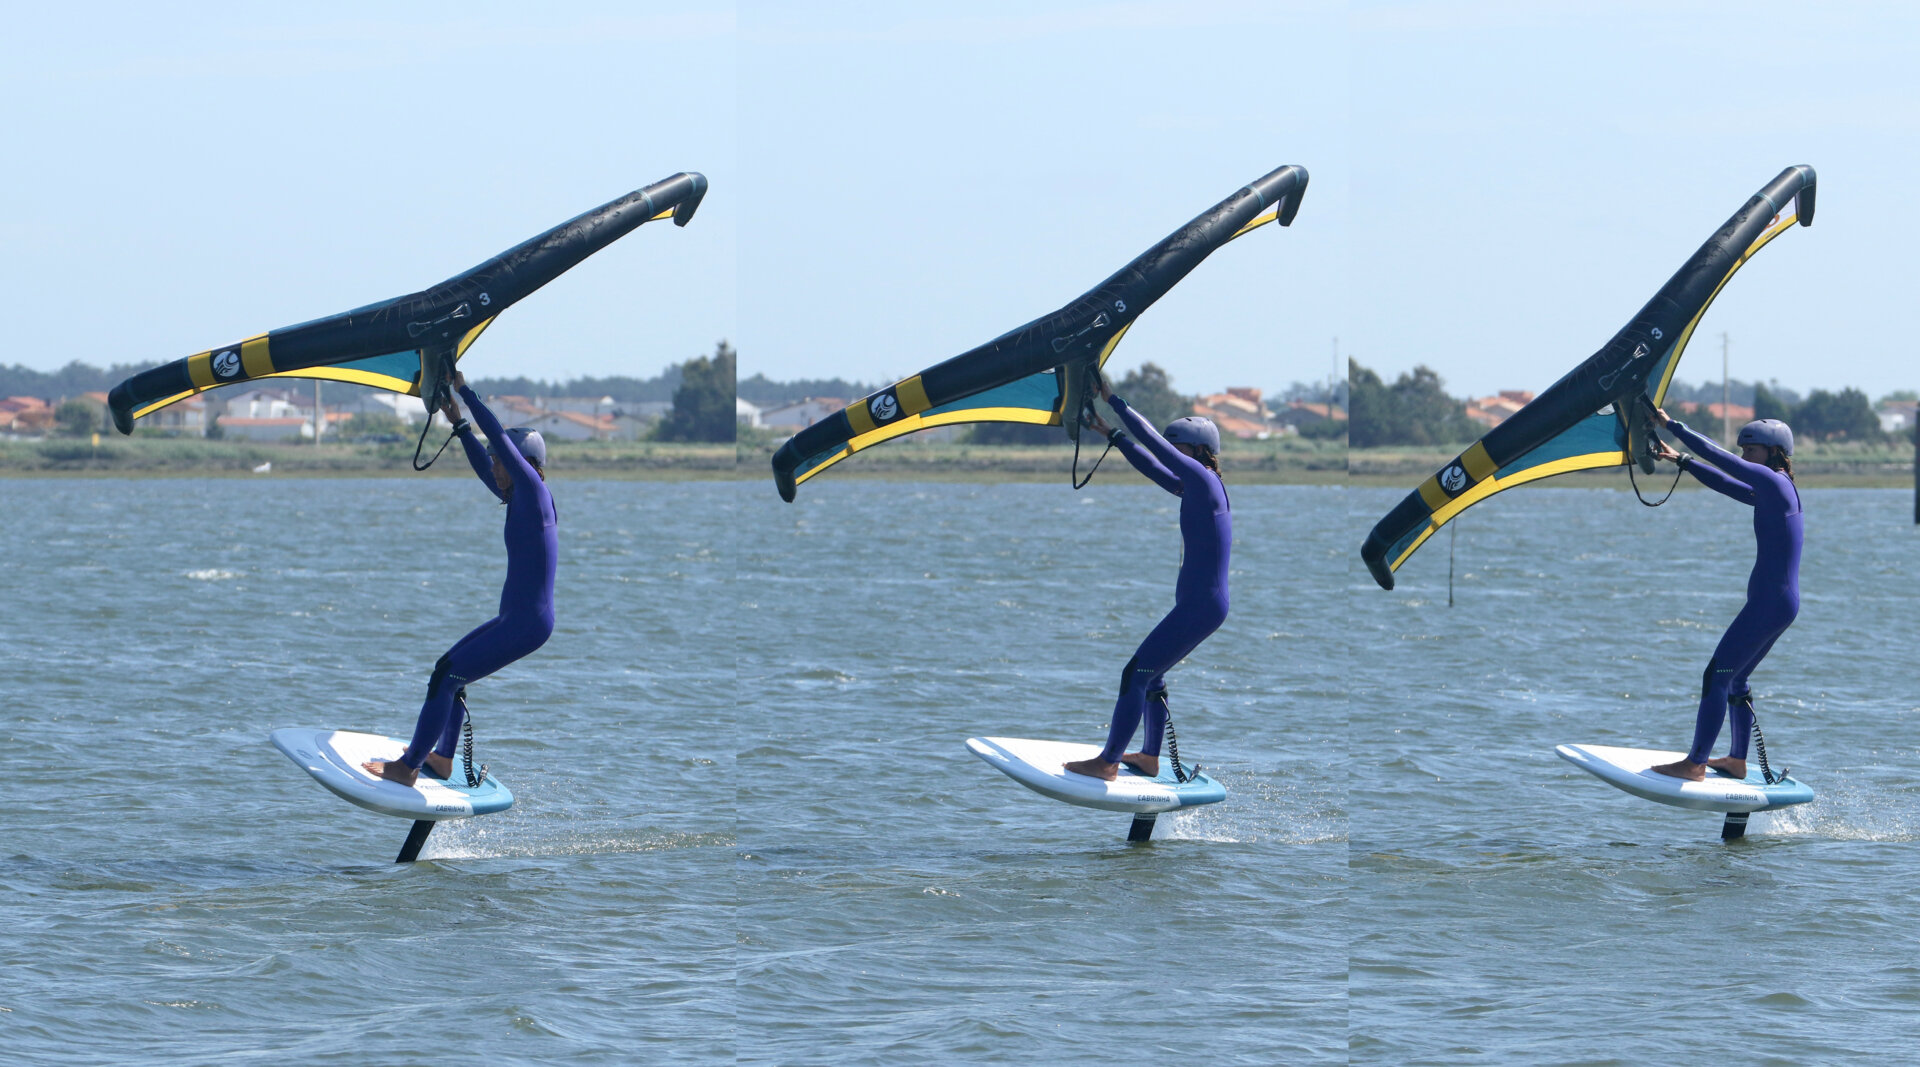
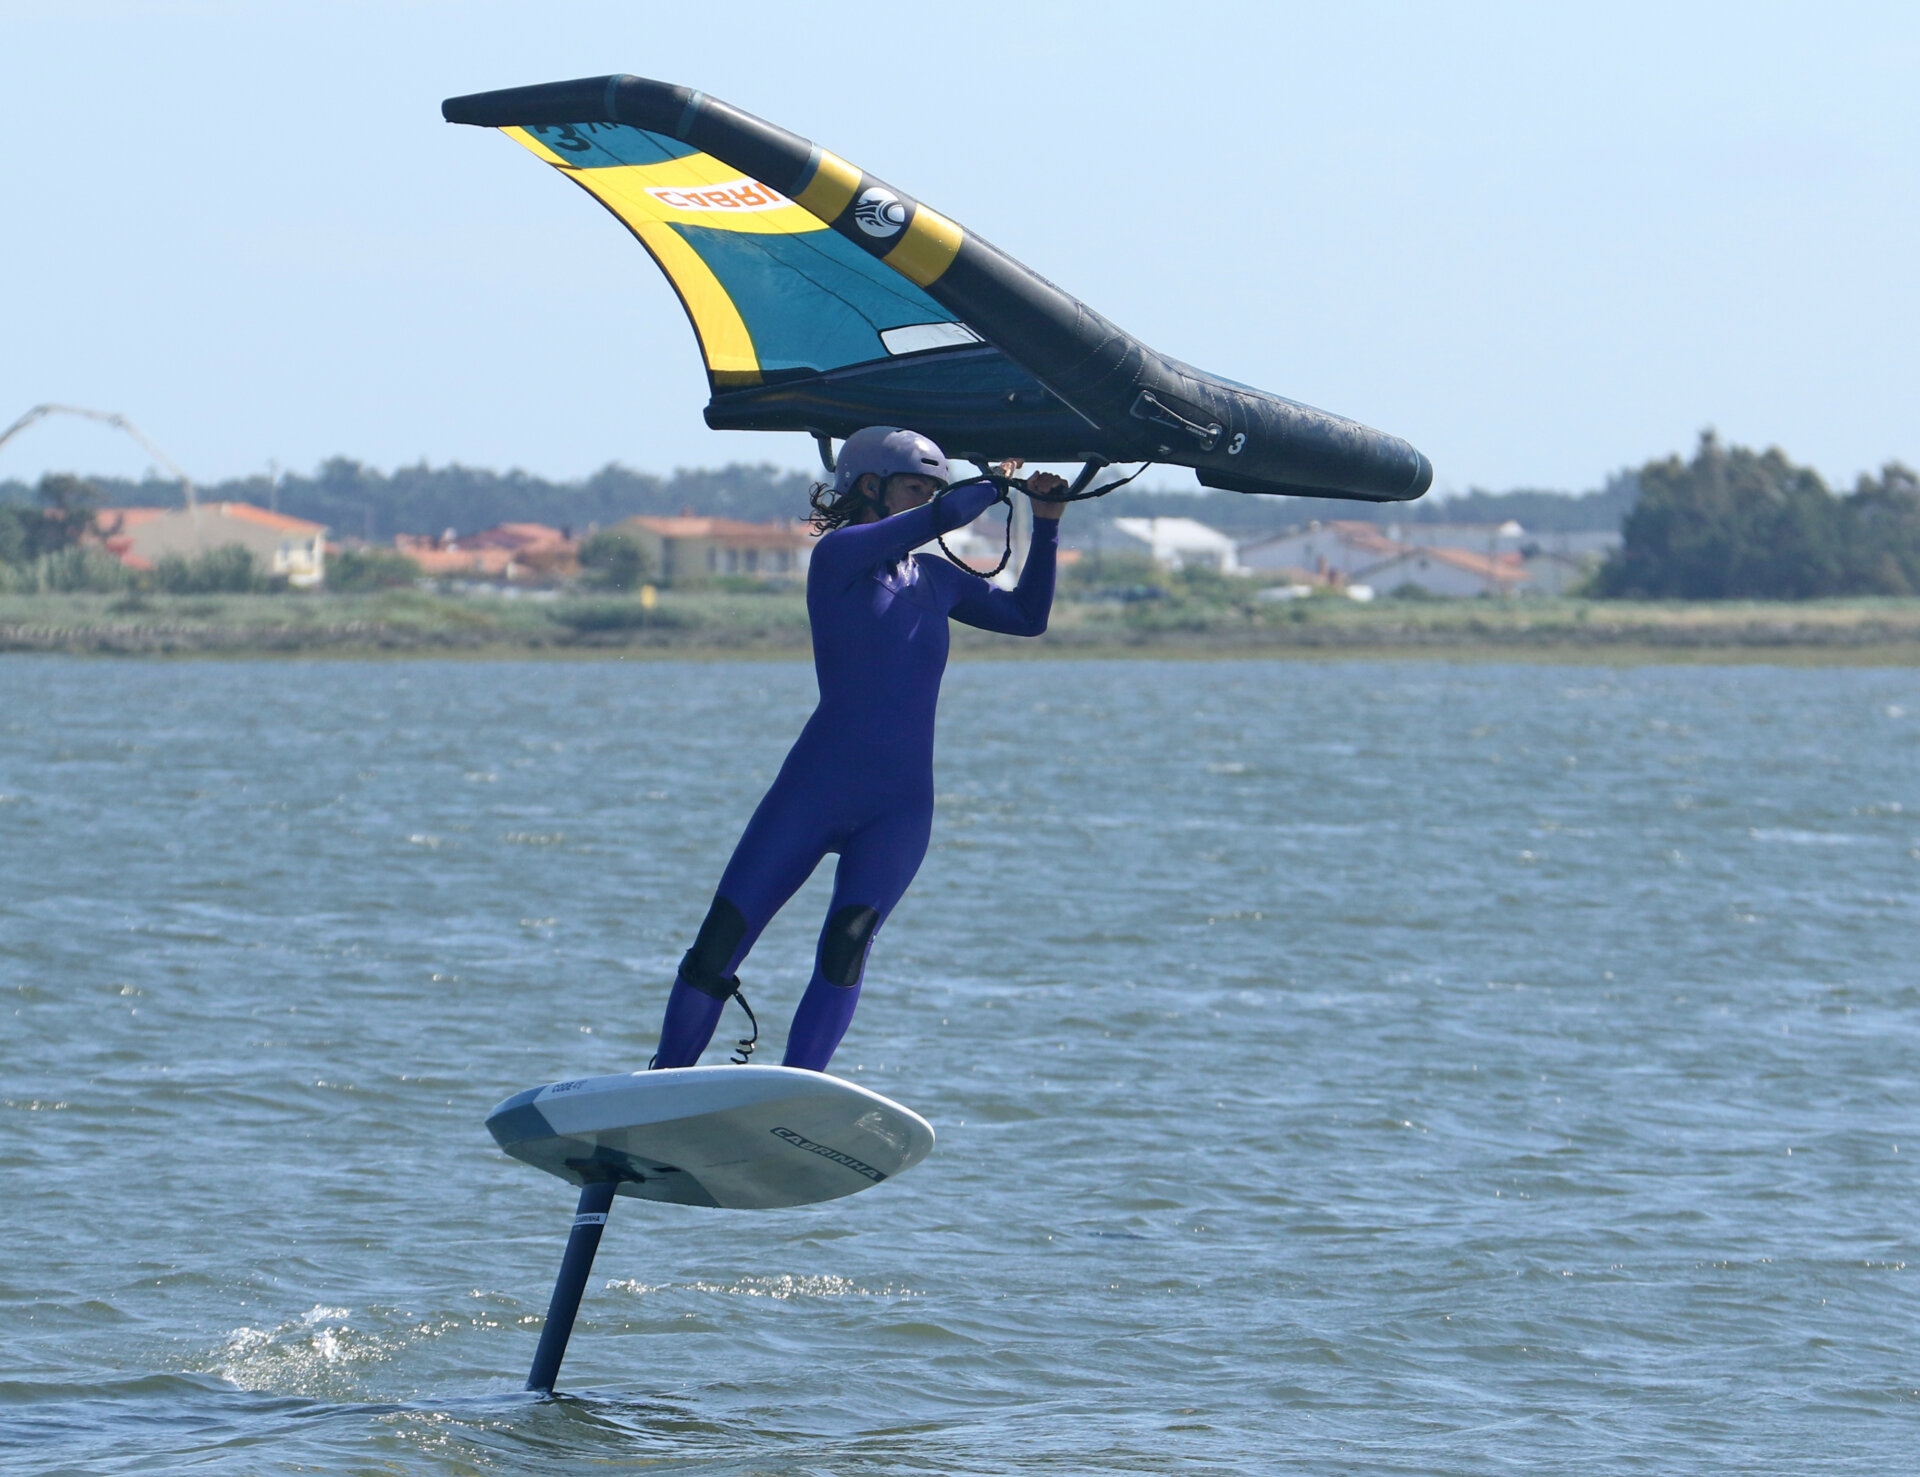
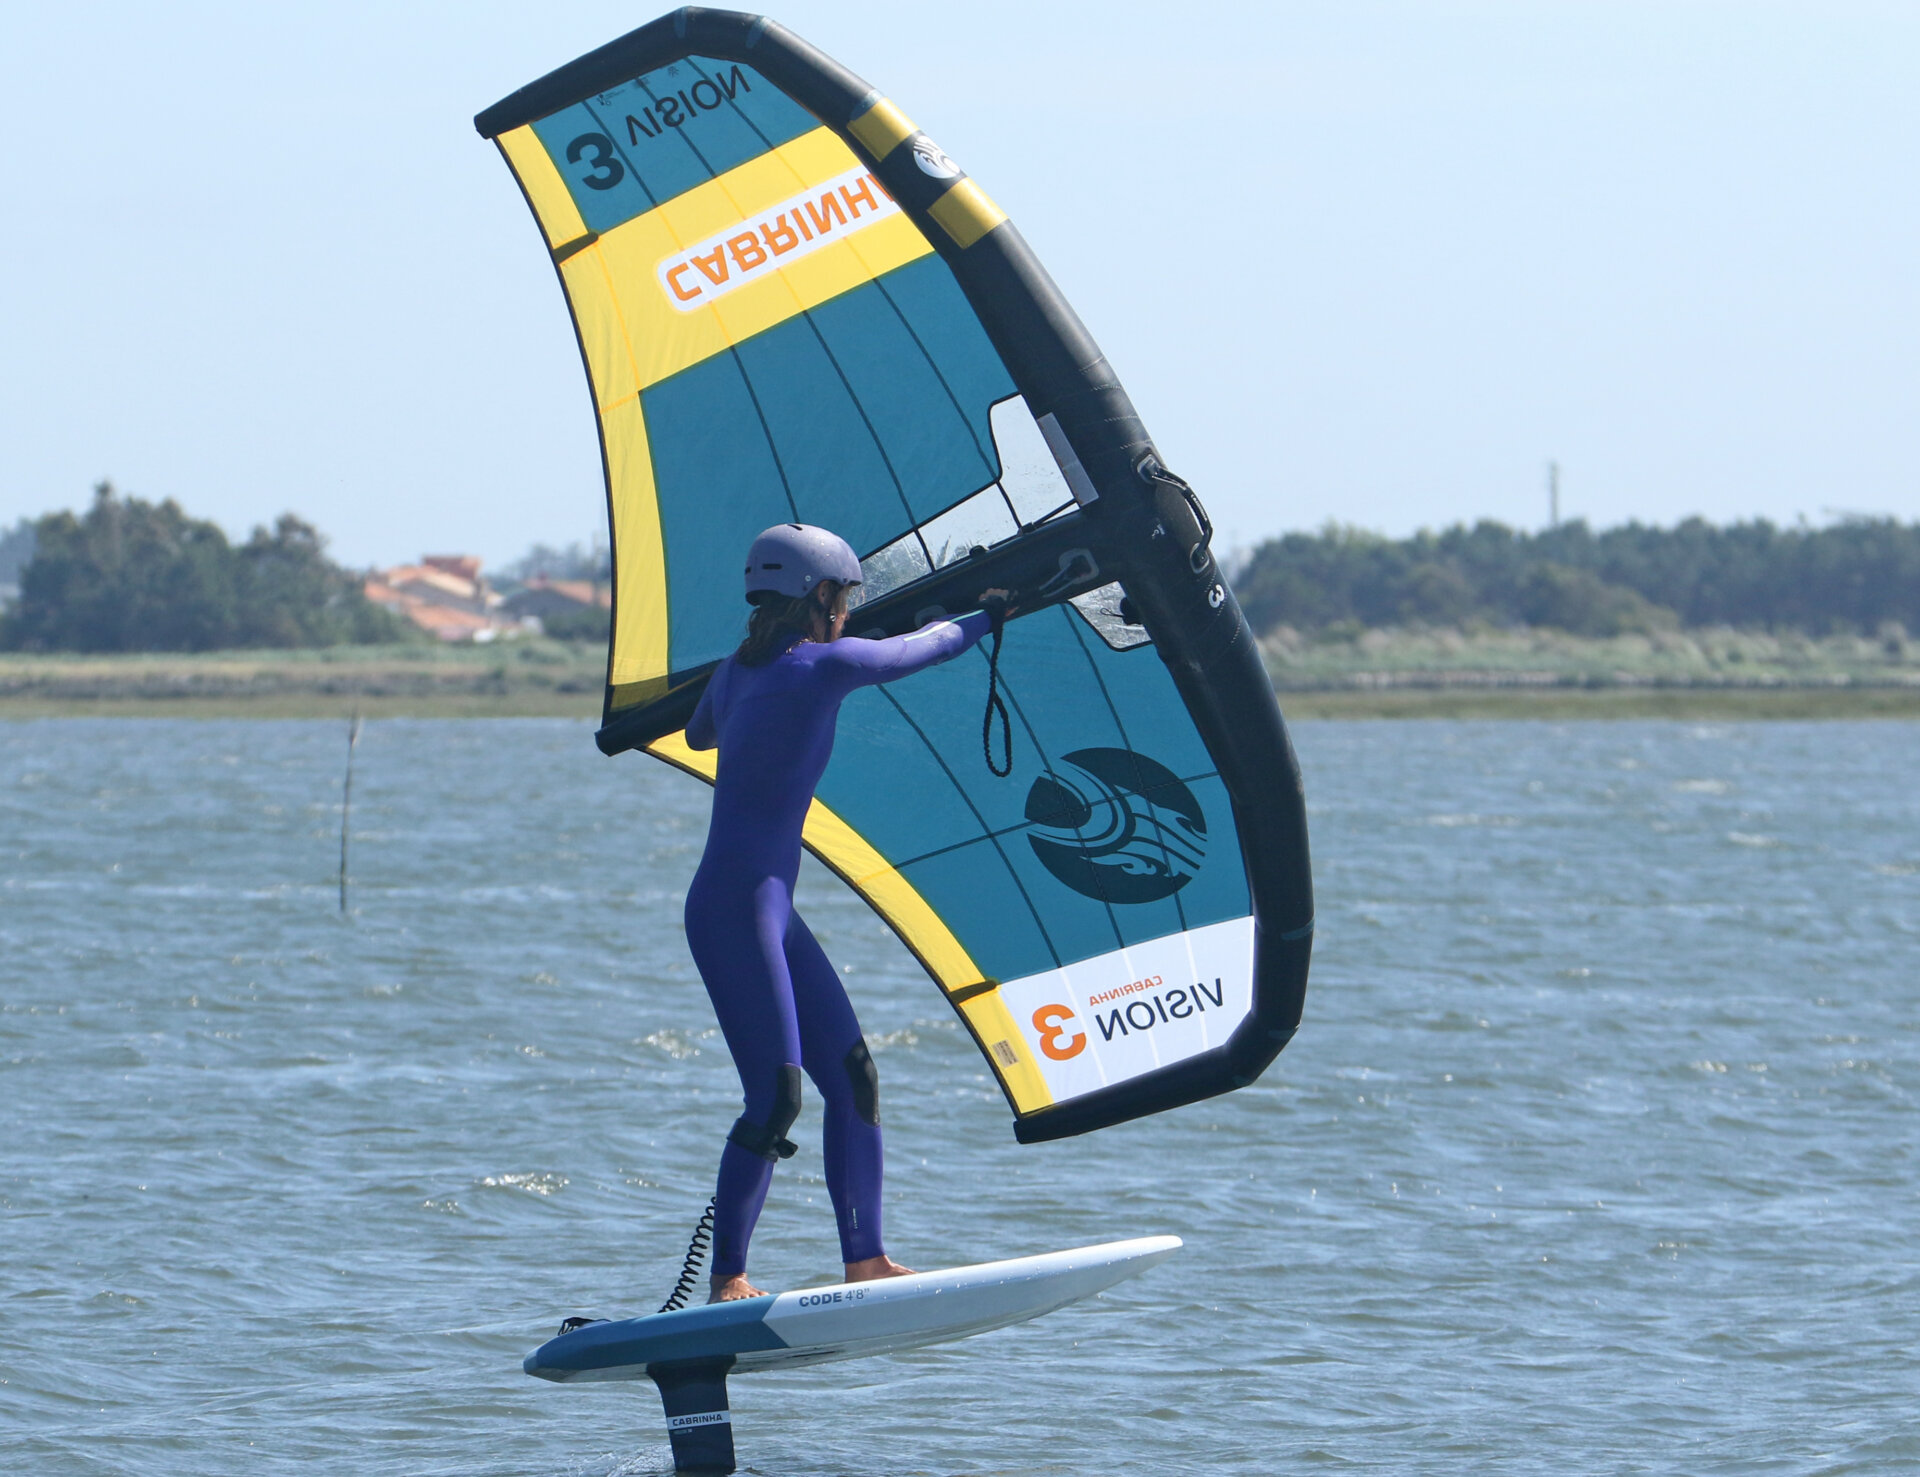
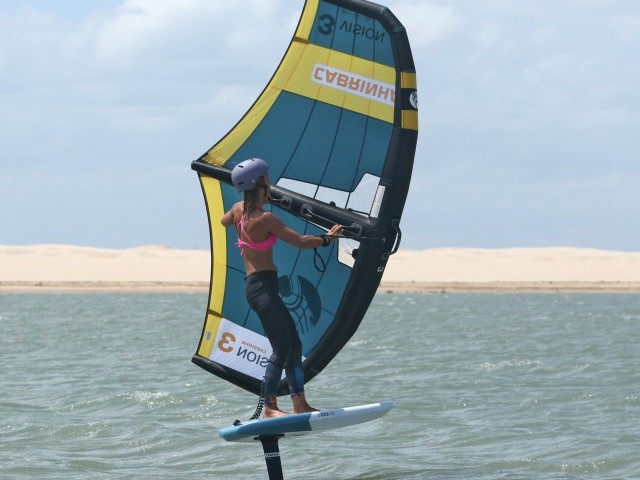
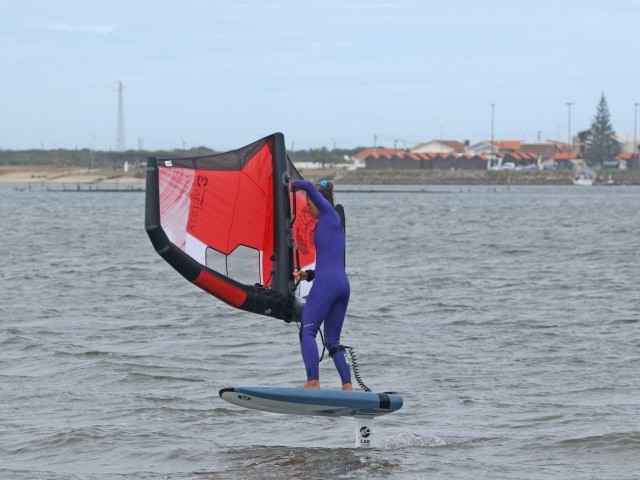
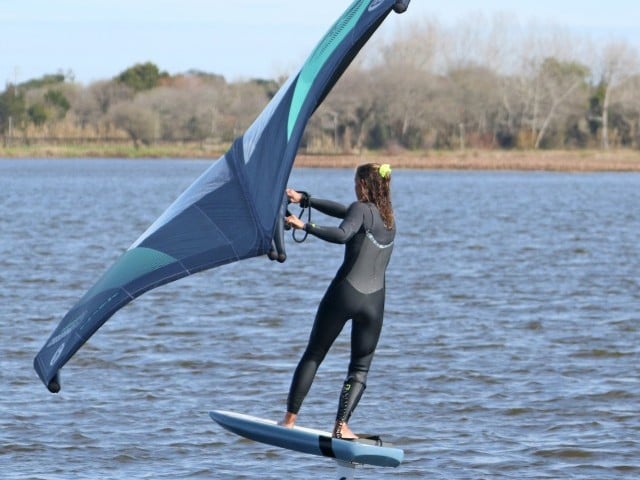
Carve Pic C.
As the wing climbs, you need to get your carve on. To do so, flex your knees and drop your weight onto your heel, hinged at the hips to keep your upper body and head upright, keeping you balanced. You’re not looking for radical tip free spray, but a constant, controlled banking. As you drop, extend your arms to keep the wing high. Even with no power, you will have some support from the wing. The tricky bit here is to keep enough weight on the front foot so that the board stays trimmed and the nose doesn’t lift. You can see that Karine’s wing is high and away from her. She’s dropped her weight and her hips are centred, meaning both feet are weighted and carving the board together.
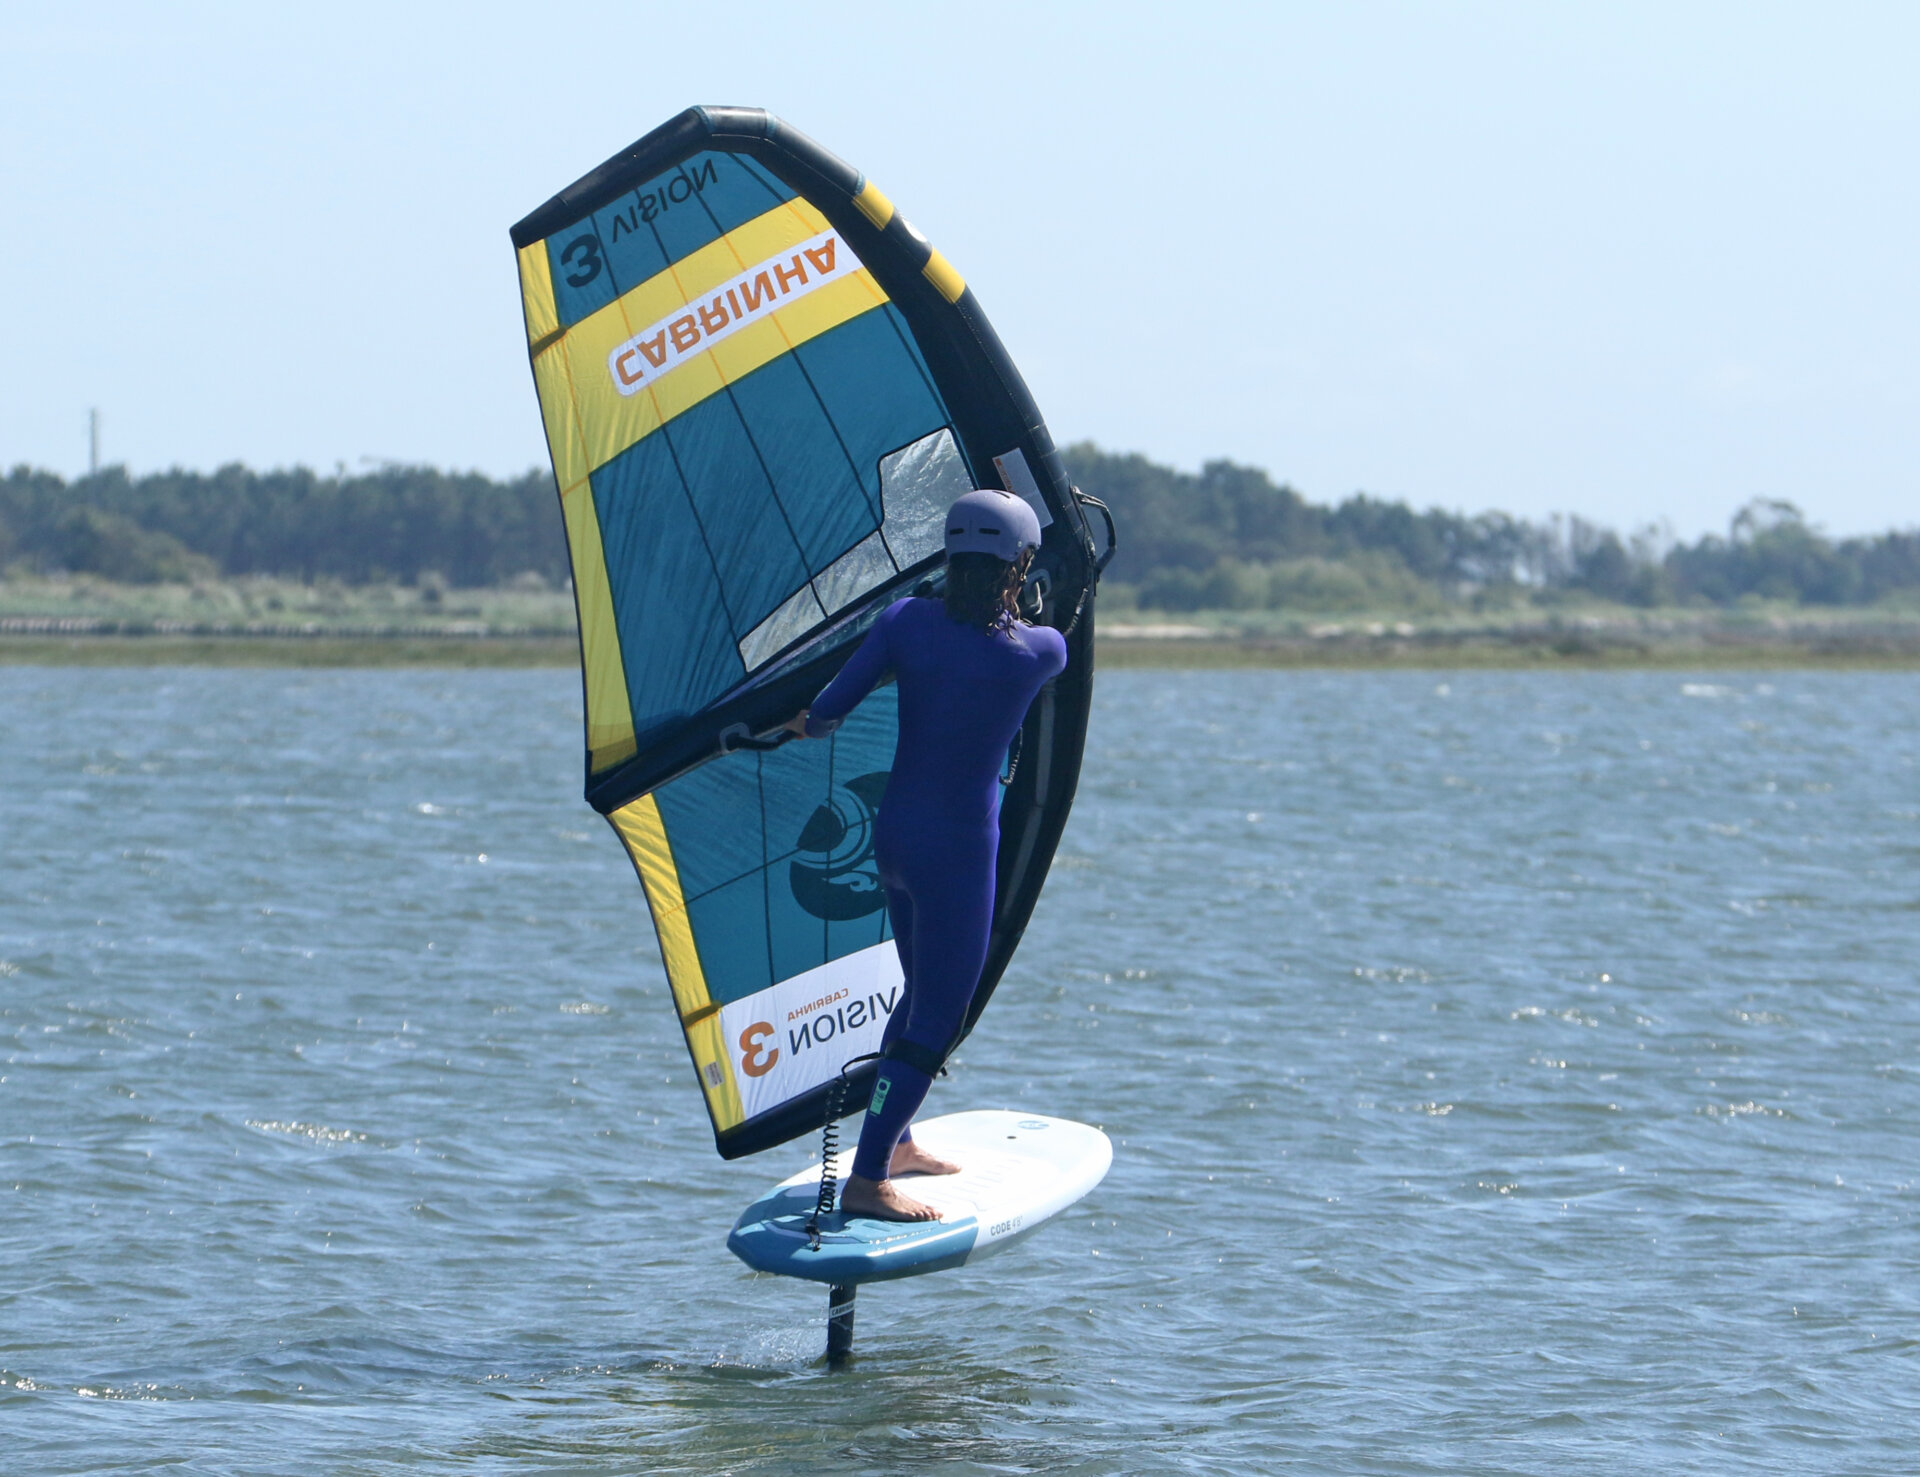
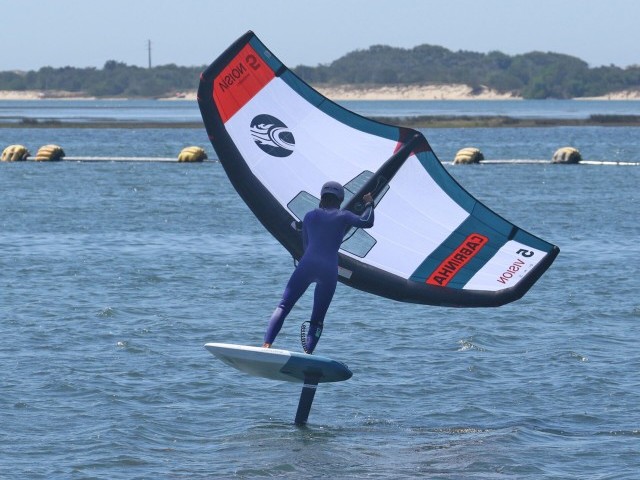
Keep Carving Pic D.
Where are you going? The answer is further than you think. You’re trying to get the nose of the board through the eye of the wind before worrying about anything else. If you stay in your carving position, the board and the wing will at the very least make it into the wind. The point here is that the further you go, the better your chances. The reason for this lies in the picture. With the wing above Karine, she still has support. The wing won’t drop her if she keeps her upper body upright. The combination of carving, which generates lift and drive from your foil, and the support of your floating wing will keep you on the board. This is why you must not release your wing too early. Should you completely dump power, you’ll struggle to stay balanced.
Release and Twist Pic E.
Ignoring your intuition and being patient should get you through the wind. Now it’s time to put the Leo Sayer on and get moving. Your objective is to get the wing across above your head. You need to release your back hand to do this, freeing both you and the wing. When your hand is off, you can twist your head, shoulders and torso to look forward. This will enable you to pull the wing over your head with your leading arm while encouraging the board to carry on carving. Make sure to keep the wing forward as you bring it across, as this will keep your weight centred and your nose down. Place the handle in a better position for the next step! You can see that now that Karine has released her rear hand, she can twist her upper body and pull the wing over and across towards its new side.
Hand Swap Pic F.
We discussed this briefly earlier; you need space to grab the handle. Looking at Karine, she’s deliberately left herself space behind her front hand. As soon as the wing comes across, she’s reaching up and across with her free hand. This hand swap can at first feel a bit slow and cumbersome. The key is to twist your upper body and look for the handle so that you can grab it. If you reach without twisting, it’ll feel out of reach. As alluded to in the previous photo, Karine has kept her wing forward, which makes for an easier swap.
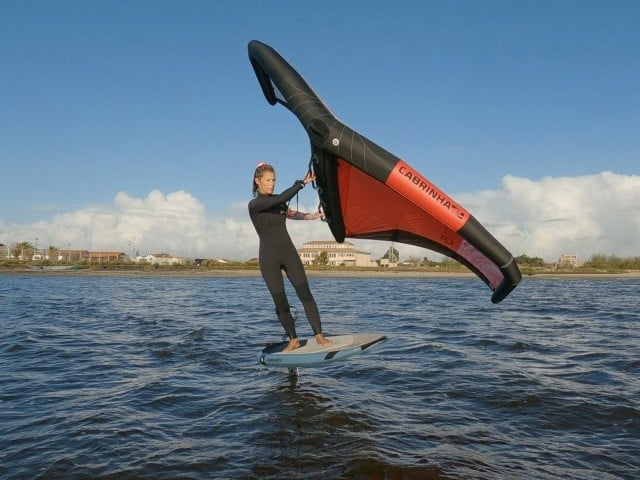
Back Handle Pic G.
Now with your new front hand on, and the wing on the downwind side of the board, it’s all about getting power back on. Your first port of call is grabbing the rear handle. Dare we say it, if the front handle felt far away, the rear handle can seem unreachable. You need to bring it within reach. To do this, bring your front hand and the wing down, moving it a little forward, positioning the rear handle a bit closer. You’re already twisted around, and it’ll be exceptionally tempting to look back and reach backwards for it. If you do, you’ll stall your foil; concentrate on using your front arm to bring the wing into position. Karine’s wing is low; she pulled it down and forward with her front hand to bring the rear handle near enough to grab without leaning back. Her board and foil are still trimmed and happy, and she’s still gliding.
Power On Pic H.
You’ll be pleased to know that we’re now approaching familiar territory:) If you can exit a gybe toe side, you should be well-versed in getting the power back on. Before sheeting in, you must get the wing down and point the arrow forward. You’ll want to sheet in as soon as you grab the rear handle, but make sure it’s pointing in the right direction first. Now, if you take a moment to look at Karine’s board in the photo, you can see that it’s still leaning over as her weight is still on her heels. For the moment, this is not a concern. You will likely exit across the wind or slightly broad. This is a good thing as it is the simplest way to quickly gain some speed and stay up on the foil.

Finish the Job Pic I.
We say it’s not a problem having weight on your heels, but you want to go back upwind, whether to continue toeside or to switch your feet, in preference to carving off downwind. To get back on the board so you can get weight onto the balls of your feet, allow the board to bear away. As the board turns away from the wind, it will turn under you, and you’ll end up over it. From here, you can follow your usual protocol to choose your direction. This may seem counter-productive, but with some practice, it will become a fast and efficient transition from heels to toes!
Top Tips
This tack can feel overwhelming at first. Carving up into the wind whilst staying over the board will feel very alien. Practice raising the wing so you can stay over the board and carve without feeling like falling to the inside.
Your second challenge will be keeping the board and foil trimmed while carving. In an ideal world, your board would stay level throughout, but at first, it’s better to drop the nose slightly as you carve rather than lift it.
Patience is a virtue. Waiting until you carve through the wind will prevent you from wearing the wing and allow the board to turn away from the wind under you so that you can get back overboard.
Practice your hand swap on dry land. Twisting, swapping, and grabbing the rear handle will take some getting used to. The more polished your action, the smoother your tack.

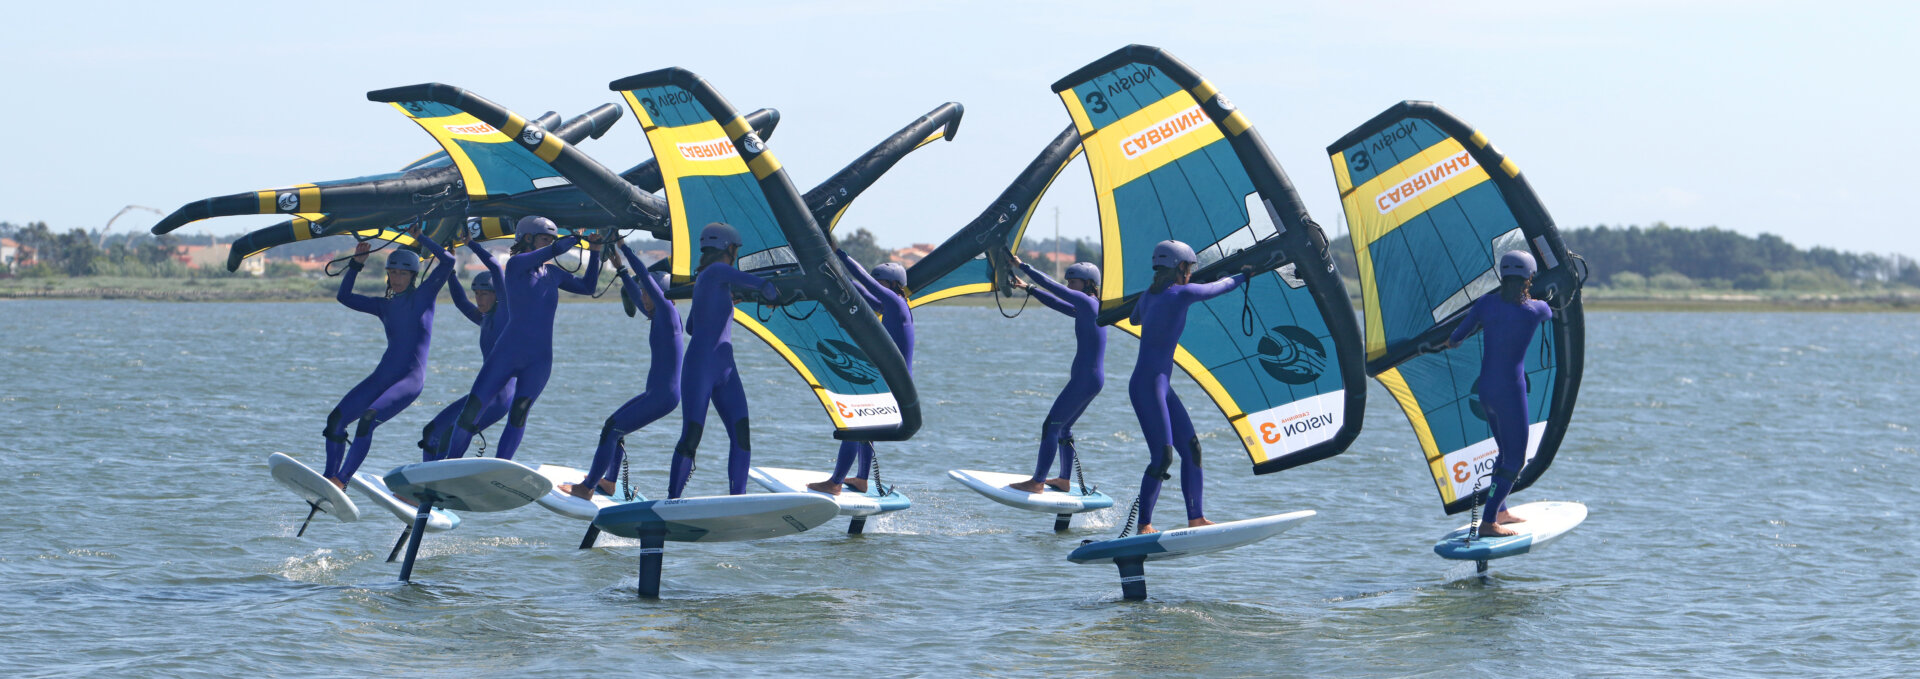
Right, have a look at the sequence for a step-by-step visual, and stay tuned for the upcoming video on the Tonic channel.
Happy tacking, C&K
This technique article was in Issue 24 of Tonic Mag.
Related
By Christian and Karine
