
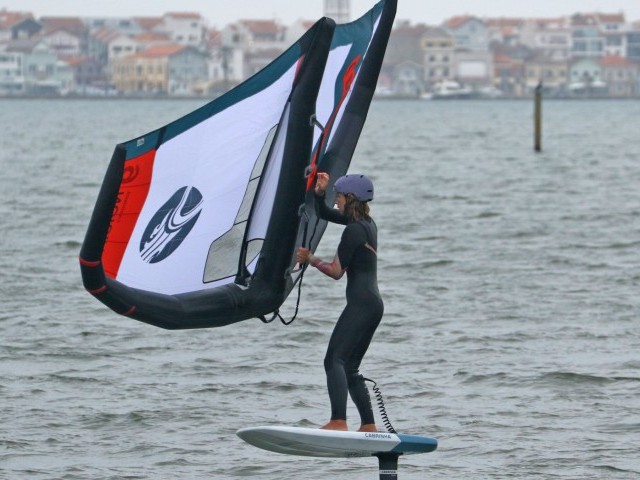
Tack Off The Foil
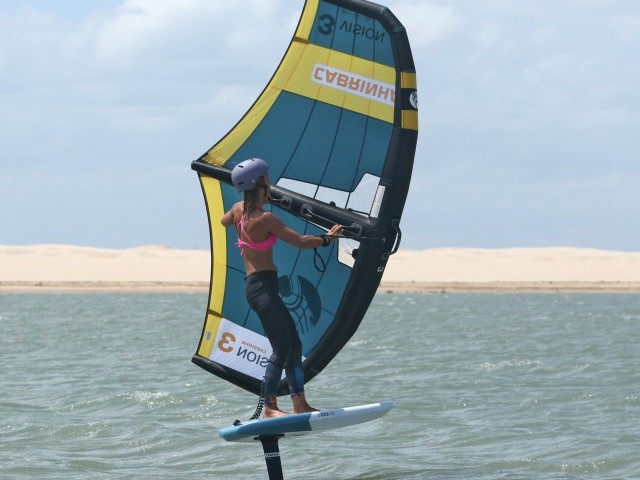
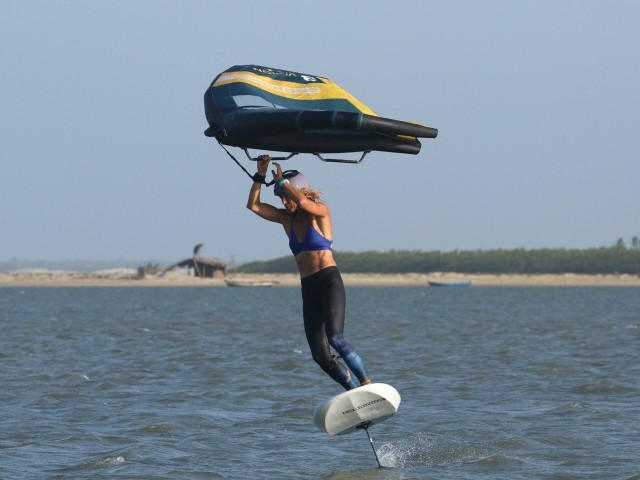
Technique / Wing Foil

Today’s the day, Ladies and Gents! Your first foray into the world of tacking. If you’re unsure what a tack is, think of it as changing direction 180 by steering up into and through the wind. It’s the opposite of the gybe. The tack has a few advantages over the gybe: if you’re trying to make ground upwind, you won’t lose the precious meters you’ve made when you turn. In fact, a good tack will gain you even more ground. This means that if the wind is onshore and you want to get away from the beach, it’s perfect. If you’ve been out and the wind drops, and you want to woff back upwind, same deal; each time you turn, you won’t lose those hard-fought yards.
Now, if all this sounds too good to be true, you’d be partially right. Because you’ll be changing from one tack to another, you will need to swap sides on the board and still need to get the wing pointing in the new direction, too. This means that the tack involves dancing with the wing above your head.

The great thing is that there’s no better place to start your tacking journey than off the foil in light wind. This will give you a chance to get the fundamentals mastered. Although the feet won’t necessarily be doing the same as when tacking on the foil, the positioning and awareness, along with your upper body, hand and wing movements, will get you practised and ready for the foiling version.

Realistically, we can split the tack into three parts: turning upwind, the tack – lots going on, and then power on to finish your turn. If you’re happy steering, you’ll already have the first and last parts in the bag.
Right, let’s have a look at what’s going on and what you need to do to get this nailed.
Part 1 Turning Upwind
Set Up Pic A.
Conditions and Tools! We should start by saying that although light wind is great, if there’s hardly a puff, this will be really difficult. You’ll struggle to turn the board far enough into the wind. It’s also worth noting that a big board is your friend when learning a woffing tack. It’ll be far more forgiving when you’re stomping around like an elephant.

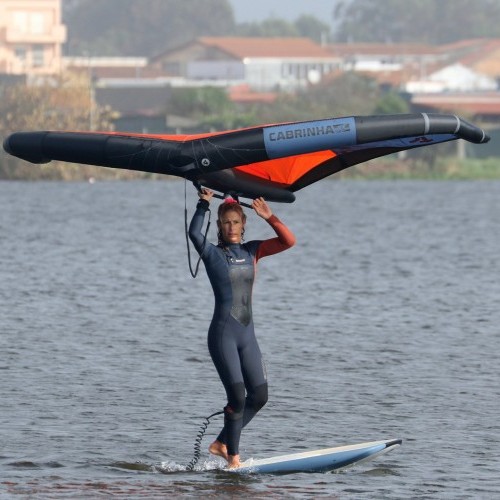
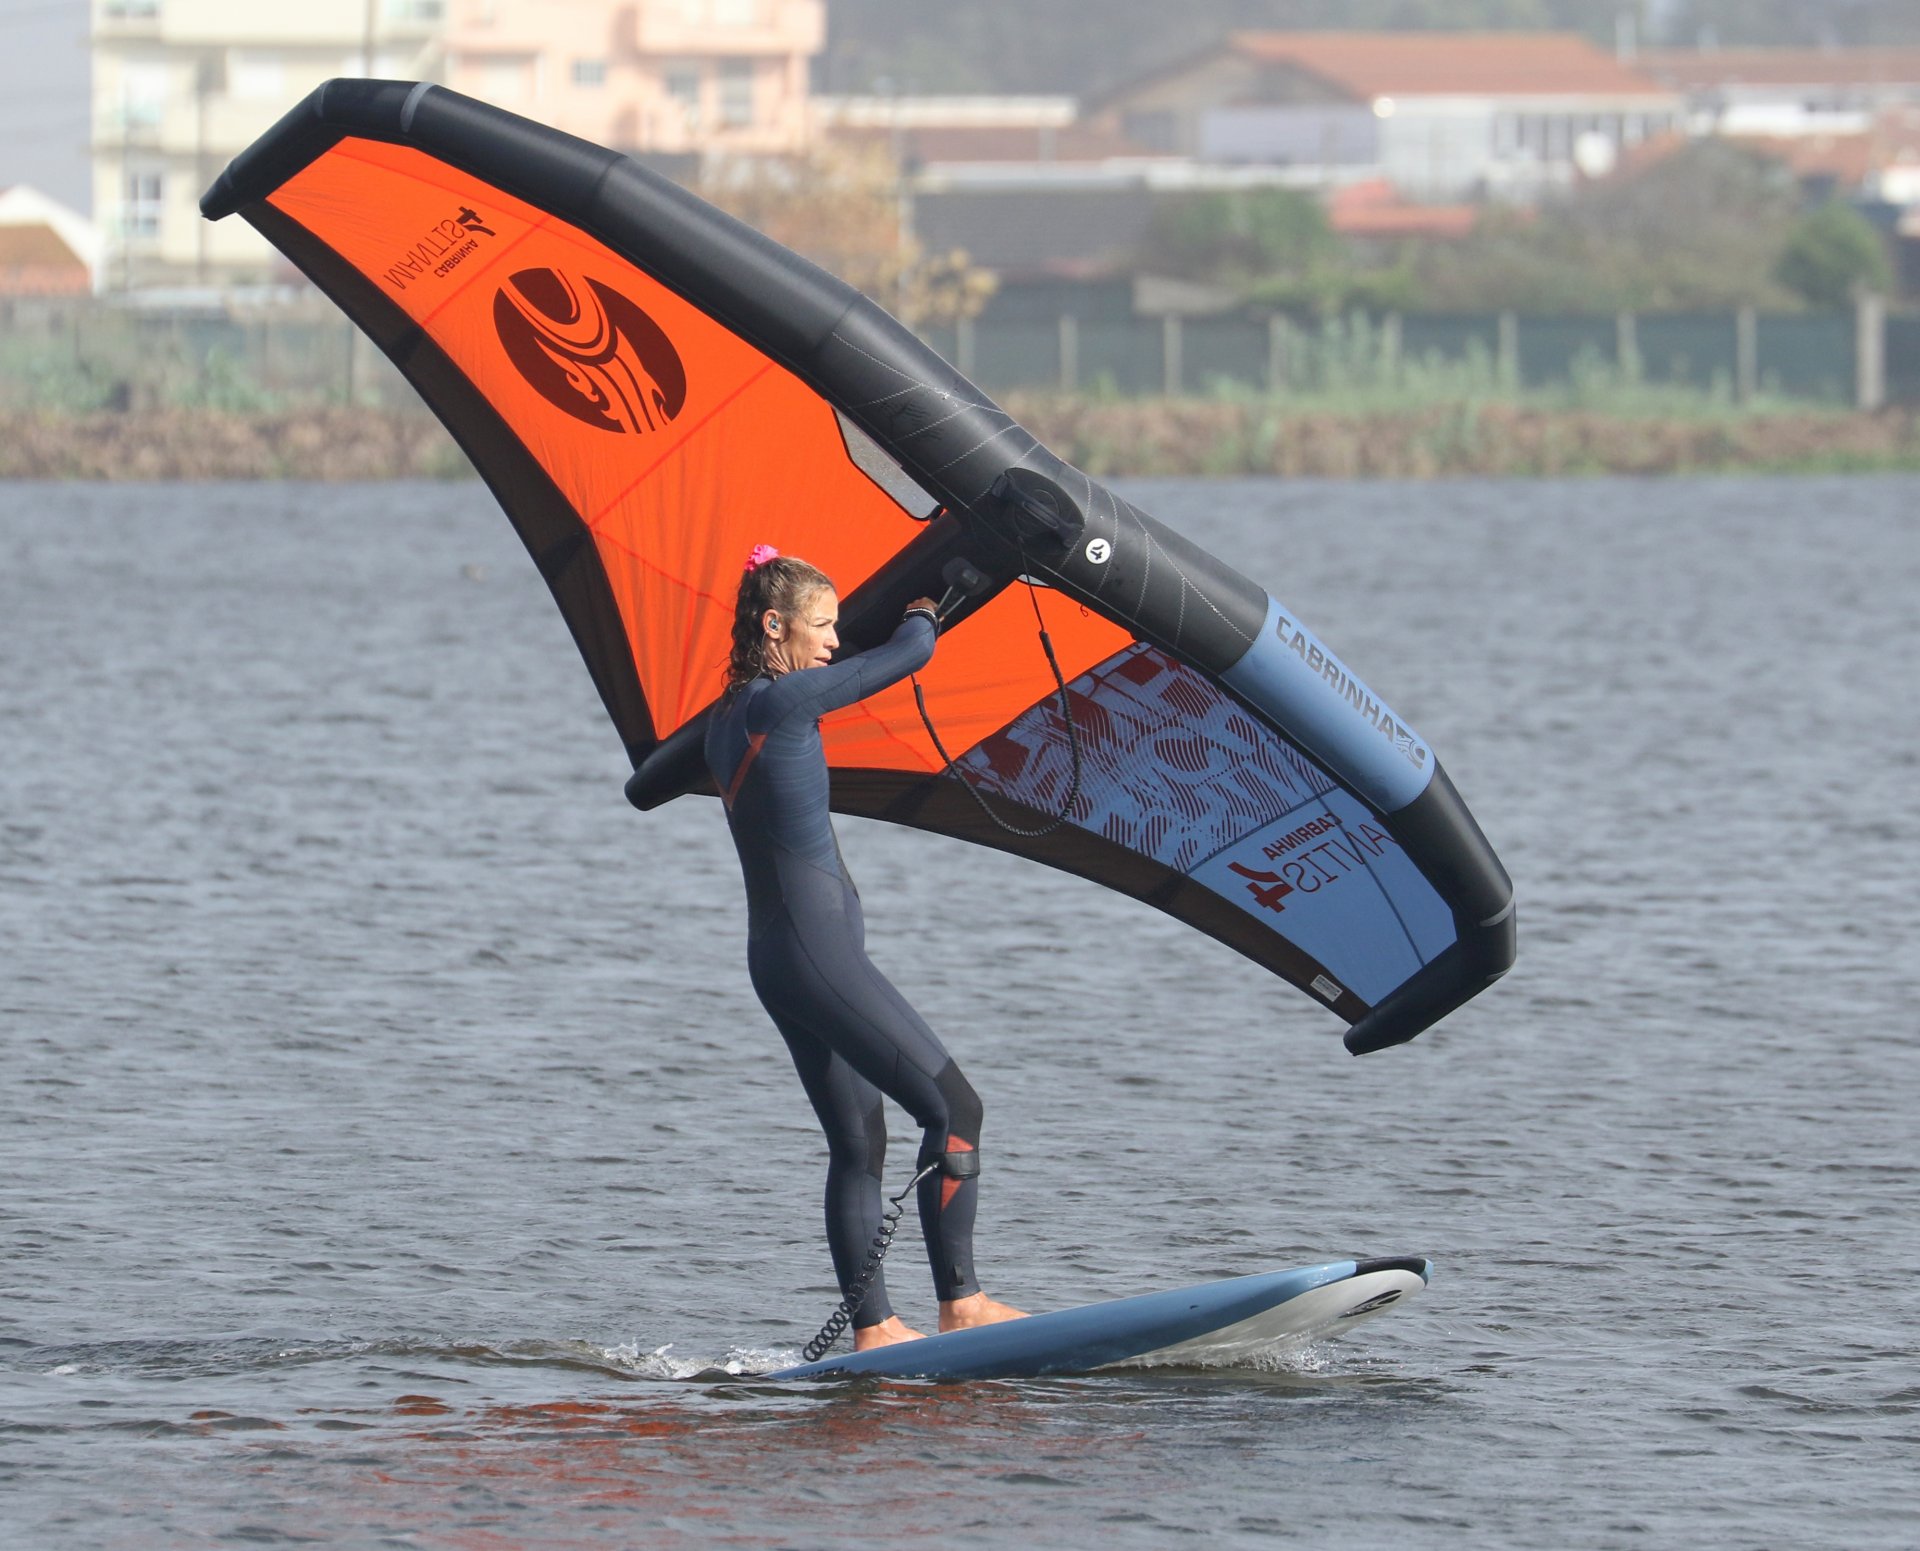
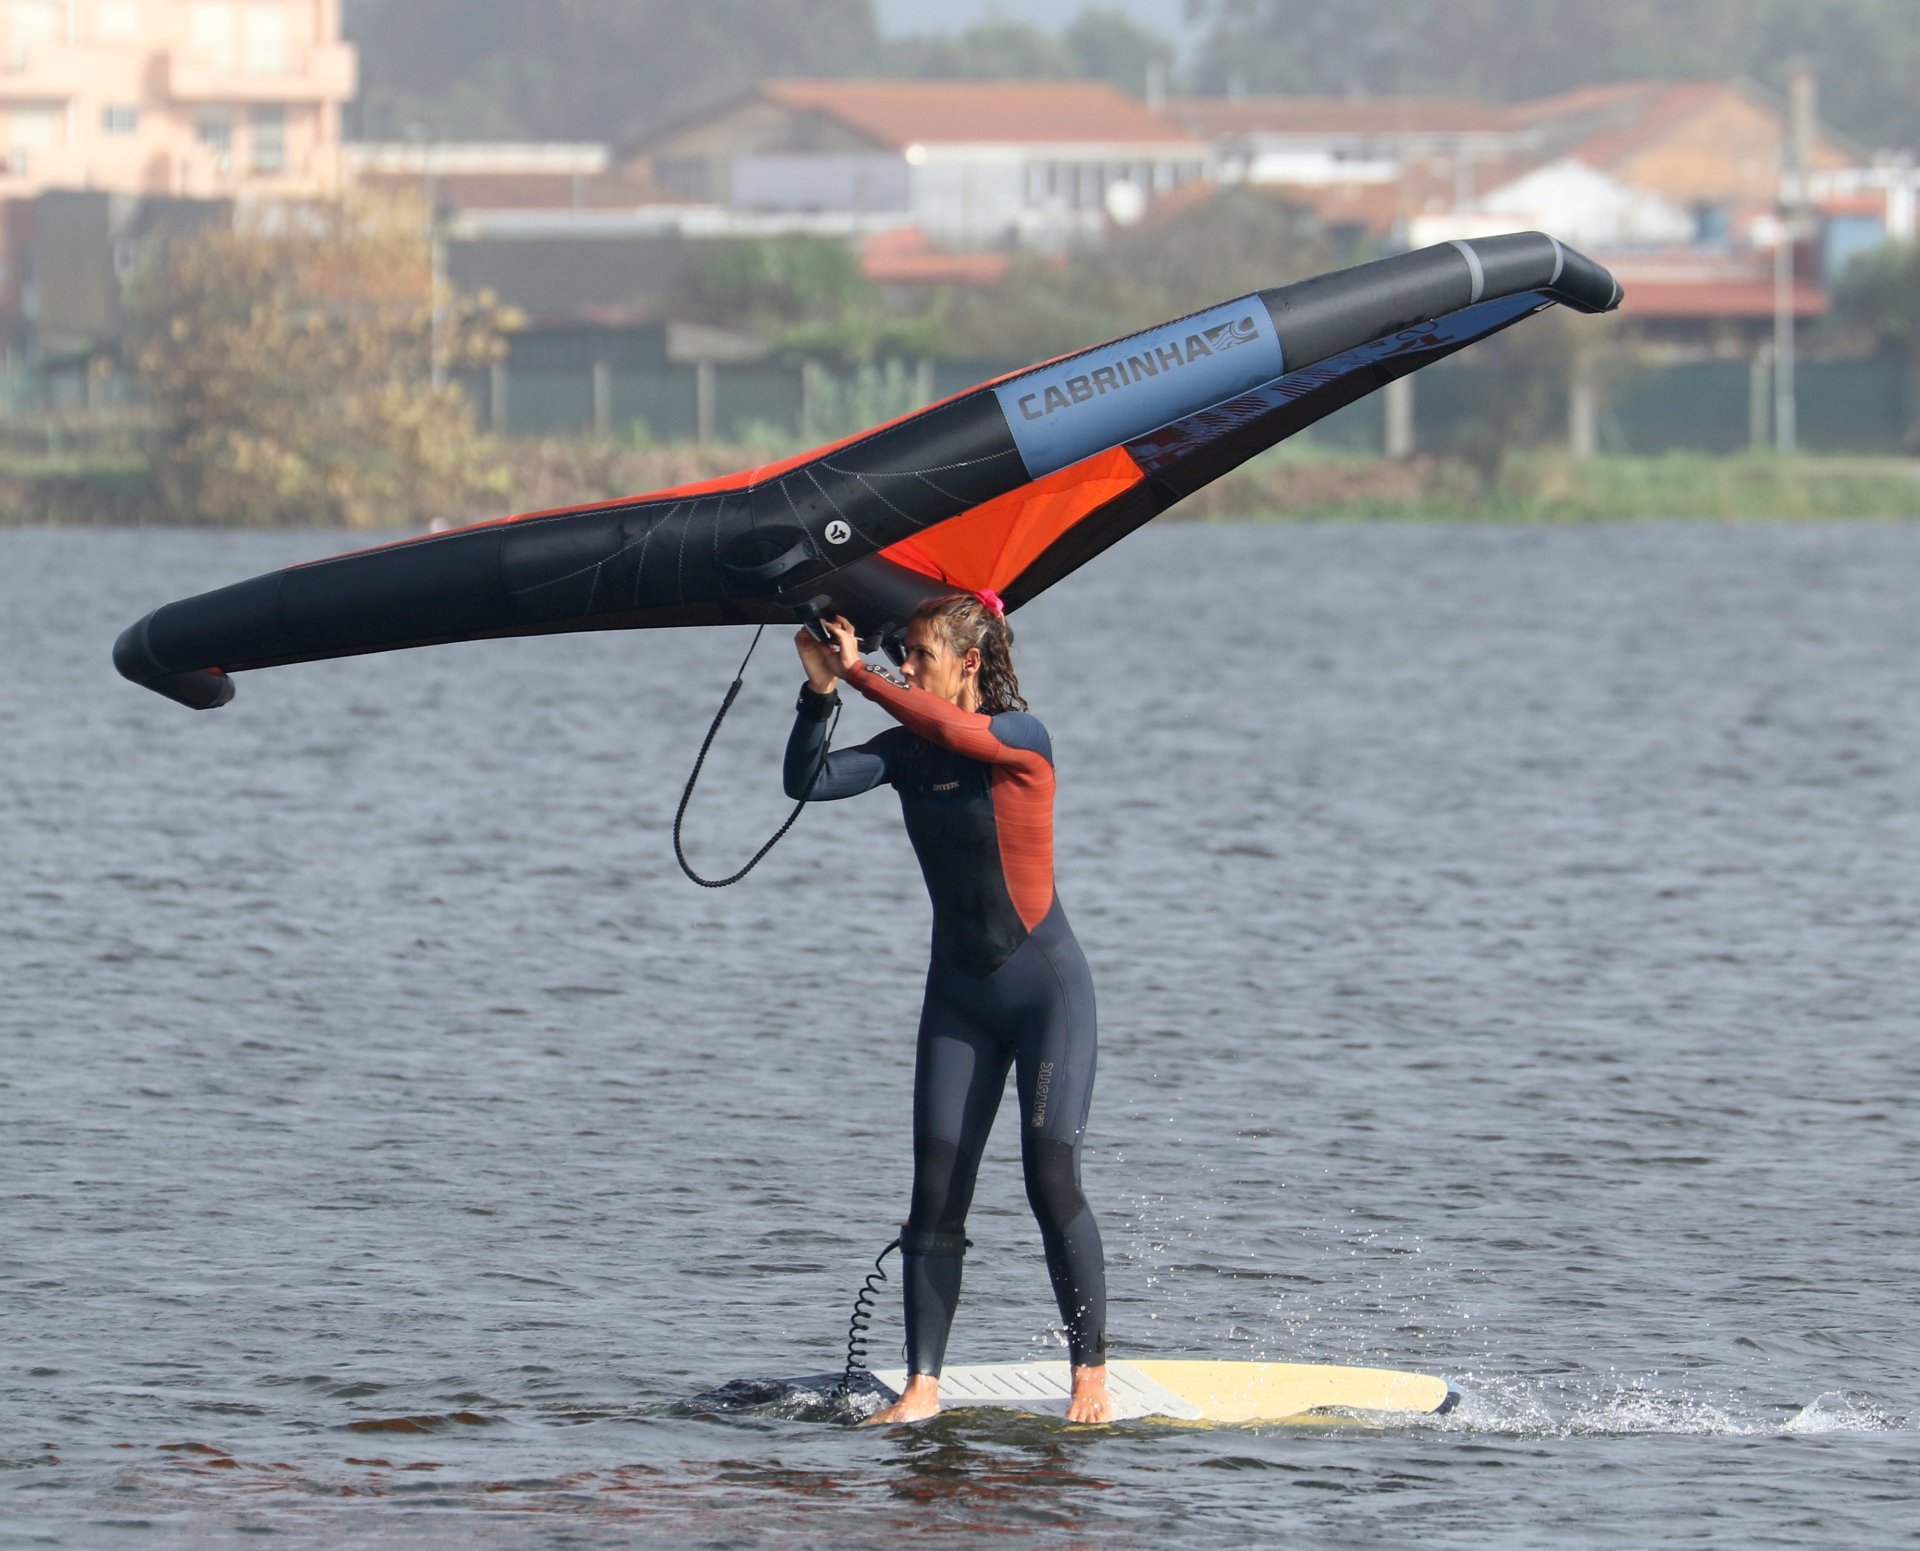
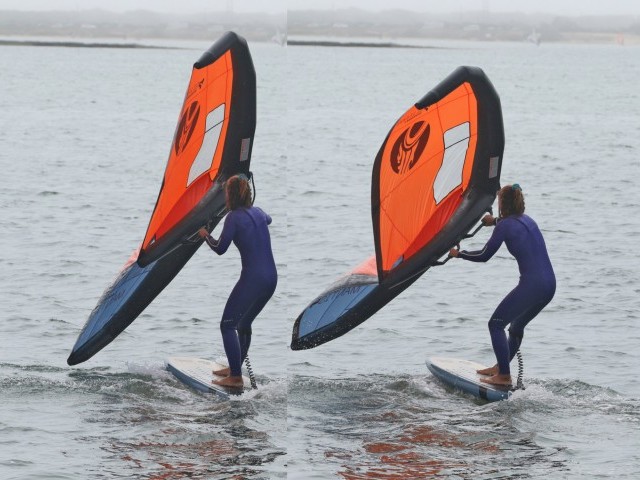
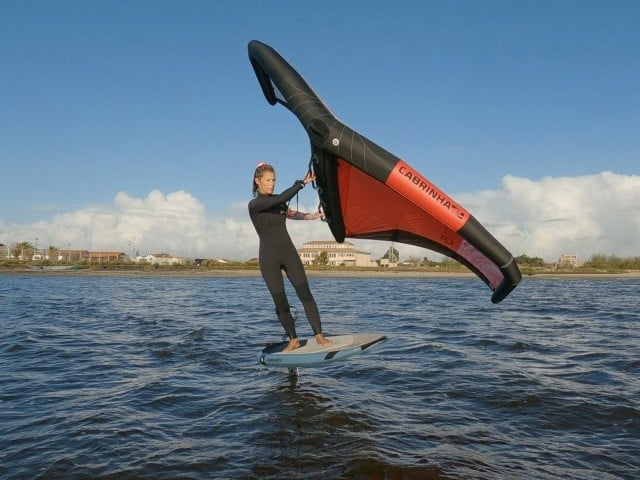
Approach riding comfortably, slightly upwind. Feet should be offset so that your front foot’s big toe is on the centre line, whilst the rear foot is straddling or just over the centre line. This encourages an open stance with your hips facing forward. You need forward momentum; it’ll help if you can feel the wind in your wing. If you’re holding the wing up, the tack will be trickier. Keep your wing centred so that you can keep on course. Here, Karine’s feet are offset, her shoulders are open, and she’s looking forward with her wing centred.
Turn Upwind Pic B.
You should be familiar with this part, especially if you practice the turning drill back in our first video from TONICMAG Issue #9. Your aim is to turn the nose up into the wind until your board stops. You won’t be able to get the nose into the wind, but as far as she’ll go. Turn upwind by moving your wing slightly back, twisting your shoulders to look upwind. Keep power in the wing and push across the board with your back foot. Be careful not to over-sheet your wing by pulling in too much with your backhand. This will prevent you from turning far enough as it will push the board downwind. Bending your front arm will help prevent this. You can see that Karine has a lot of weight on her back foot as she pushes laterally against the board. She pushed her wing back whilst she turns her body upwind.
Part 2 The Tack
As you and your board turn closer to the wind, you will slow down and come to a halt. You’ve turned as far as possible. This is your cue for the actual tack. The aim of this tacking part is to position the wing high, where it’s happy so that you are free to get on with swapping sides.
Wing High Pic C.
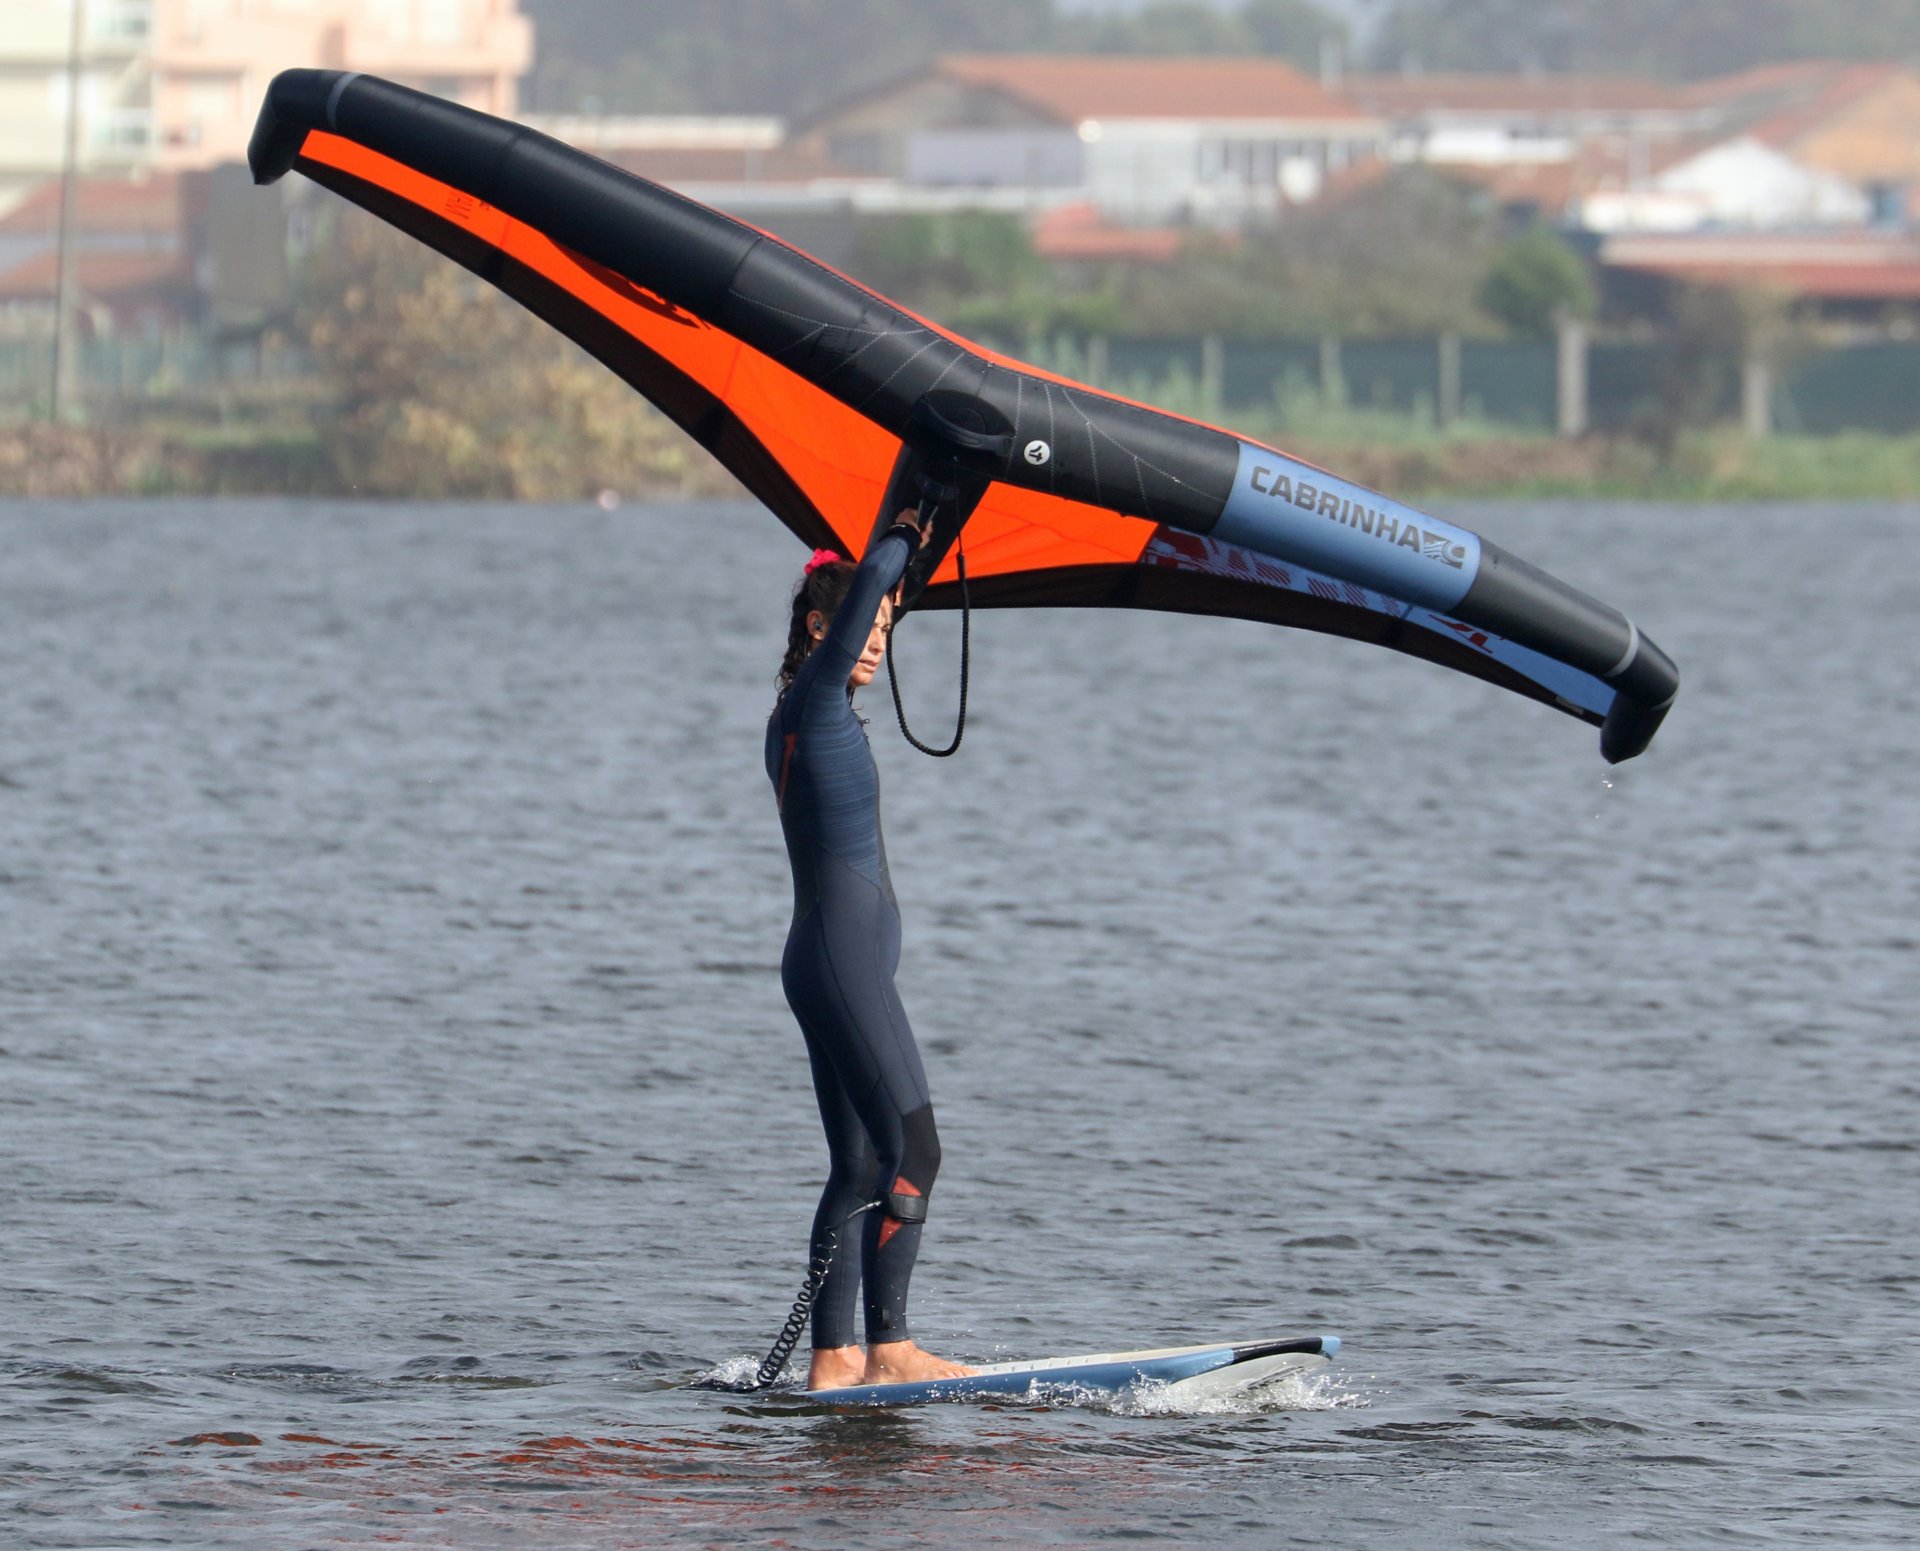
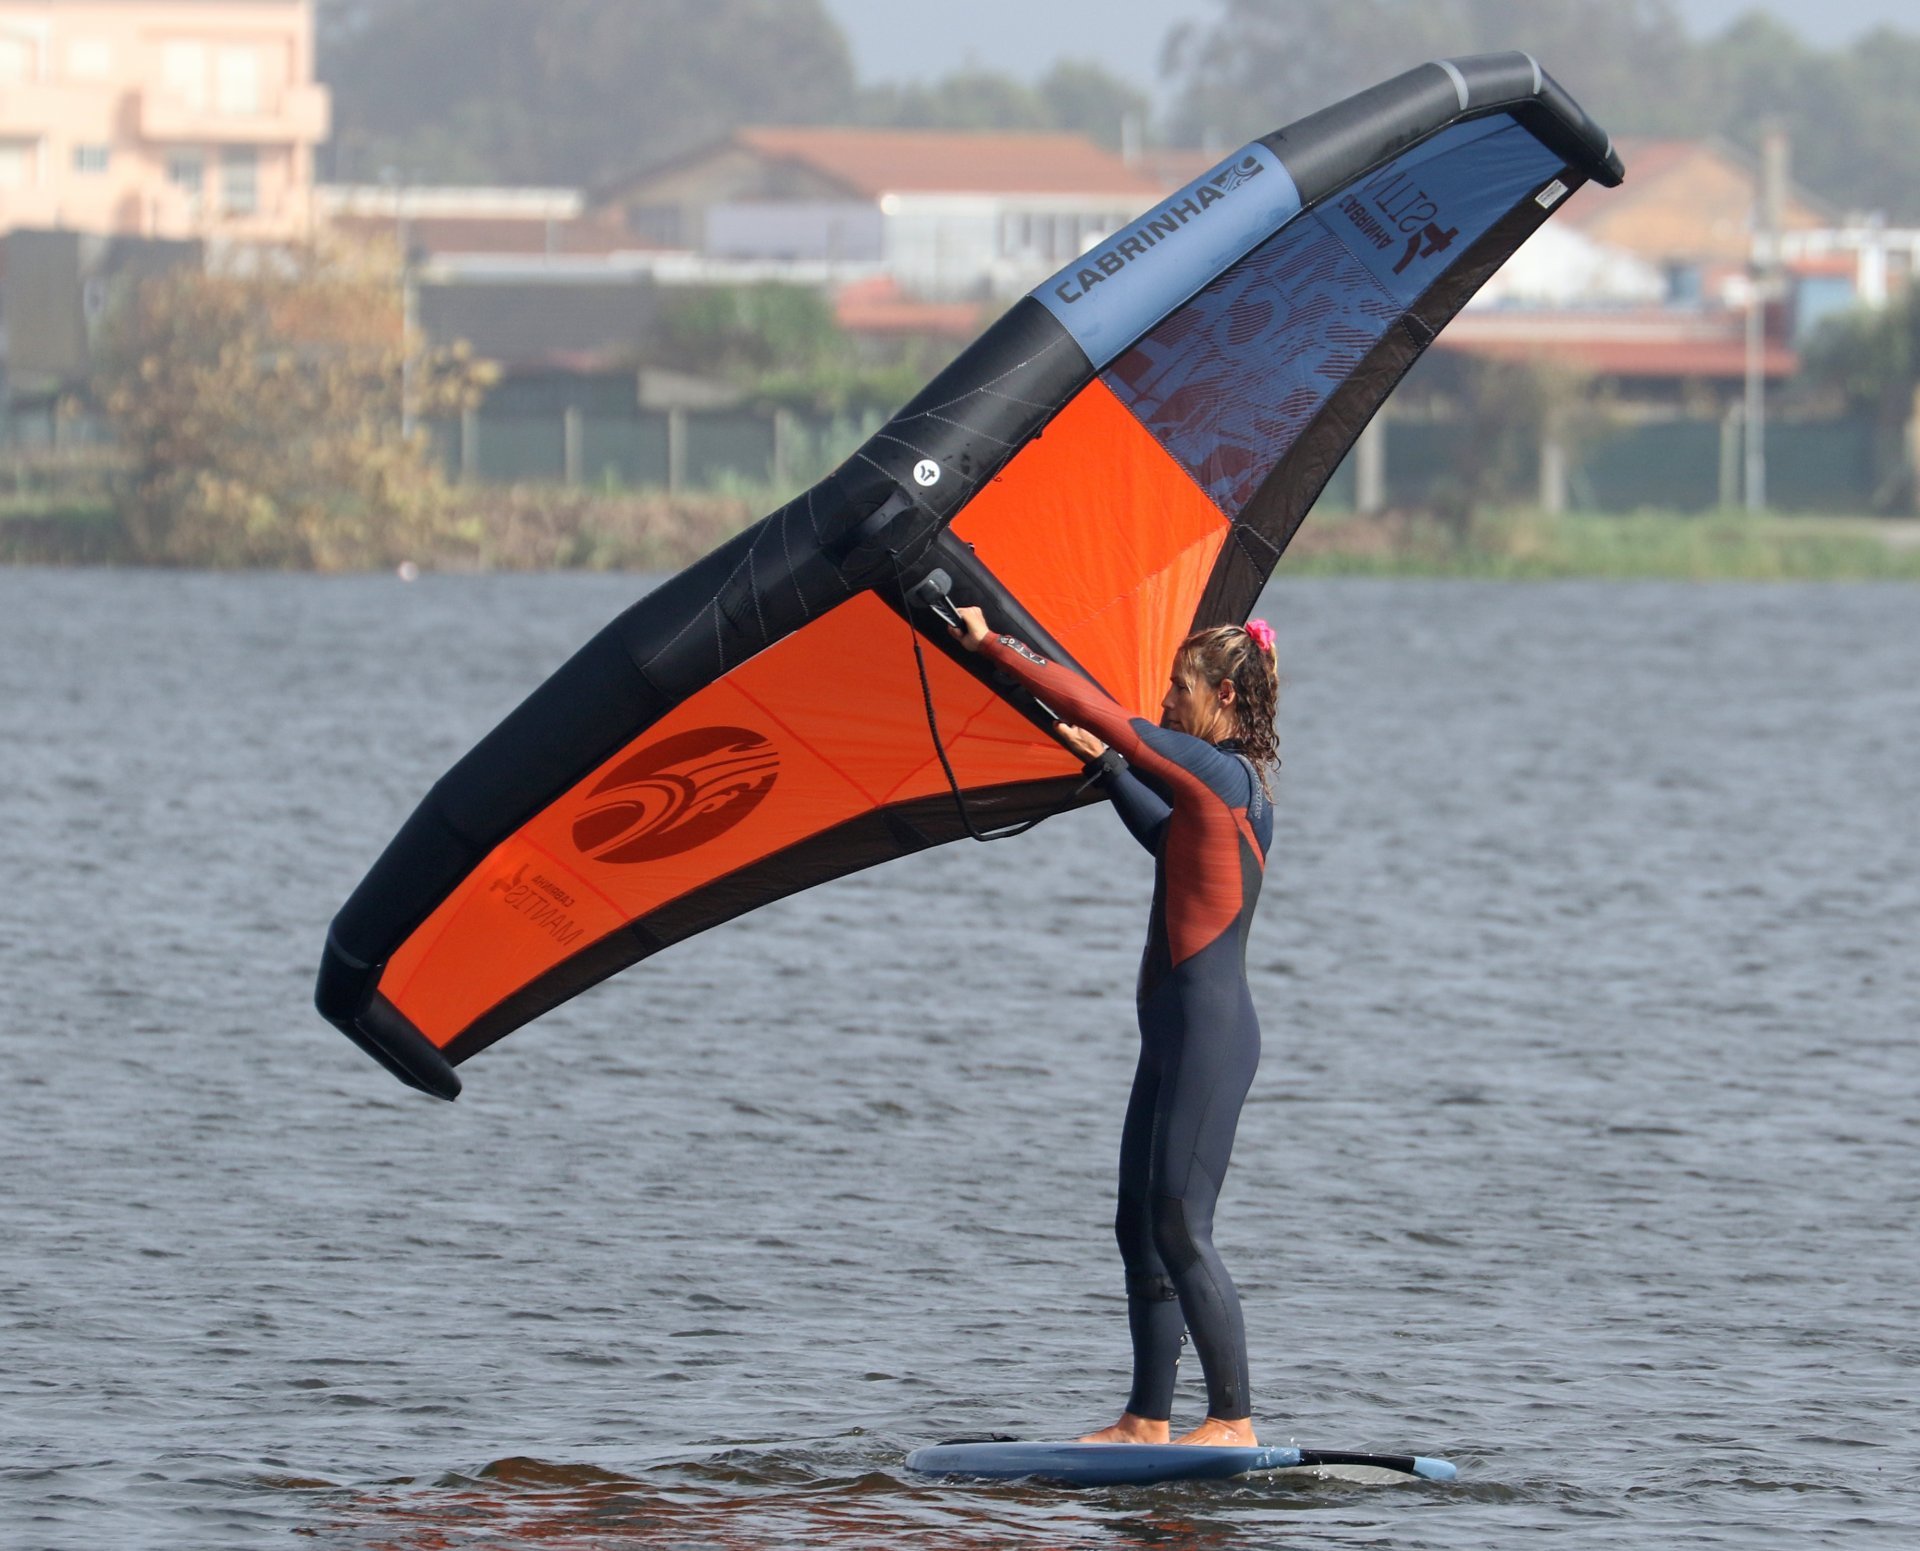
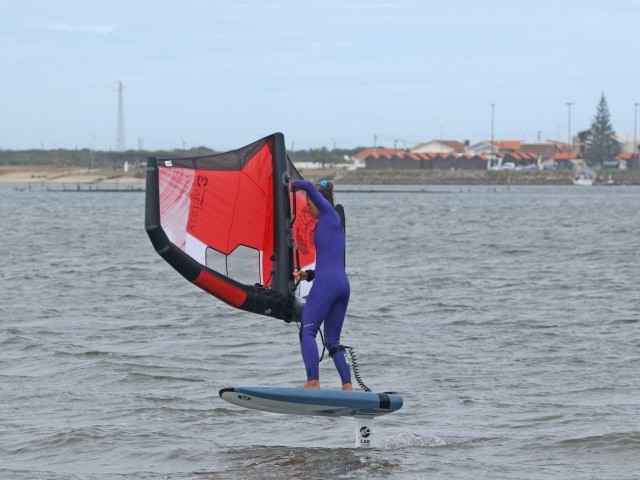
Your first job is to get your wing high. This gets it out of the way, giving you room to move, and also stops the wing pulling so that you can stay balanced. This position won’t push you and the board back downwind. In a perfect world, you’ll anticipate the board slowing and start moving the wing up as you turn closer to the wind. To fly the wing up, lift your front arm and push gently down with your rear hand to steer it higher. Let the wind do the work. Karine has flown her wing up high, allowing the wind to hold it above her.
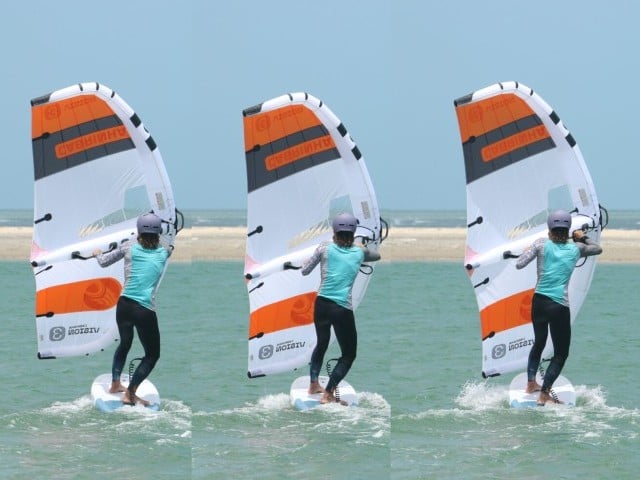
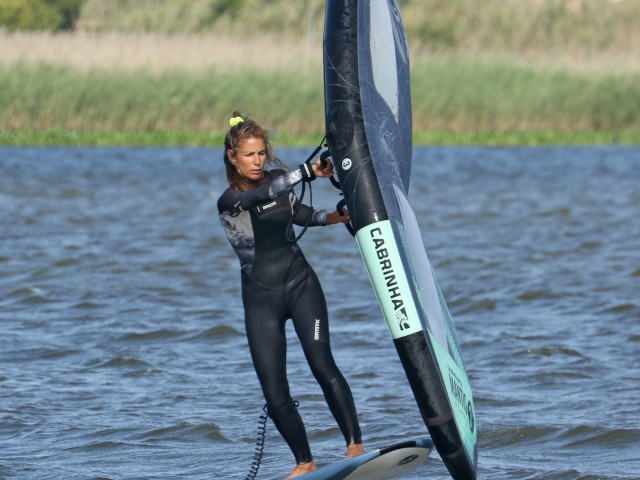
Body Twist Pic D.
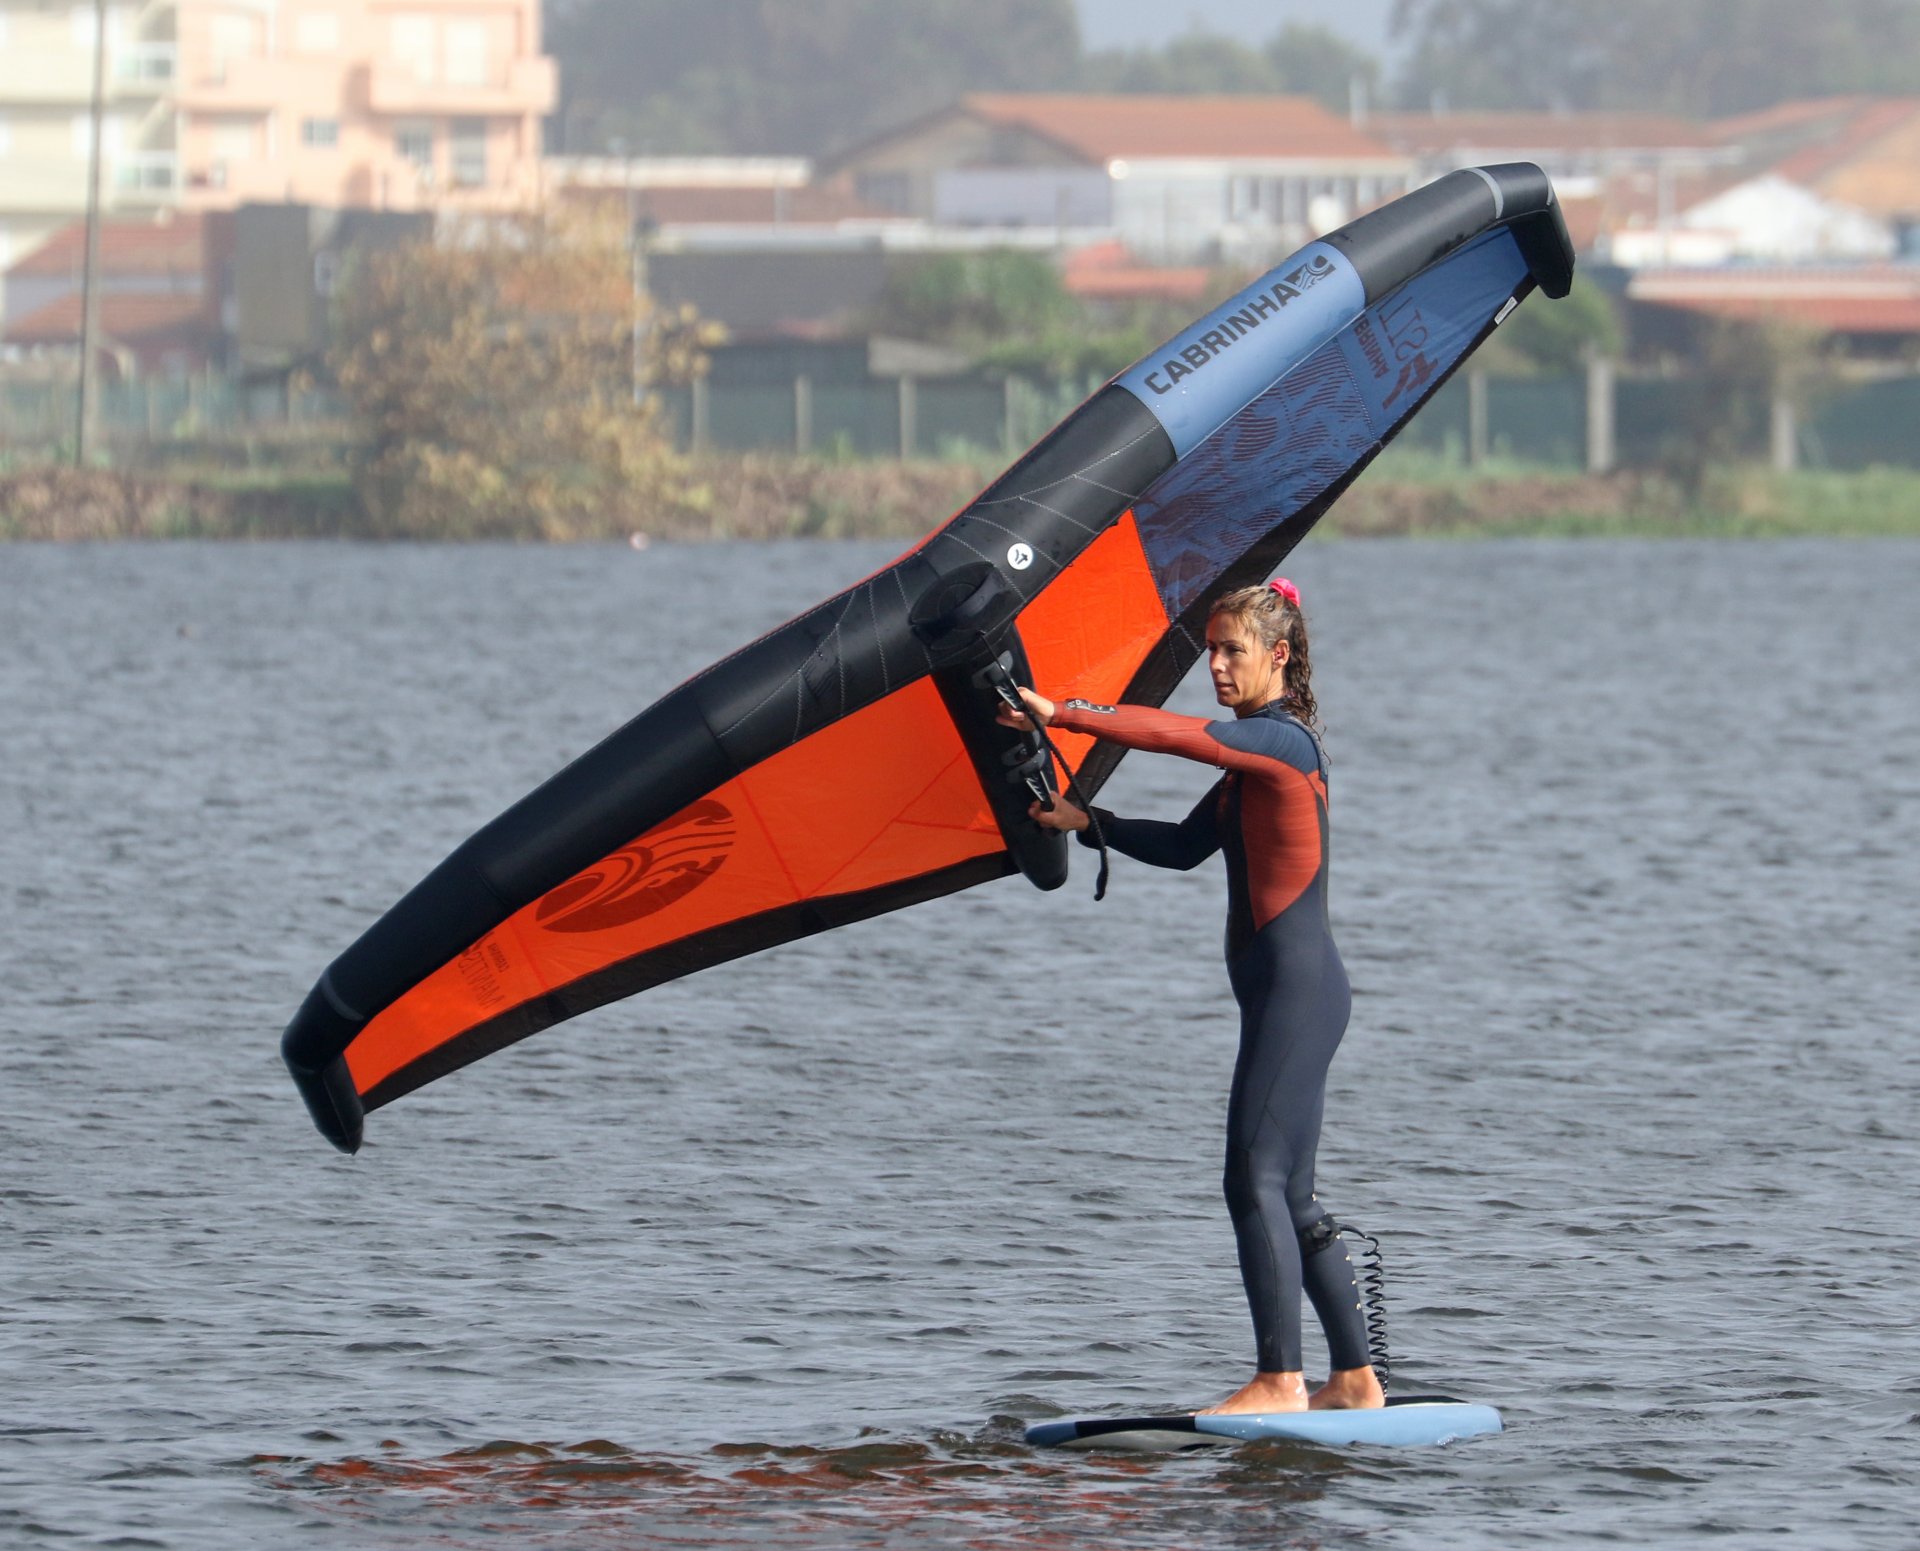
With your wing high, you want to get it floating above you, pointing into the wind, supporting itself. Once it’s happy flying itself, you can then get on with swapping hands and feet! The position doesn’t need to be exact; if you give the wing half a chance, it’ll get there by itself. Getting your wing into this position is about turning your shoulders and looking upwind. Keep your feet planted and twist from the waist up, looking upwind as much as possible whilst sheeting the wing out so it’s supported on the breeze. You can see how Karine has really twisted her shoulders open so that her chest is facing the nose of the board. Her wing is neutral, supporting itself and pointing into the wind.
Release & Front Foot Pic E.
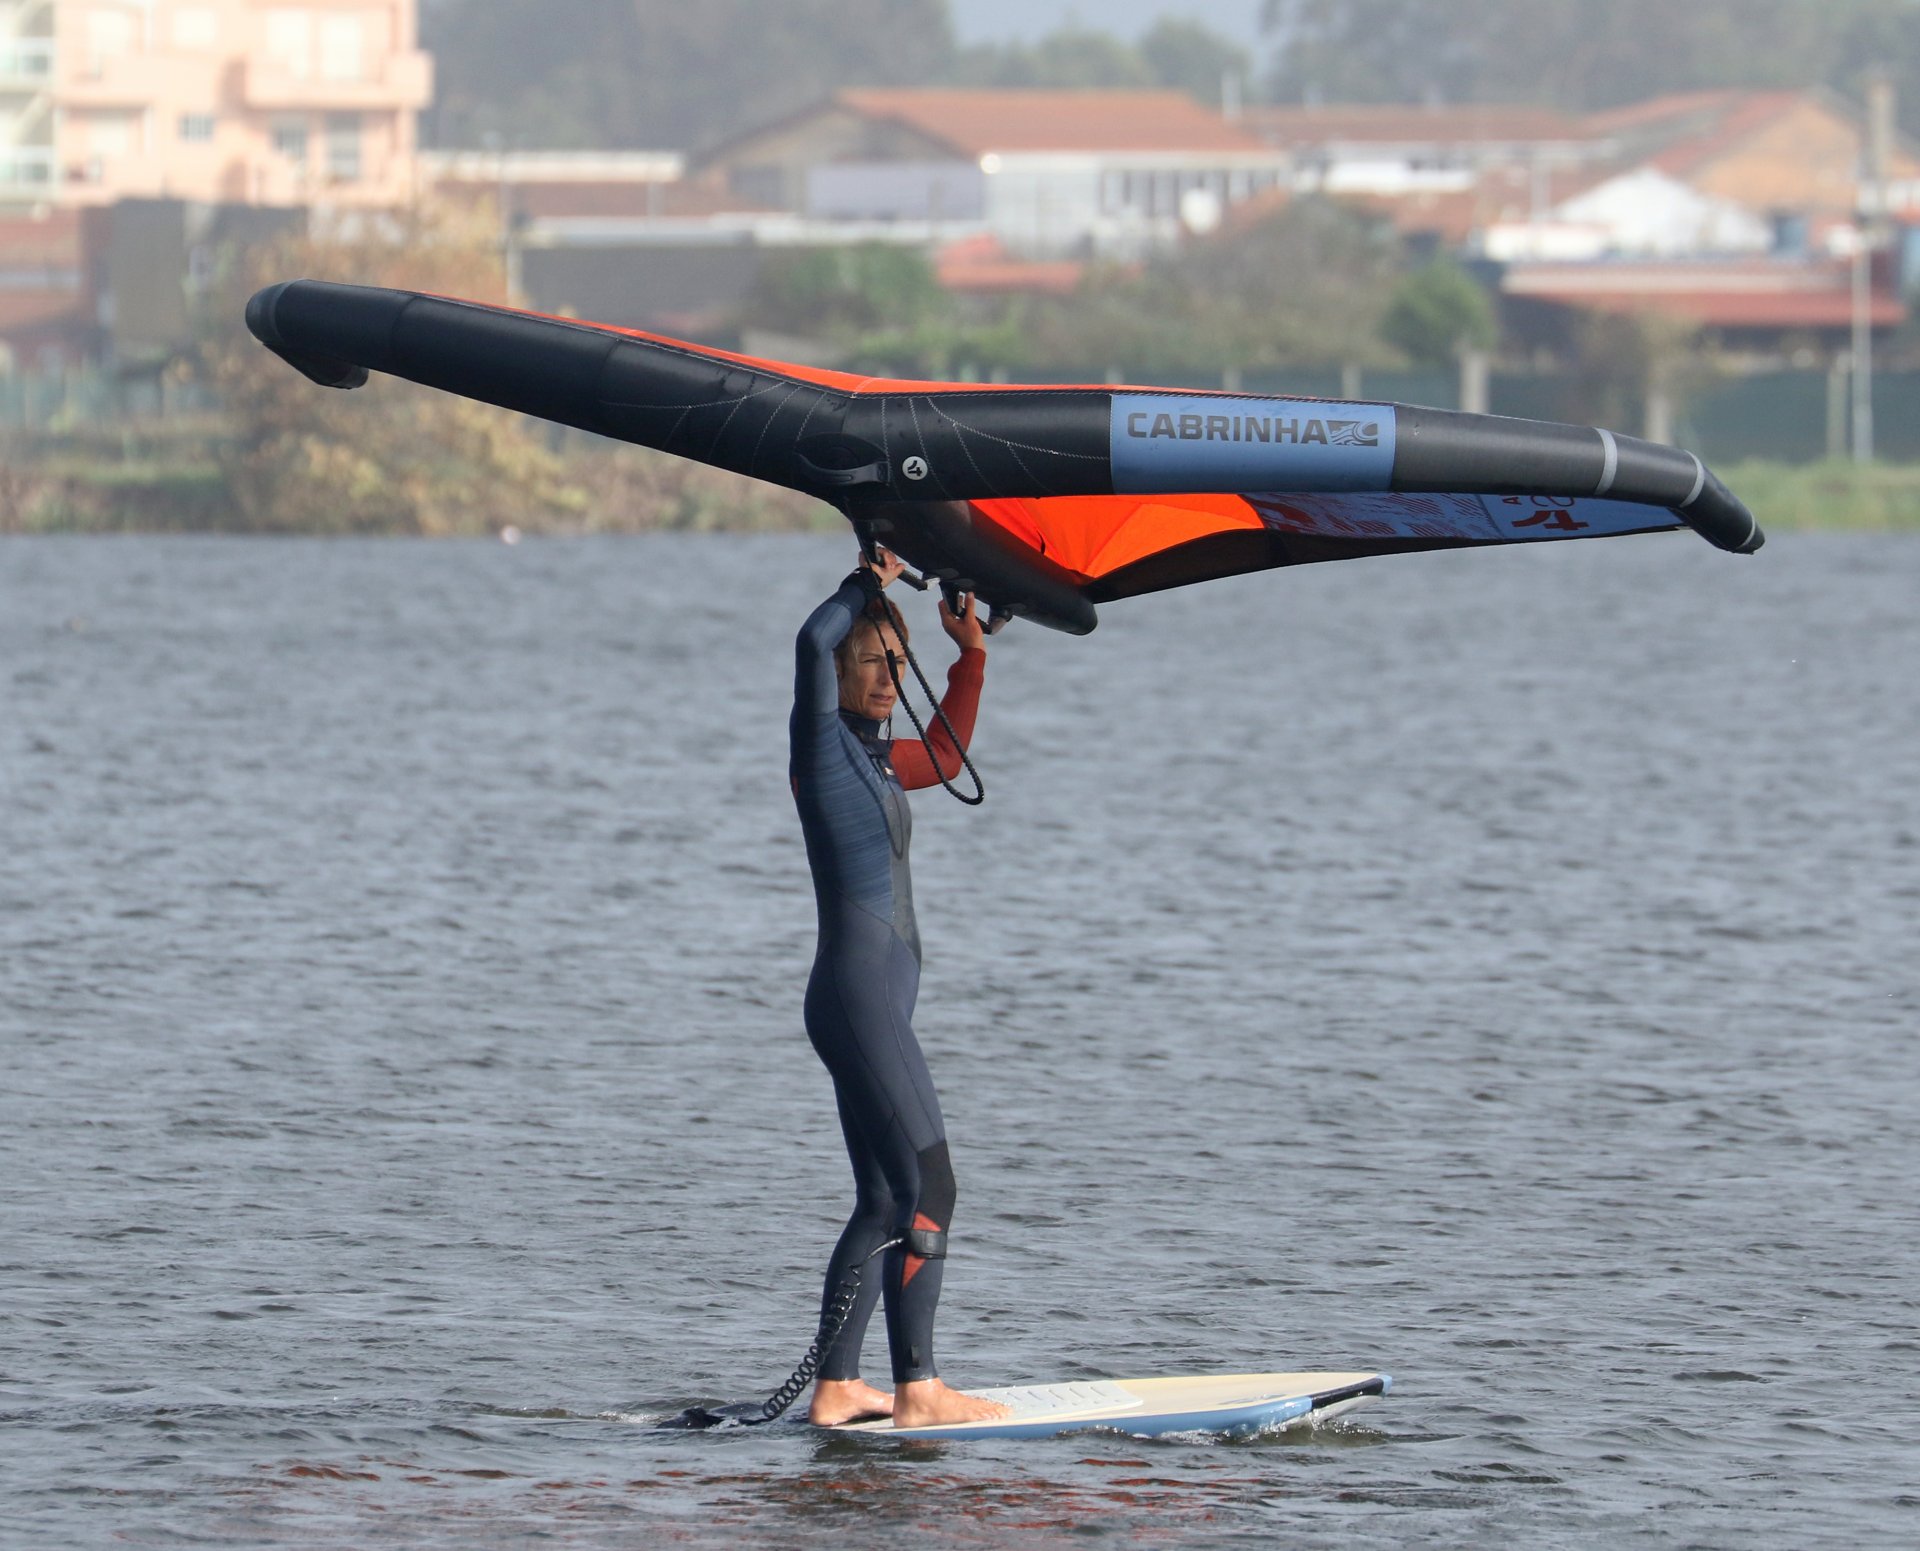
The moment of truth, dancing with your wing! If you’re fond of a boogie with your partner, you may unwittingly already have this tacking skill. You’re going to release your backhand, giving you the freedom to move your feet. Think of this as a continuation of the body twist. You can still turn your shoulders as you let go with your backhand. You want your feet to come with you, so step your front foot back and turn your hips. You will automatically bring the wing across with you as you change position. Looking at Karine, you can see that by continuing to turn her body and move her feet, the wing comes across with her.
Hand & Foot Swaps Pic F.
As soon as your front foot lands, move your rear foot forward. On a big board, you don’t need to be overly precise, but in an ideal world, your feet will be near enough to the centre line where they would normally be. It’s a two-step action, back and forward, with your new front foot replacing the old but on the new side. You also need to swap hands on the front handle. If you can, try to go directly to an overhand grip. In the photo, you can see how Karine simply brings her free hand up and grabs the handle while her feet are positioned near the centre of the board.
Part 3 Finishing Your Turn
Getting power back in the wing will give you some support and enable you to get the nose of the board completely through the wind so that you can start moving again.
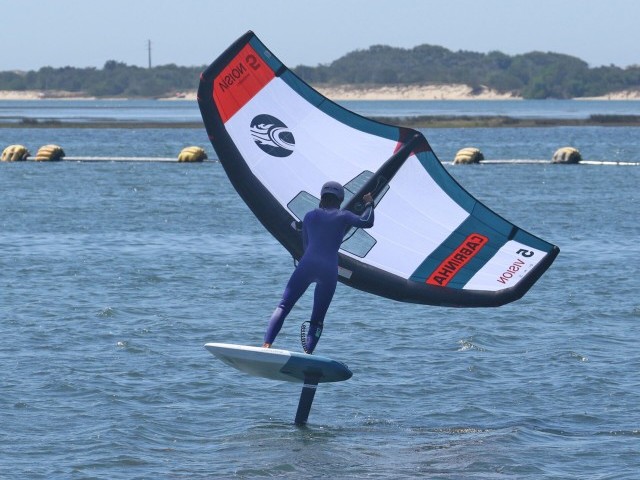
Power On Pic G.
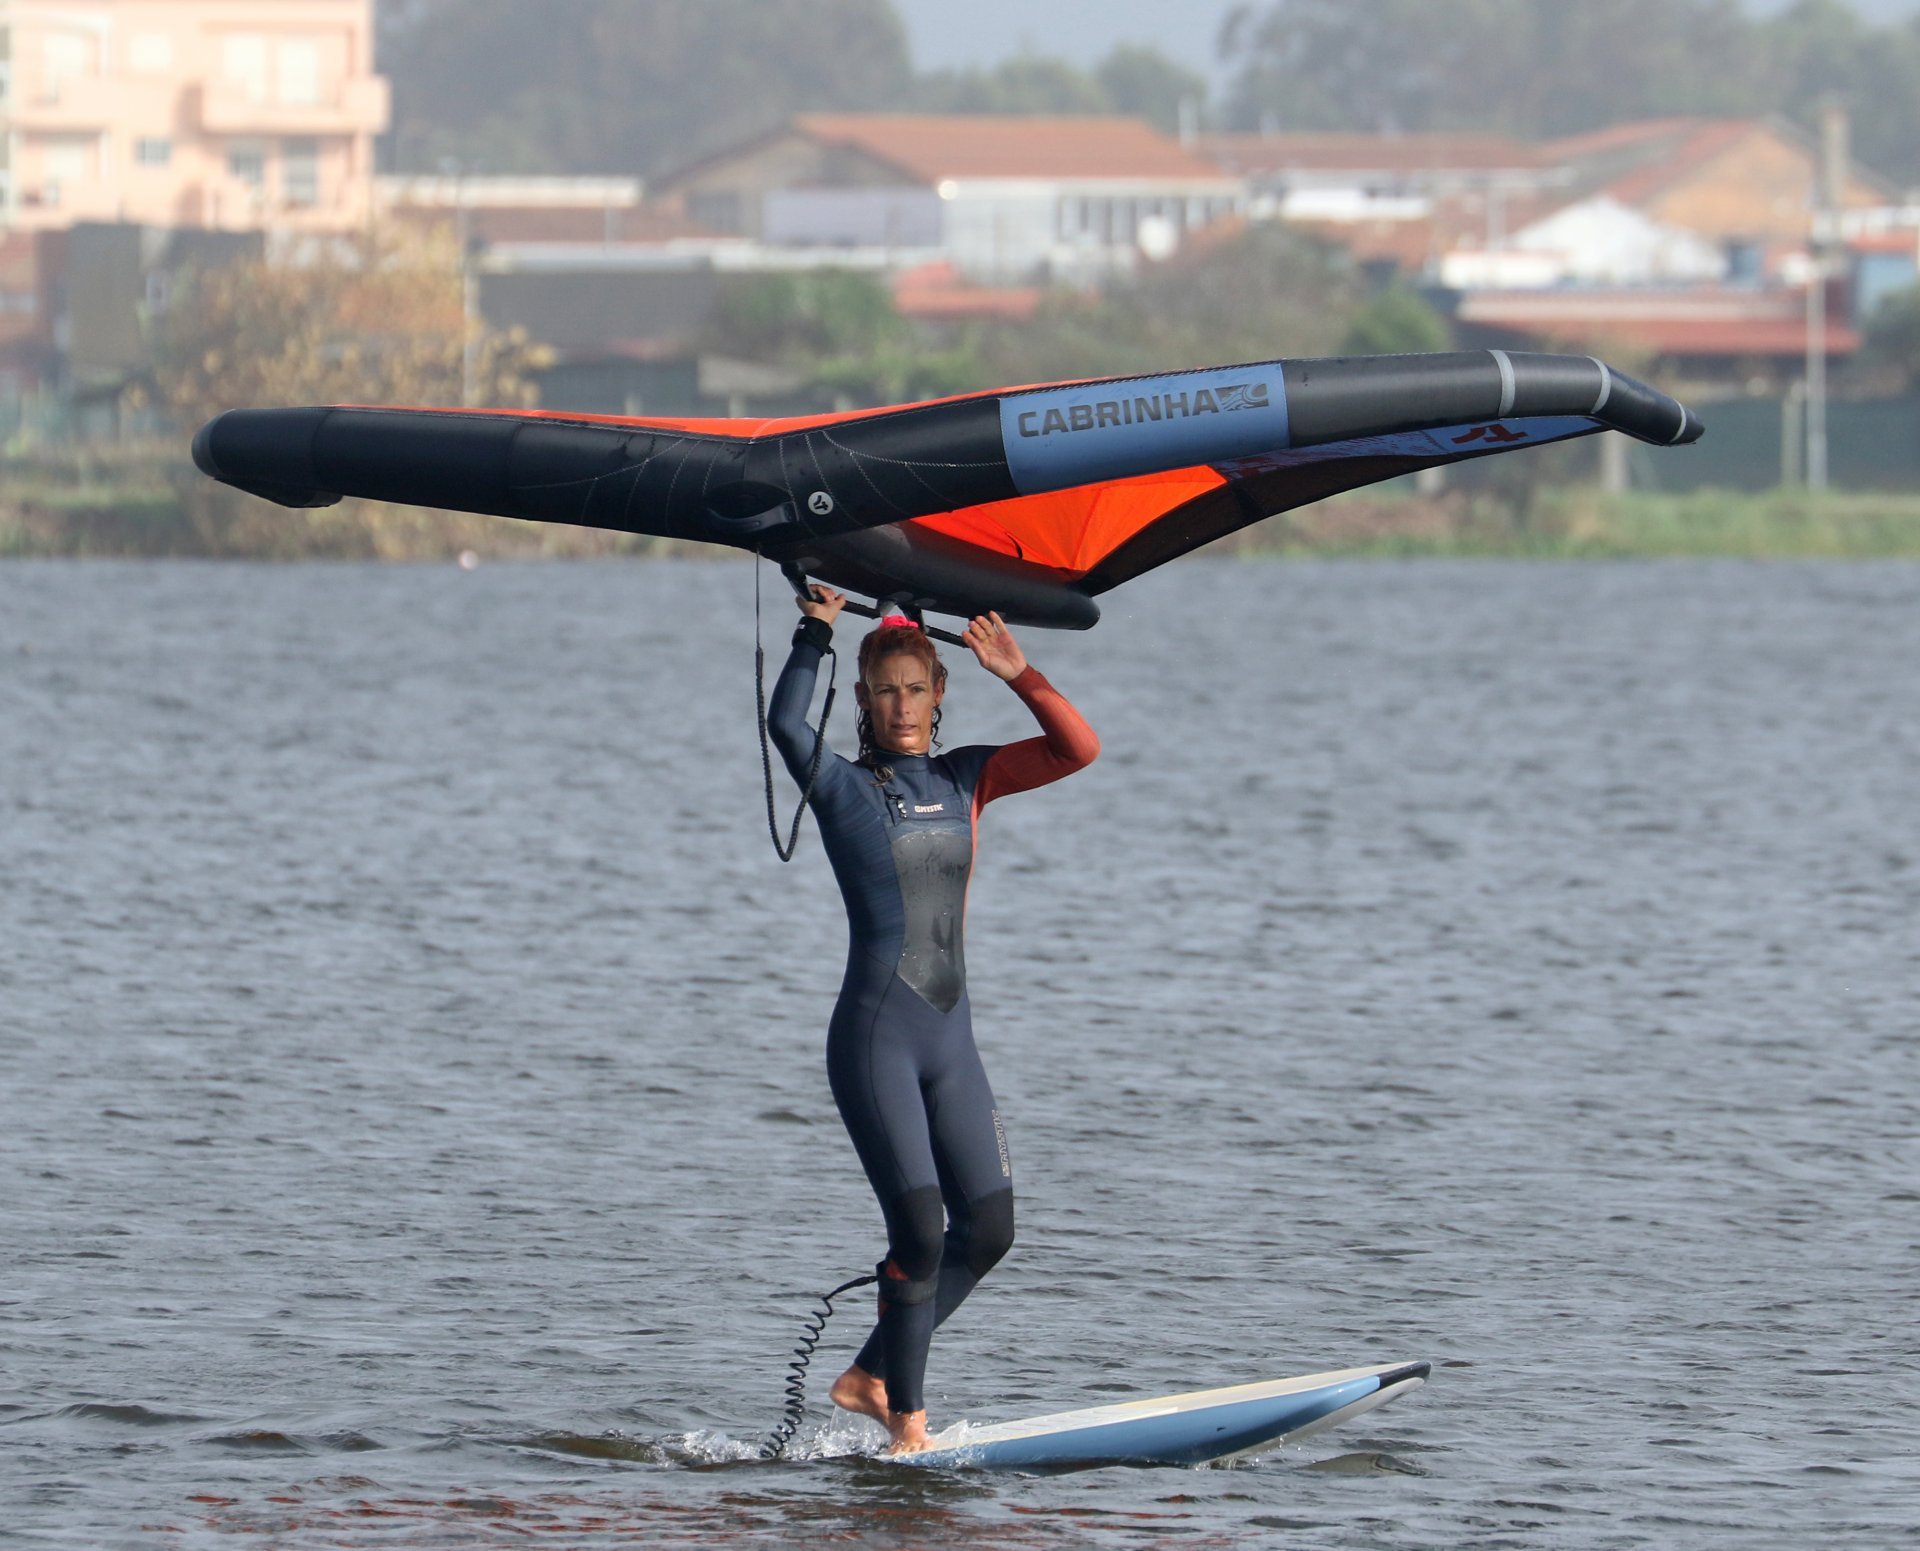
Before you can get the power on, you need to get your new backhand on the wing, so reach back and grab the handle. Once you have it, gently sheet in with your backhand and extend your front arm away until you feel the wind pulling. Don’t worry about where your board is, but concentrate on sheeting your wing in until you feel power. You can see in the photo that because the board is not yet through the wind, Karine’s wing is in an unusual position in relation to her board. Not a problem; she’s searching for some breeze to pull her through.
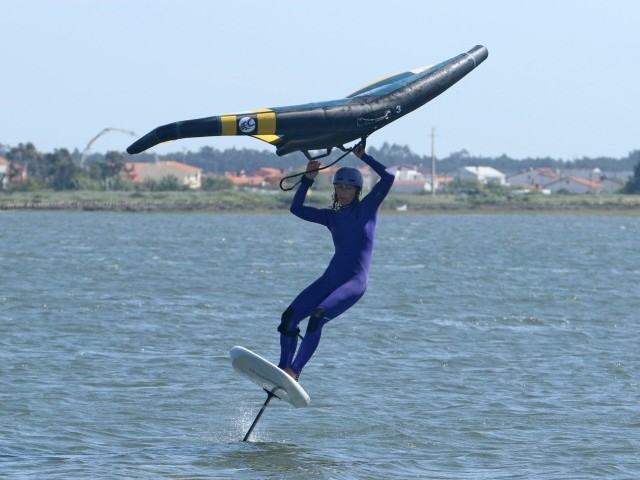
Pushing The Nose Pic H.
With a bit of wind in your wing, you need to push the nose through the wind and bear away until you can move forward again. This bearing away is the other part of the drill from the previously mentioned video, possibly a skill you already have. It’s all about transferring the power from the wing through your front leg so that you can push the nose of the board. Hold the wing forward and stiffen through your body and front leg to steer the board away from the wind. Once you’ve turned enough, the board will start to move, and you can return the wing to a more central position as you move in the new direction.
Top Tips
Anticipate the tack. You need to be ready for the board to slow down and stop so you can start your dance just as the board stops. The longer you wait, the more unbalanced you’ll feel. With practice, the timing will become more intuitive.
Like the gybe, it is tricky to know where the wind is coming from. The good news is that by turning into the wind, your board and wing will tell you by slowing to a stop.
It’s a good idea to practice the hand and foot movements on land first. The new front foot wants to land near where the old one was. You’ll find that there’s a tendency to step too far forward, making bearing away difficult or even sinking the nose.
What you do with the wing and your hands is extremely good practice for foiling tacks. It’s tempting when woffing to rush the wing across you, but be diligent and concentrate on getting your wing high; you’ll be thankful in the long run.
This technique article was in Issue 18 of Tonic Mag.
Related
By Christian and Karine
