
Wing Foil Gybe Part 2 – Steering on the Foil
Technique / Wing Foil

Introduction
We said it in our first Wing Foil technique, and it holds true through every stage, you’ve got to put in the preparation work. Everything needs care, love and attention and your future foiling gybe is no different. As such this issue is all about the second stage of your foiling gybe prep, nurturing it towards reality by steering on the foil. Steering upwind, steering downwind and choosing your path is the absolute prerequisite. There’s so much involved, but to get straight to the point, steering and riding upwind will enable you to make up lost ground between gybes, and you will lose some. Whilst steering downwind will let you get yourself and your kit into a position from where you can start a gybe, so you absolutely have to be able to do it! No short cuts, no magic wand, but once you’ve got steering nailed it’s a very bright green light to start carving and gybe your heart out.
Just like when wofing, learning to steer on the foil whilst deliberately choosing and changing your direction of travel is a mission of discovery. Exploring points of sail, whilst learning about changes in speed, keeping the power on in the wing and the results in trim of the board and lift from your foil. You’ll soon get a better understanding of your equipment and an awareness of the limitations of steering. This is essential as there are too many variables to give a black and white crib sheet, including wind strength, rider weight, wing size, foil area and shape, mast position. You’ll learn what you can do, what you can’t do and a recognise the cues that are trying to tell you that you’ve gone too far.
The better you steer and the more control you have, the safer you become to both yourself and others. What good is it knowing the rules of the road if you’re unable to apply and follow them. As you master steering your confidence will grow and new doors will start to creak open.
And finally, just to be clear of your objective - we’re looking at the steering using your wing and the pressure that it subsequently drives through your feet.
First Position – Dynamic Balanced Position
It’s funny how the fundamentals of learning are all so related. Like learning scales in music, regardless of instrument, how you stand on a court, in a field or on a board is unsurprisingly important. Your first position means that you’re ready and free to move, progress and adapt. In this case your first position is where you are once you’re up on the foil. The beauty of course is that once you’re up you can rejig the pieces to make sure that you’re ready for steering. What we’re looking for is balance, so that whether powered up or nursing your wing in light airs, you are able to move and be dynamic, rather than glued to the spot.
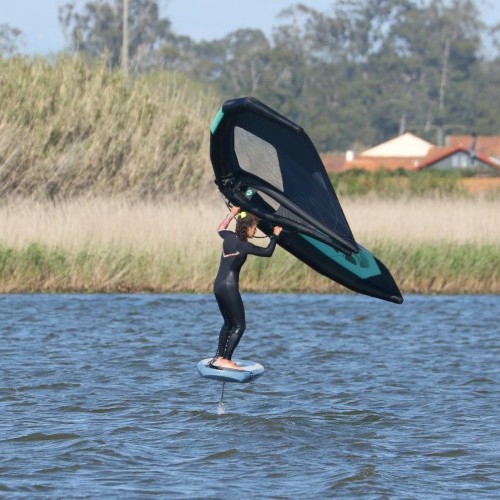
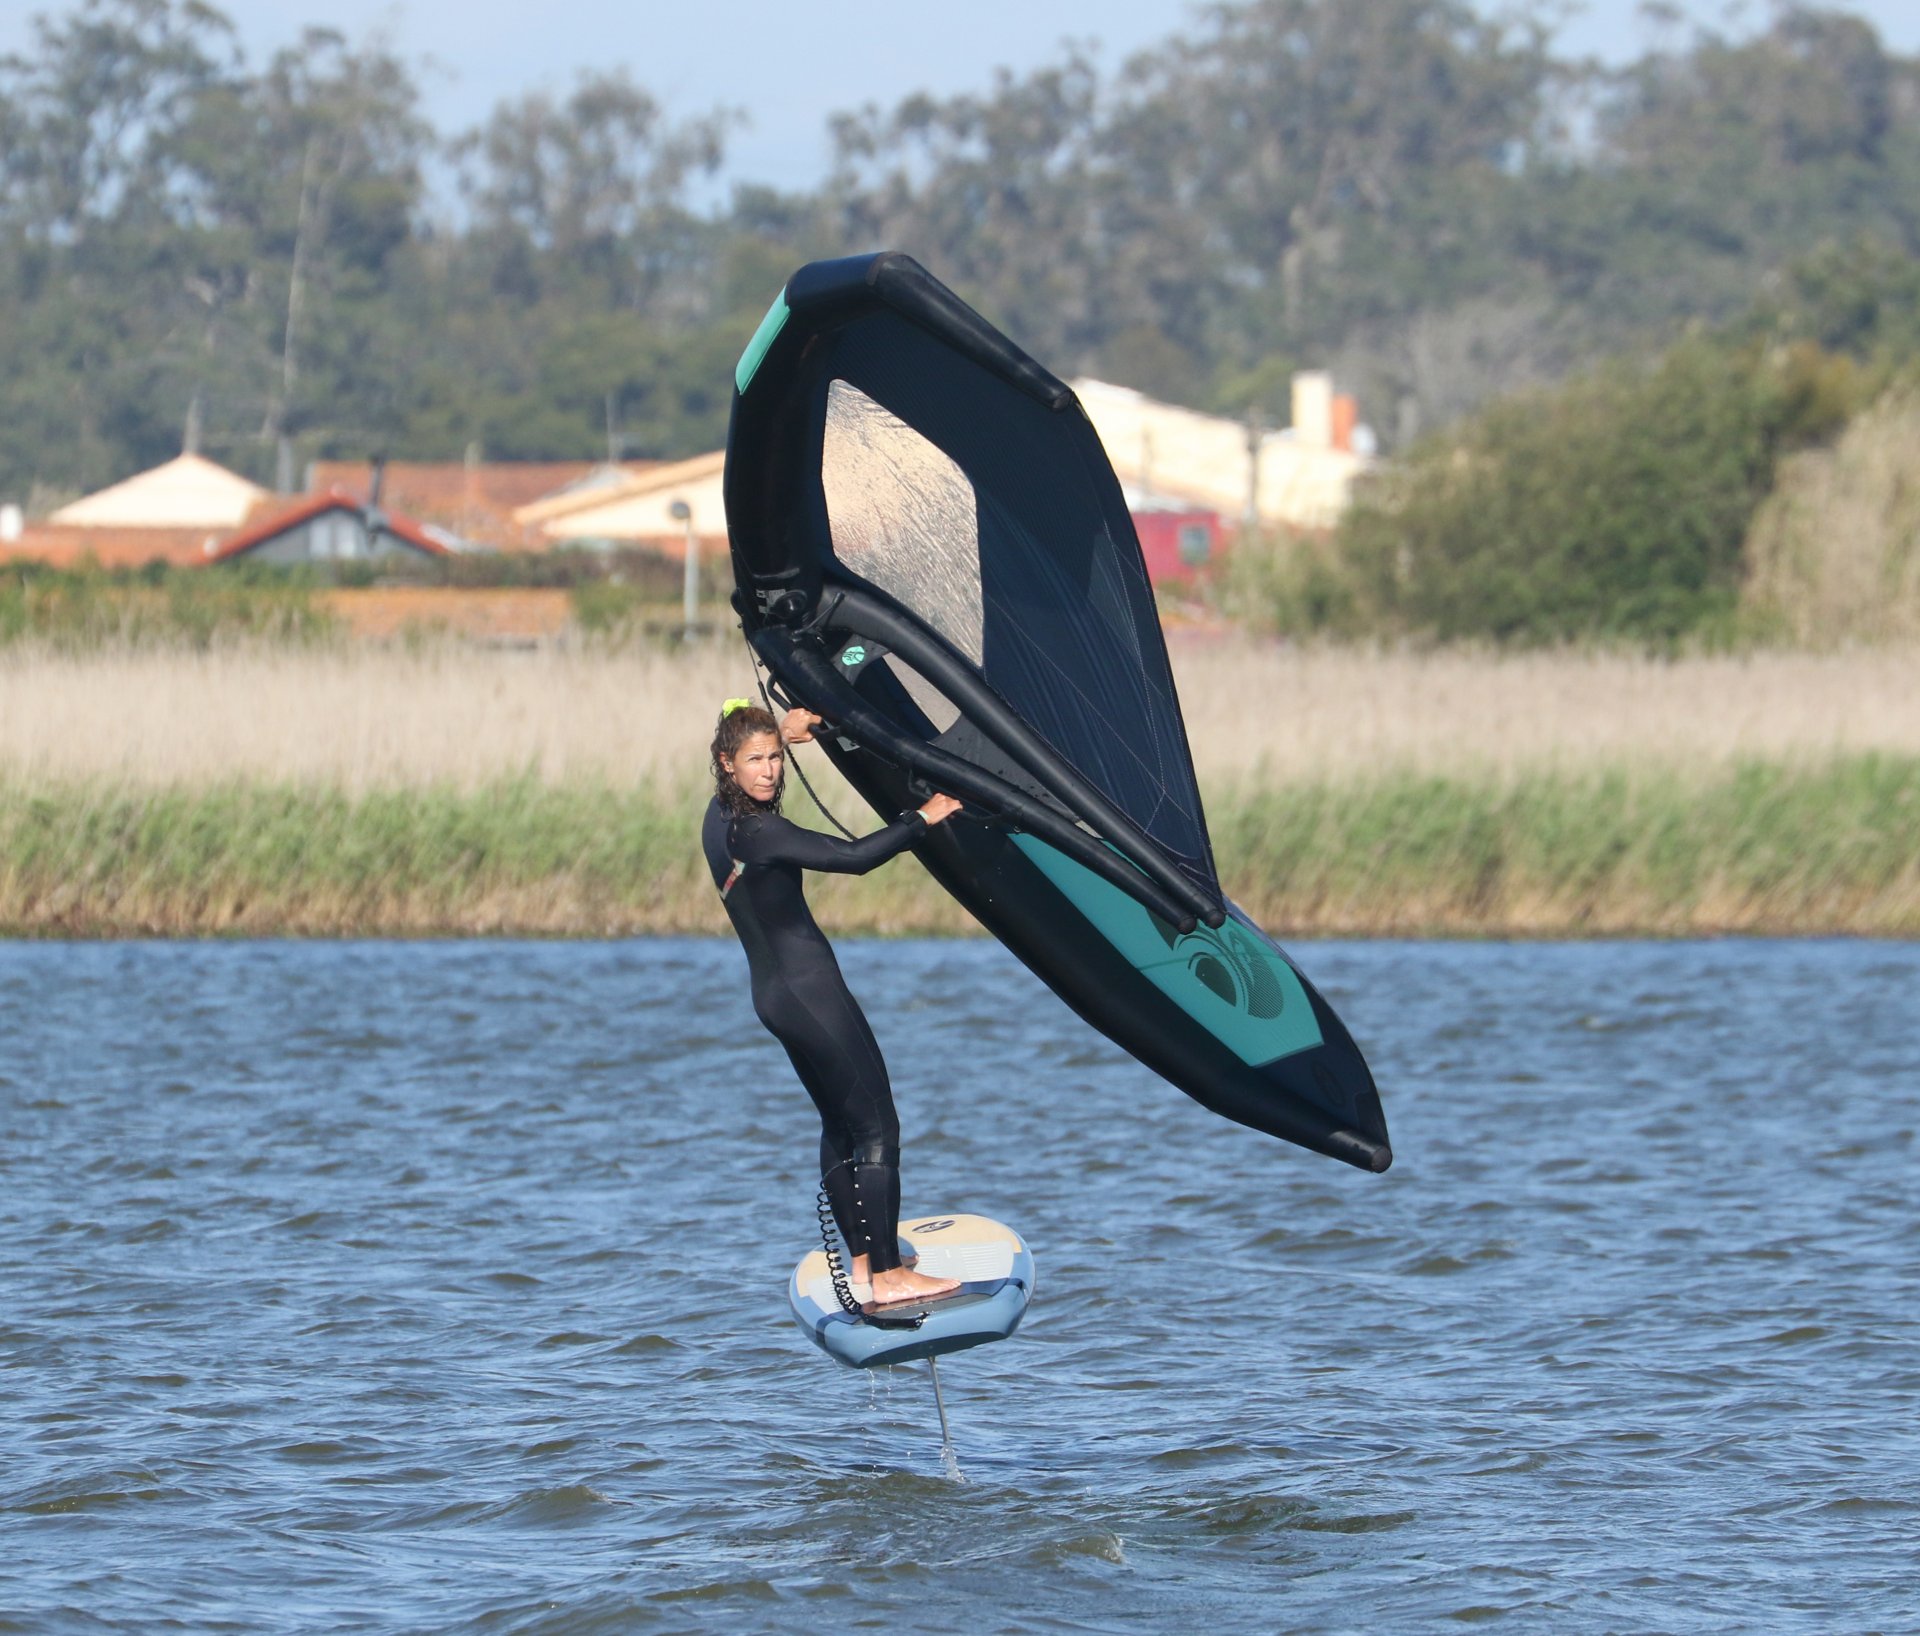
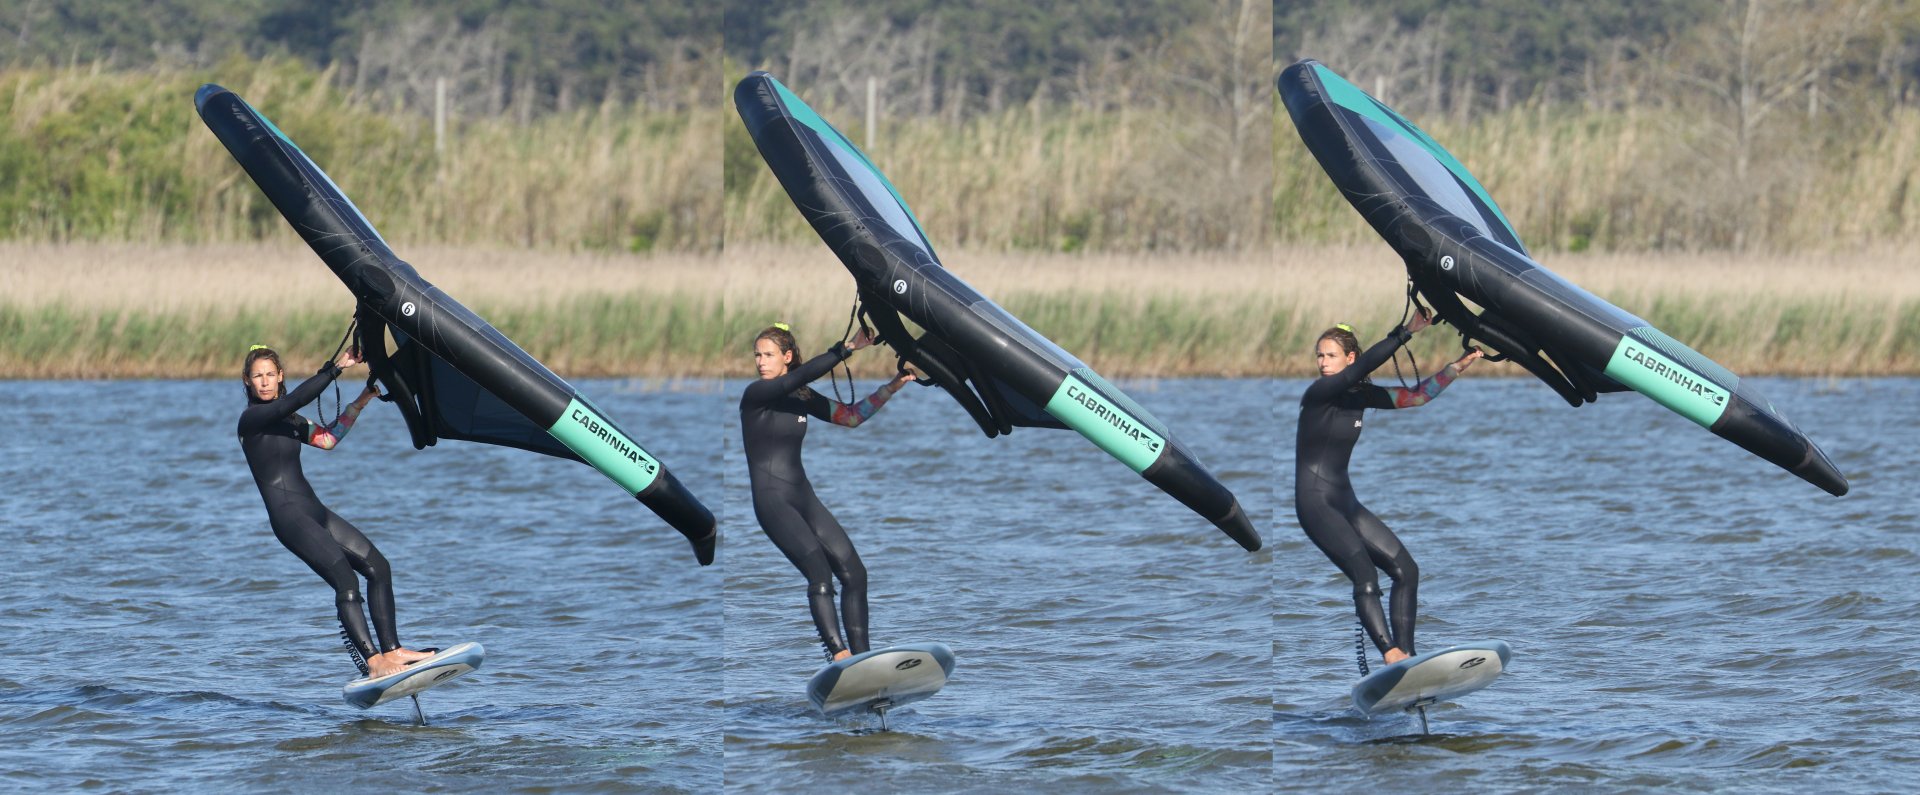
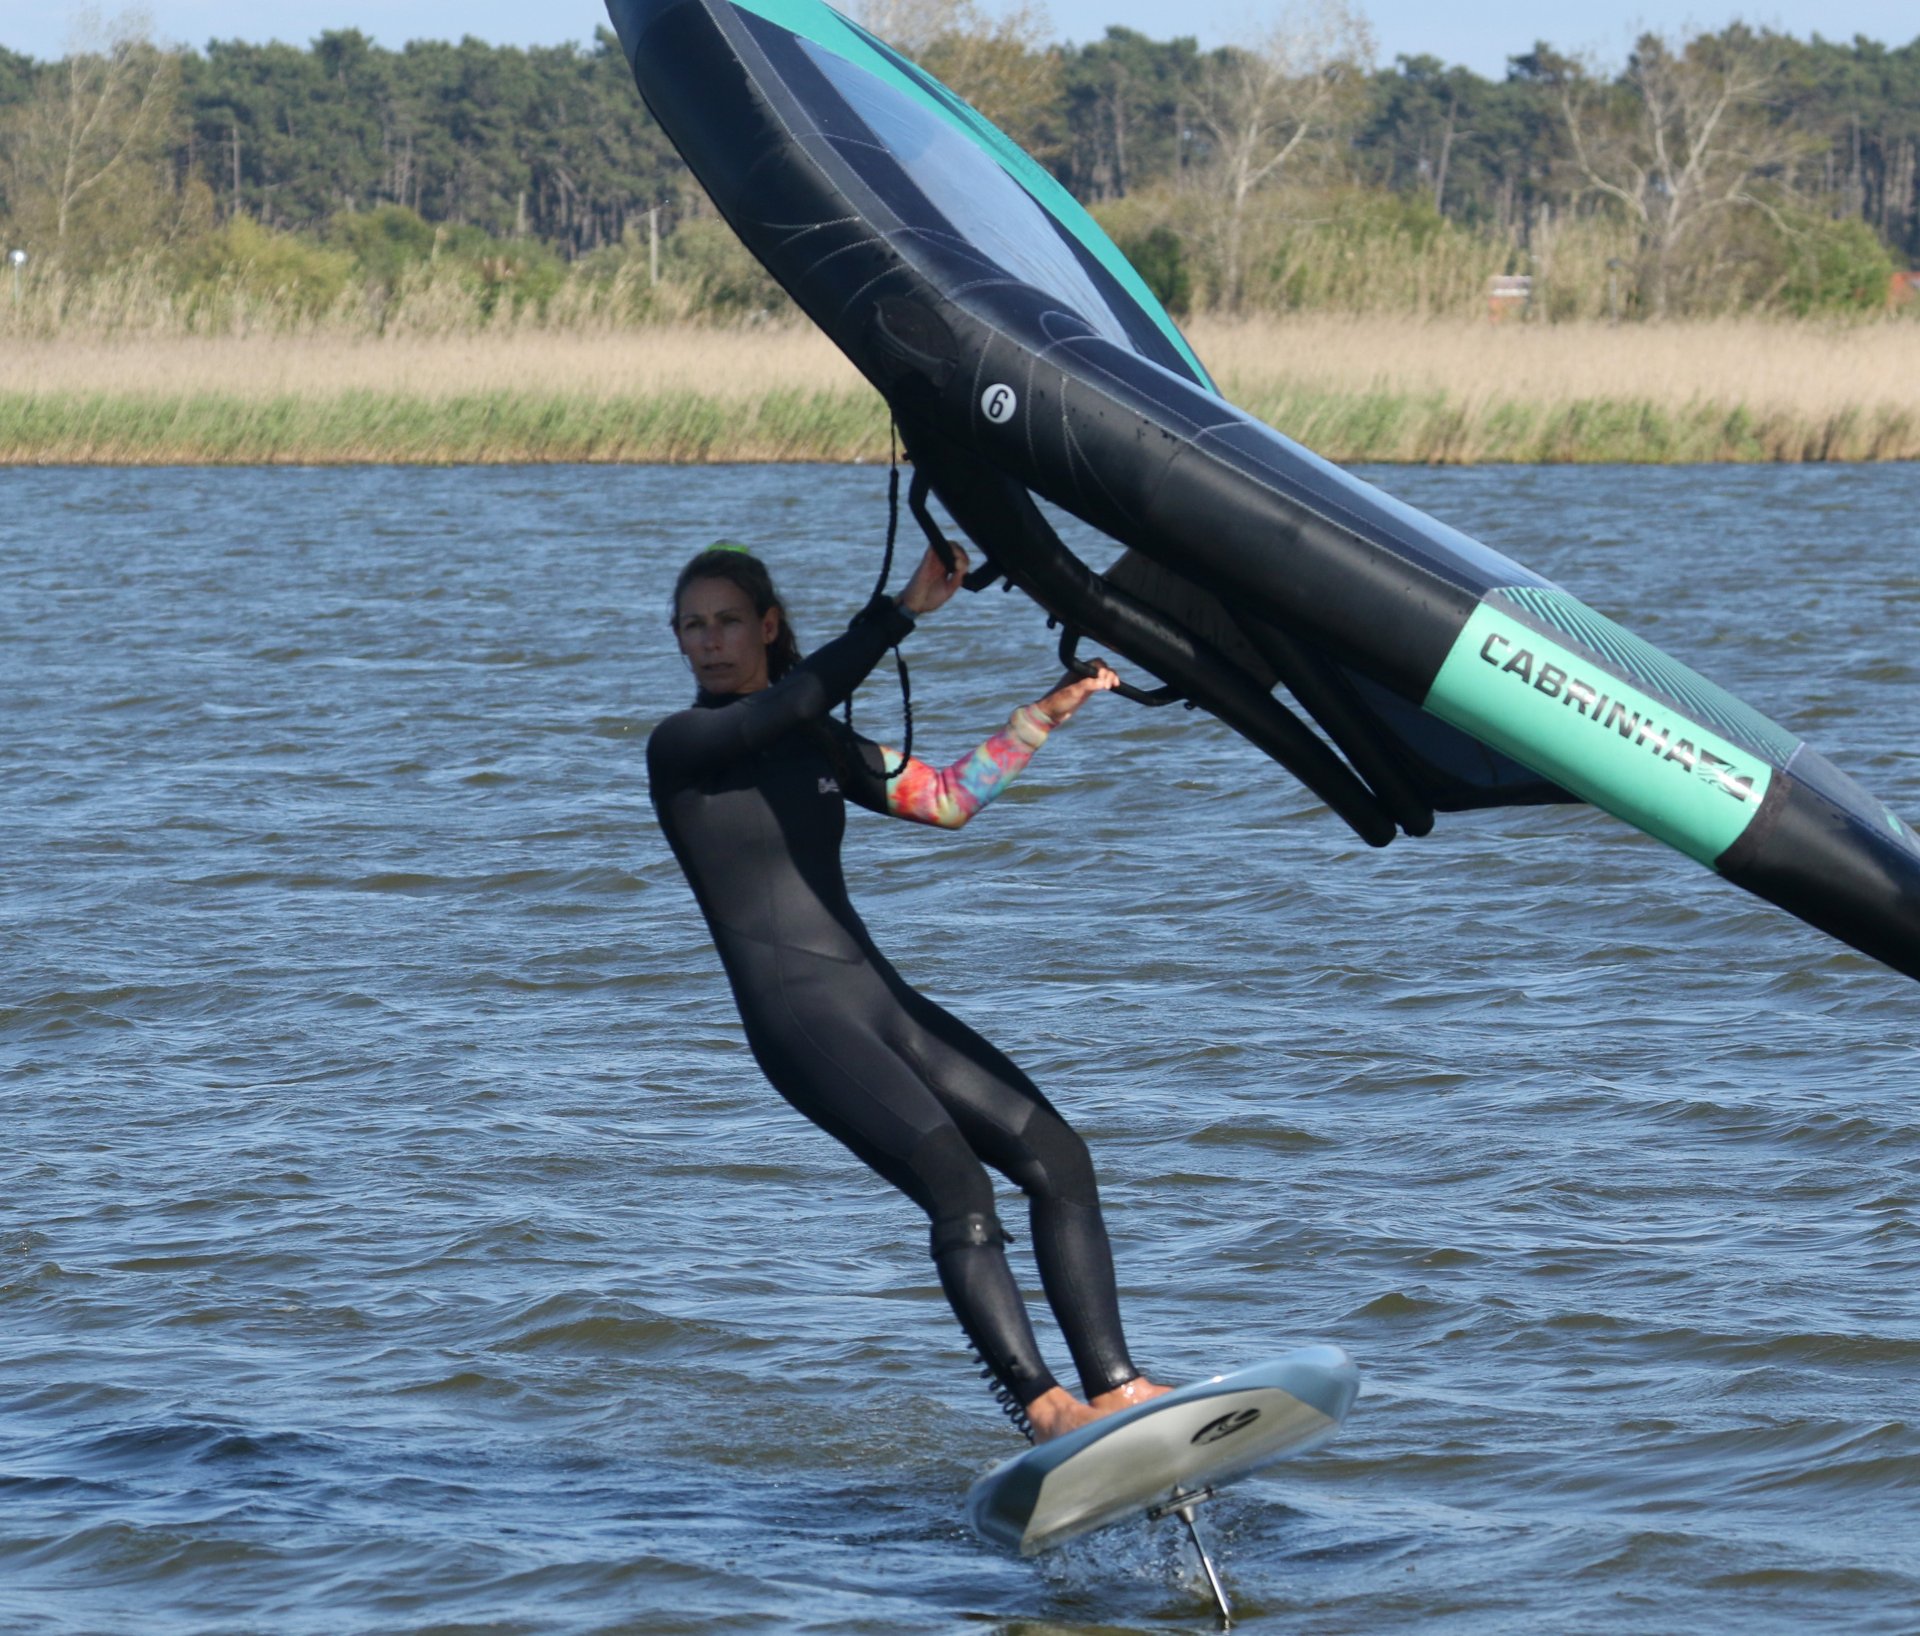
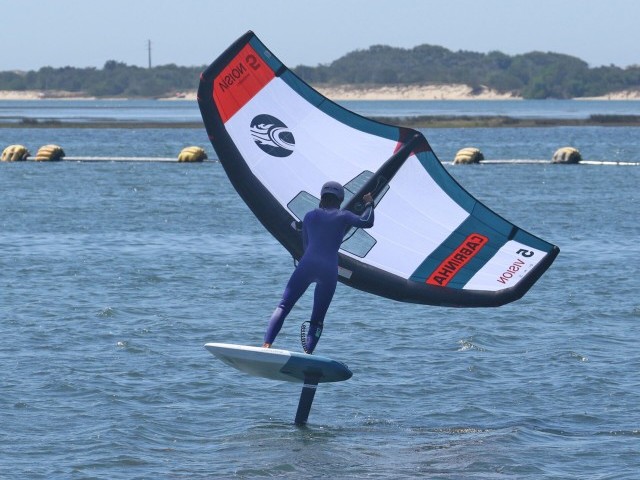
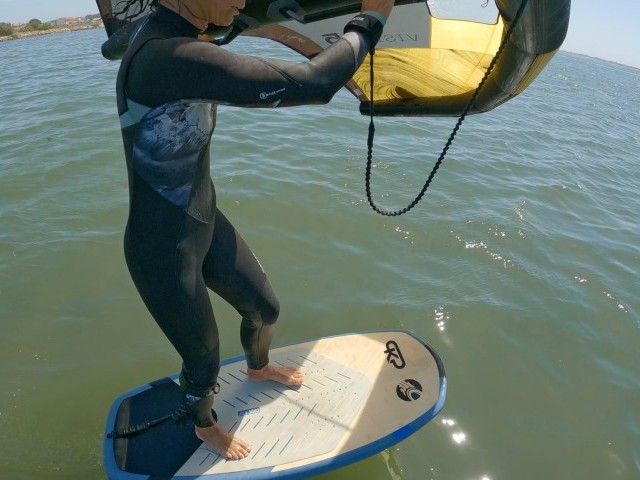
Let’s have a quick look at Karine in Pic A. where she’s just come up on the foil. To come up on the foil she will have steered the board onto a broad reach, turning away from the wind. This means that once she’s up, the board is still potentially accelerating and pointing slightly off the wind on a gentle broad reach. It’s also exceedingly likely that once up, she will have moved the wing forwards to trim the nose of the board down and sheeted out to dump some power from her wing. All of the above are essential so that she ends up over her board, in control and ultimately in first position with the wing held away from her at arm’s length. Although comfortable and balanced, if Karine does nothing she will lose ground, so her first port of call will be to check everything is in position and turn upwind.
As we have alluded to before when off the foil, it’s important to check your feet so that you’re able to trim the board both from nose to tail and rail to rail. Once up on the foil it’s possible that your feet won’t be perfectly placed, especially if the wind is strong or you’ve had to work hard to get up. However, if the name of the game is turning, your foot position will make a massive difference in your ability to turn and the effort required to turn. It’s important that your back foot is not too far forwards. Without diving deep into mast placement theory, if you’re riding with a narrow stance and both feet are forward, you can’t get much leverage against the mast to turn and you’ll need more power, effort and energy to make anything happen if at all. Make sure that your back foot is at least over the front of your mast. And if this is new to you, it will affect how you place your front foot, position your weight and hold the wing. Yet more discovery:) Once up, check your feet, Pic B. Now you’re in your dynamic, balanced first position and ready to rock.
Vision – Looking
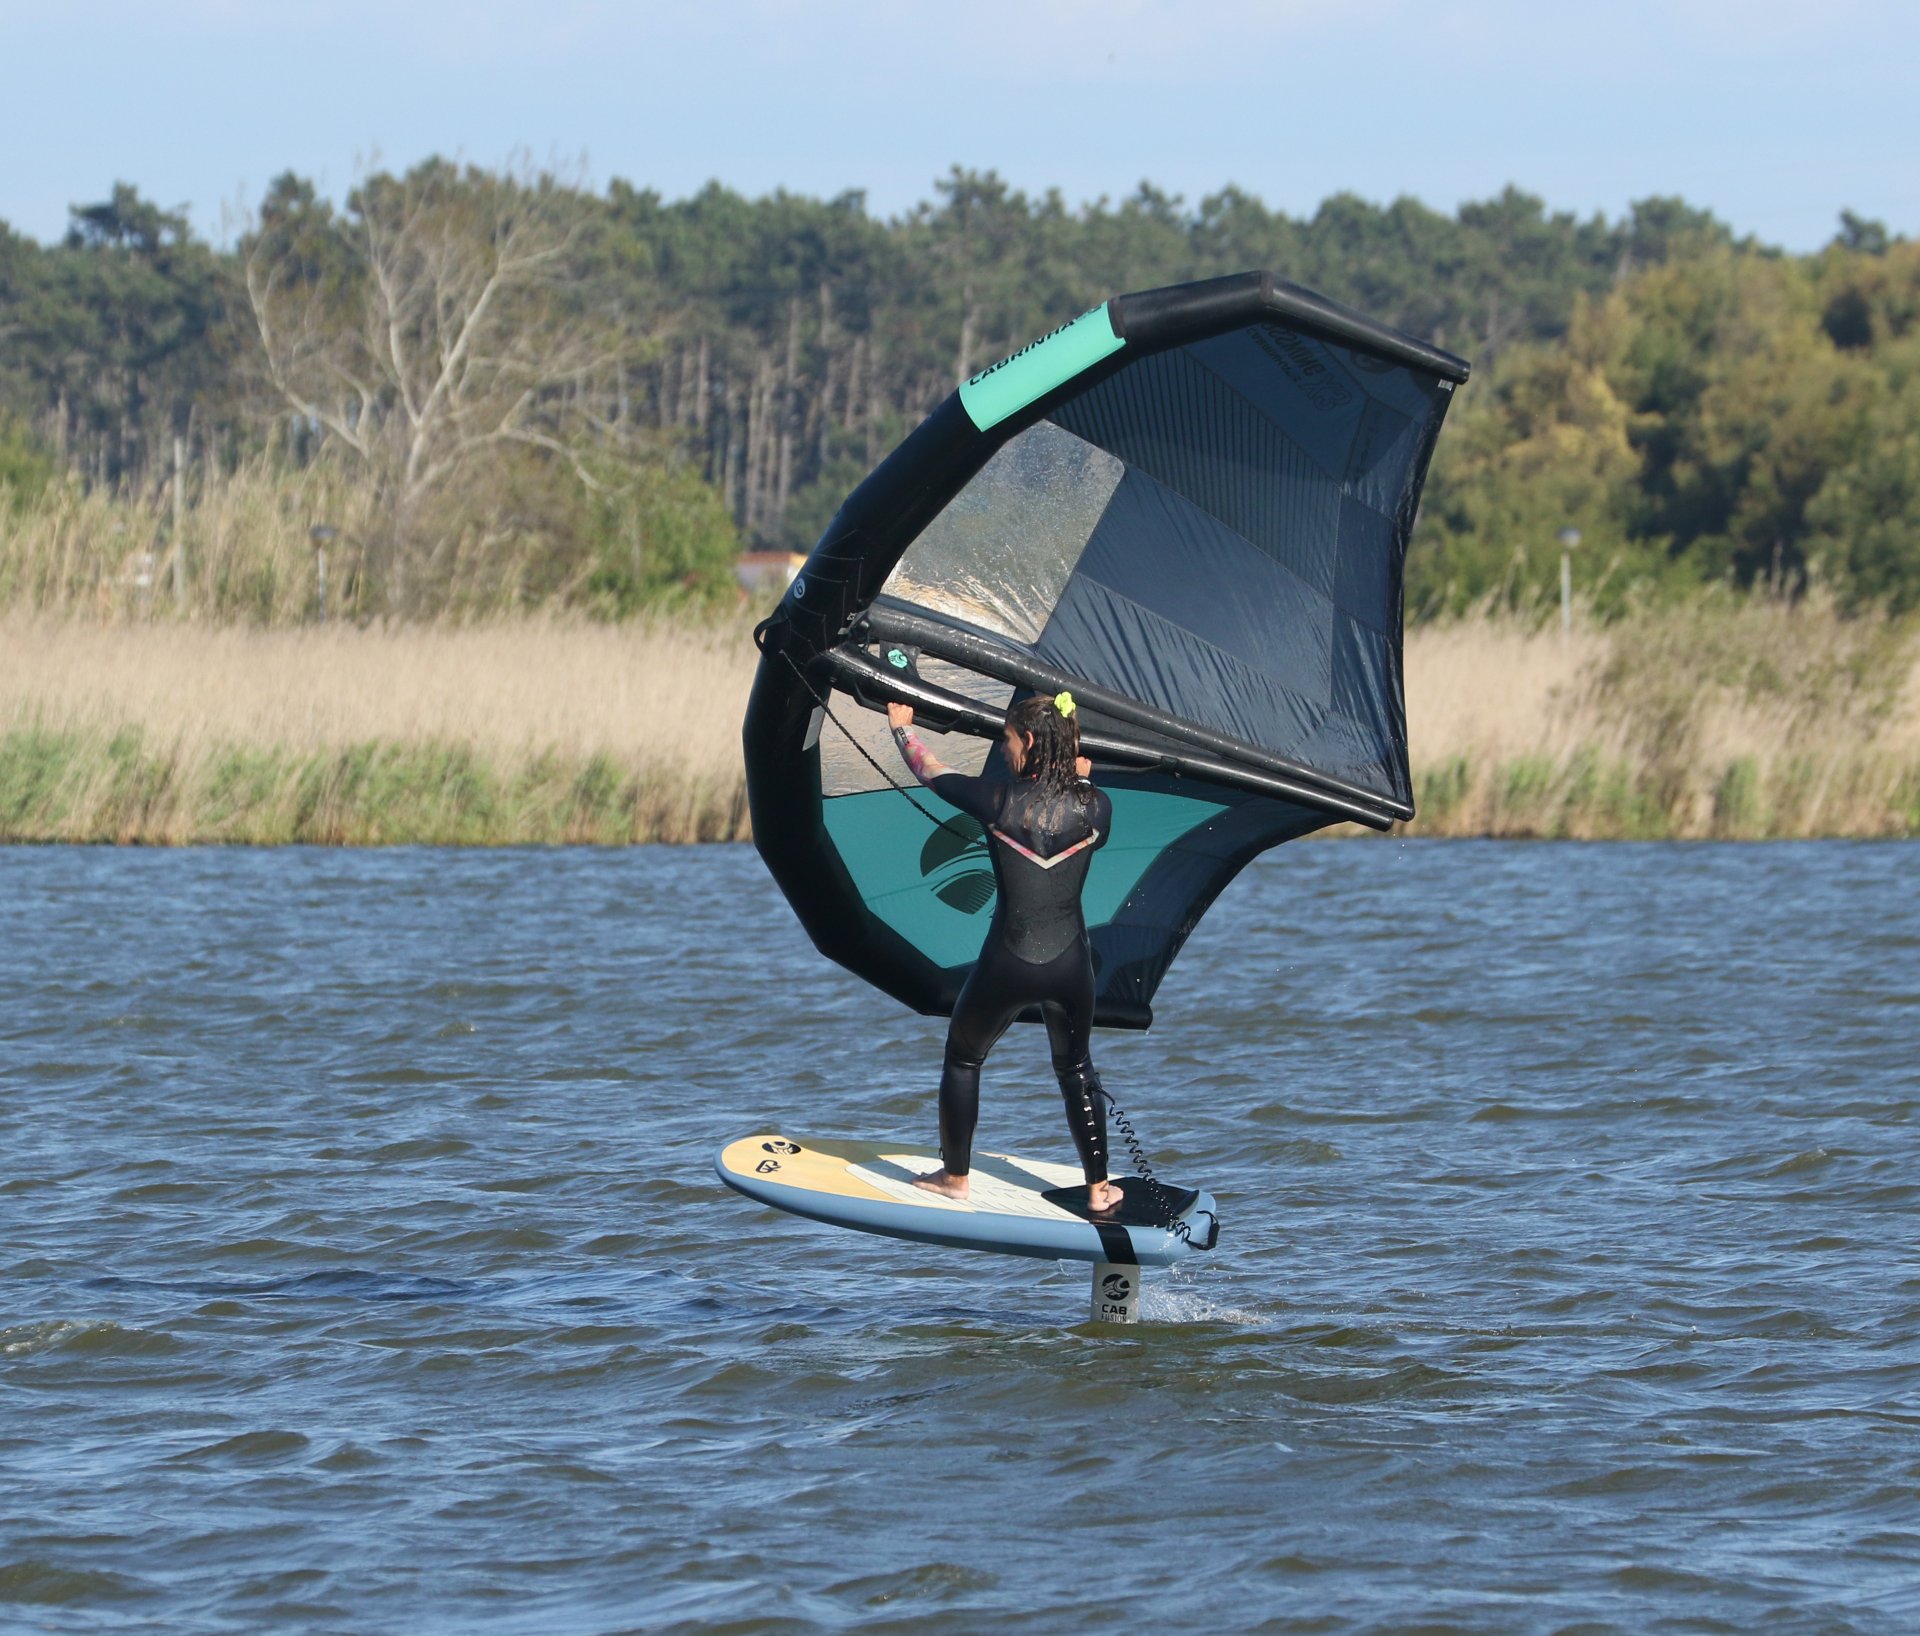
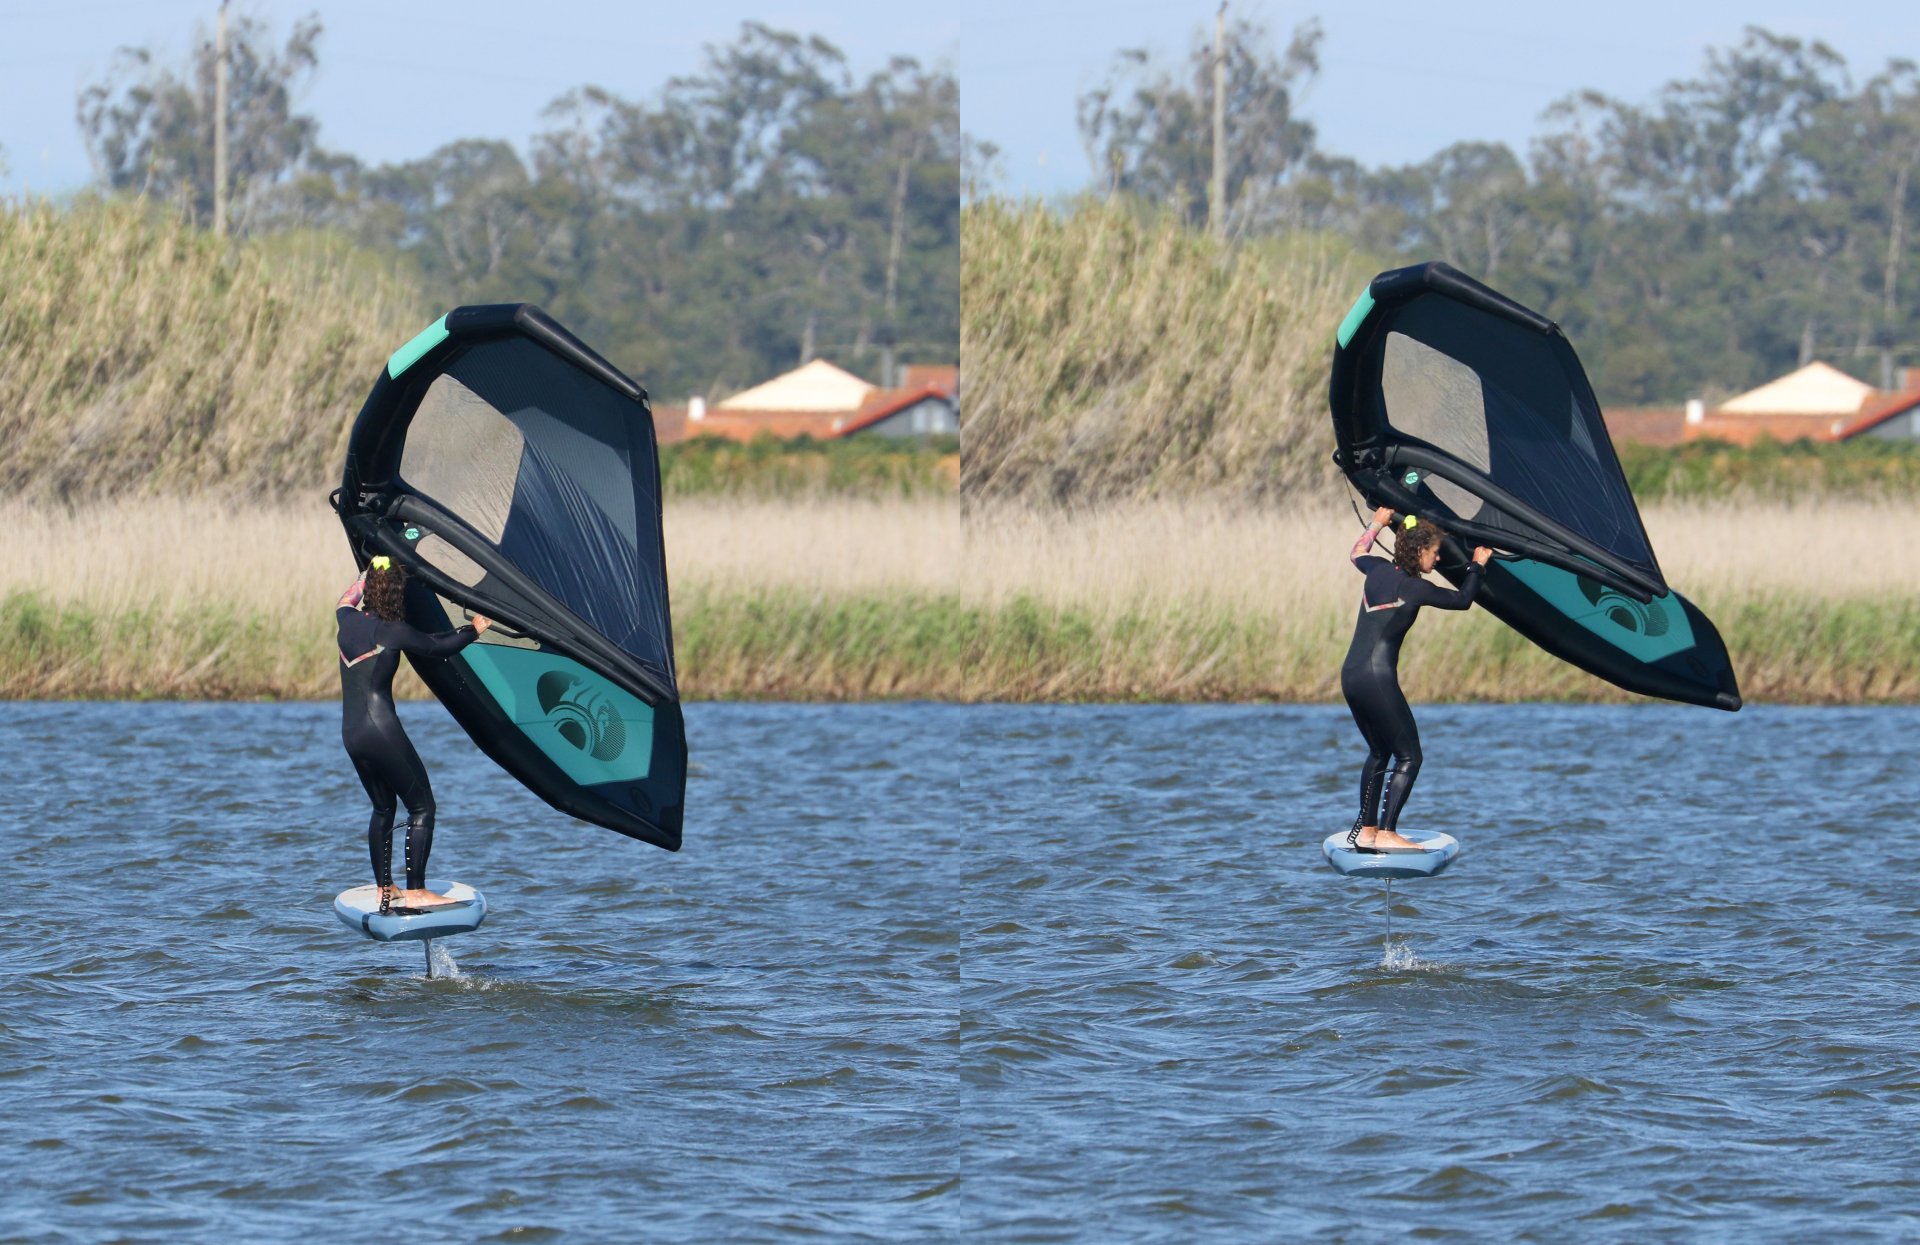
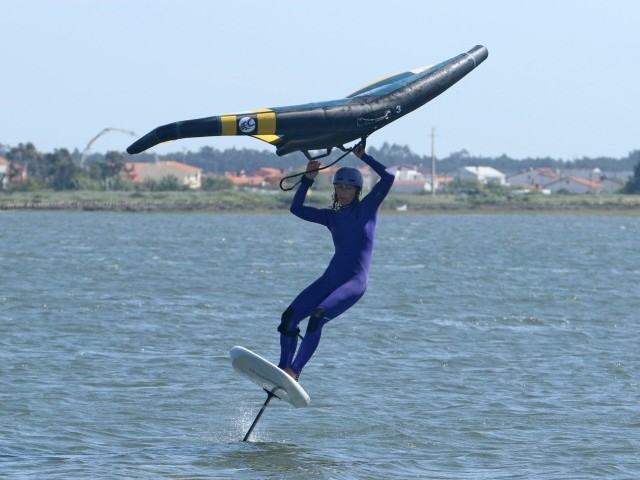
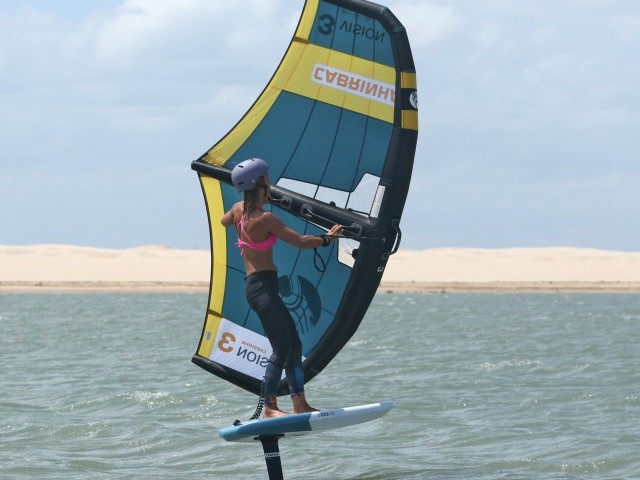
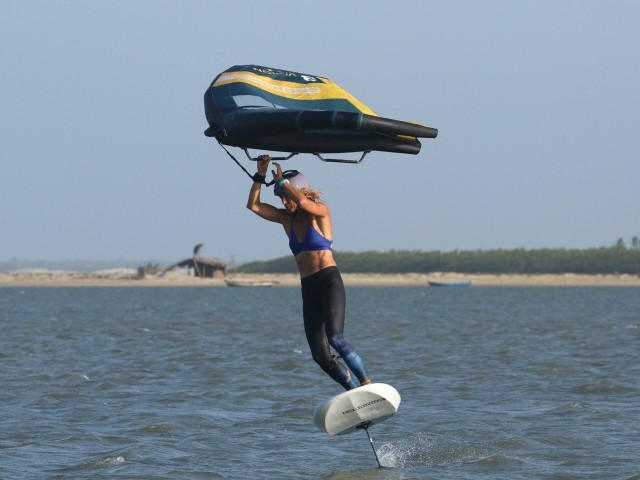
Whilst we’re on the subject of looking, we should continue with the age old maritime necessity of keeping watch. You need a constant awareness of what is going on around you, which just so happens to be one of the most difficult things to do whilst concentrating on the plethora of tasks at hand and feet! You’ll have blind spots regardless whether your Wing has windows or not, and even though you can generally see in a rather blinkered fashion in front and upwind the rest requires regular checking. Remember to 1 check behind you by looking back, Pic C, and 2 check downwind of you by lifting your wing to peer underneath Pic D. This will give you a pretty good evaluation, and the sooner you get into the habit the more ingrained it’ll become. Lift & Look!
Turning Upwind
Once up on the foil and balanced, generally the first thing you’ll want to do is turn upwind. Without wanting to labour the point... Upwind is your reference point. We’ve discussed this in previous features and videos but once riding it’s nigh on impossible to know exactly where the wind is coming from. By turning up into the wind we get a feeling for where the wind is coming from. You wouldn’t be able to plot it on a map, but by changing direction, upwind and off the wind you’ll get an idea. This is vital, not just because you won’t see a windsock or flag on each and every run, but also because the wind is not always constant, it shifts about and changes direction. If you can get a feel for this from your discovery, you’ll become more efficient with each passing session.
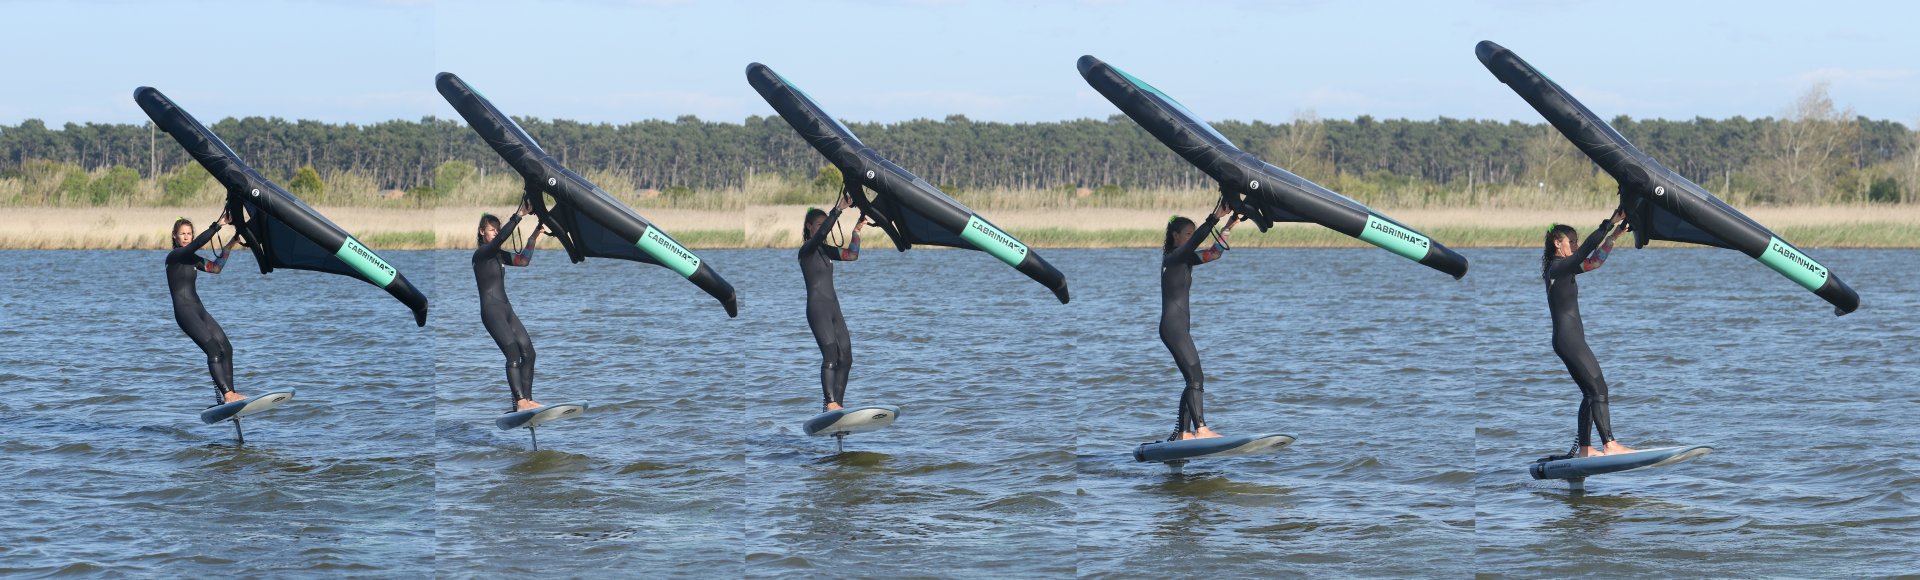
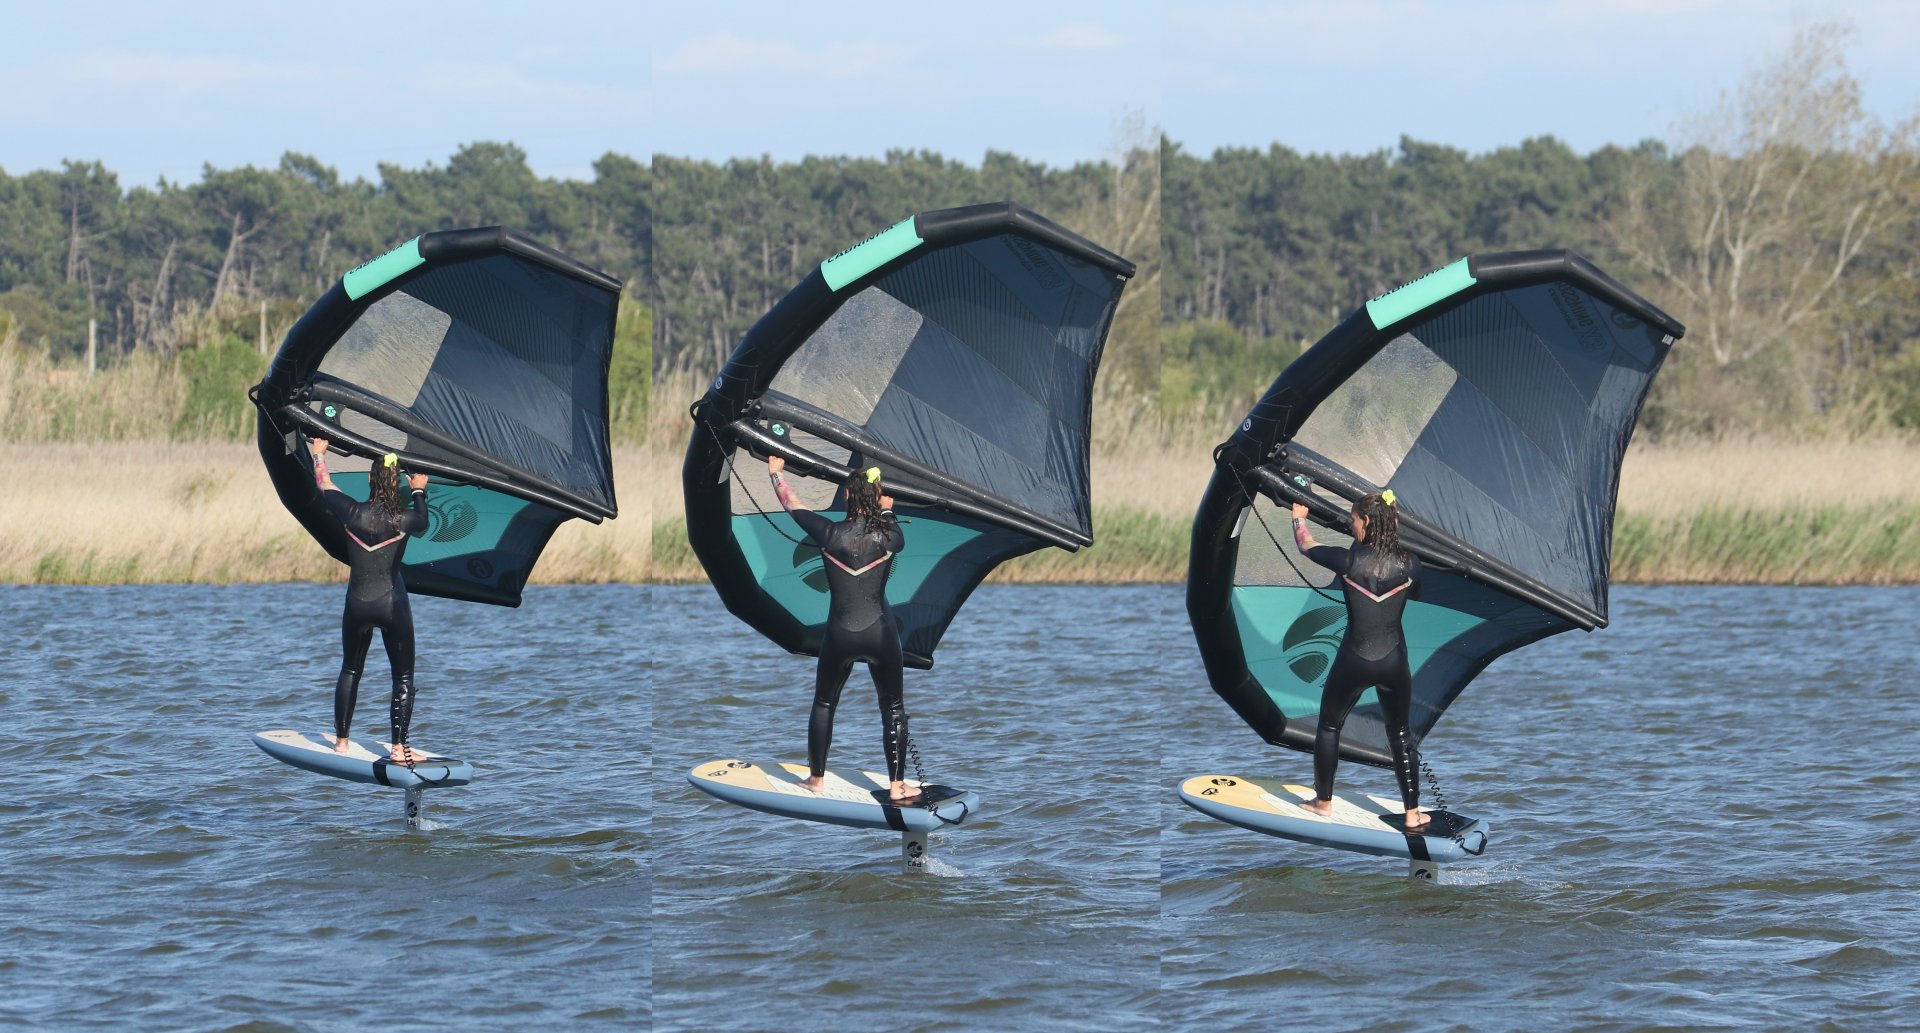
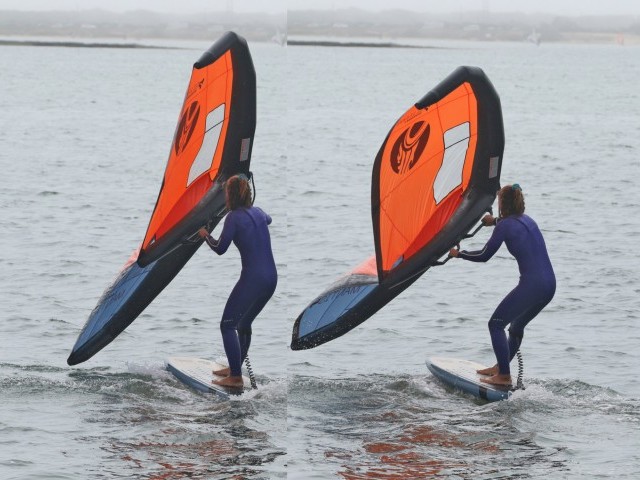
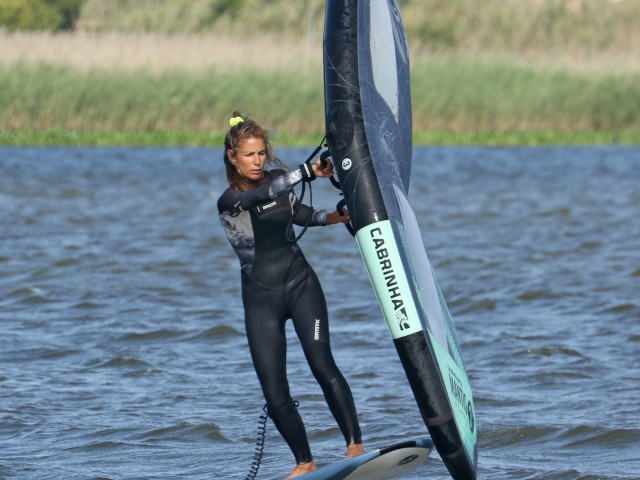
So, let’s start by looking how we turn upwind. The rather fantastic news is, that if you’ve done this off the foil, it’s much the same whilst foiling, you’ll move the wing gently back. If you cast your mind back to our Wing Foil #1, we went through how the very nature of moving your wing back, forces the pressure from your wing through your back foot. As the back foot pushes the front of the board is forced to turn up into the wind. This is why foot position is important. With your back foot somewhere over the mast the board can practically pivot around the mast and point higher. You are effectively moving the centre of effort in the wing back, so it pushes further back. If your rear foot is too far forward, you won’t have the same effect. To move the wing back look upwind and move your arms back, simultaneously open your shoulders and hips, facing them upwind. This twist directs the power of the wing through your rear foot. You can see how Karine is twisting her body to face upwind whilst moving the her Wing back in the sequence Pic E.
The important point here is that you still need to transfer the power, which requires you to be stiff and keep the wing sheeted in. If you’re all floppy, you can’t transfer the power from your wing through your back leg and against the board. The further you move your rear foot back the more radical the change in direction. Whilst doing this try and keep the wing away from you, which helps keep you balanced over the board.
Now you know from your wofing, that you can’t just keep the wing back and continue to turn, as eventually you’ll run into problems. You’ll slow down as you get closer to wind, which in turns means you’ll have less lift from your foil, and you’ll start to sink lower towards the water. This is your cue to do something, your trigger. The best solution is to put some downward pressure through your back foot to lift up and then power the wing up to bear away and stop the nose from rising too much and stalling your foil. In the sequence Pic F. you can see how Karine lifts the board back up by pushing down with her back leg and then moves the wing forwards to turn the nose of her board off the wind. As the board turns, more wind will fill her Wing, she’ll speed up a tad and the forward wing will stop the foil and board from rising too steeply and stalling.

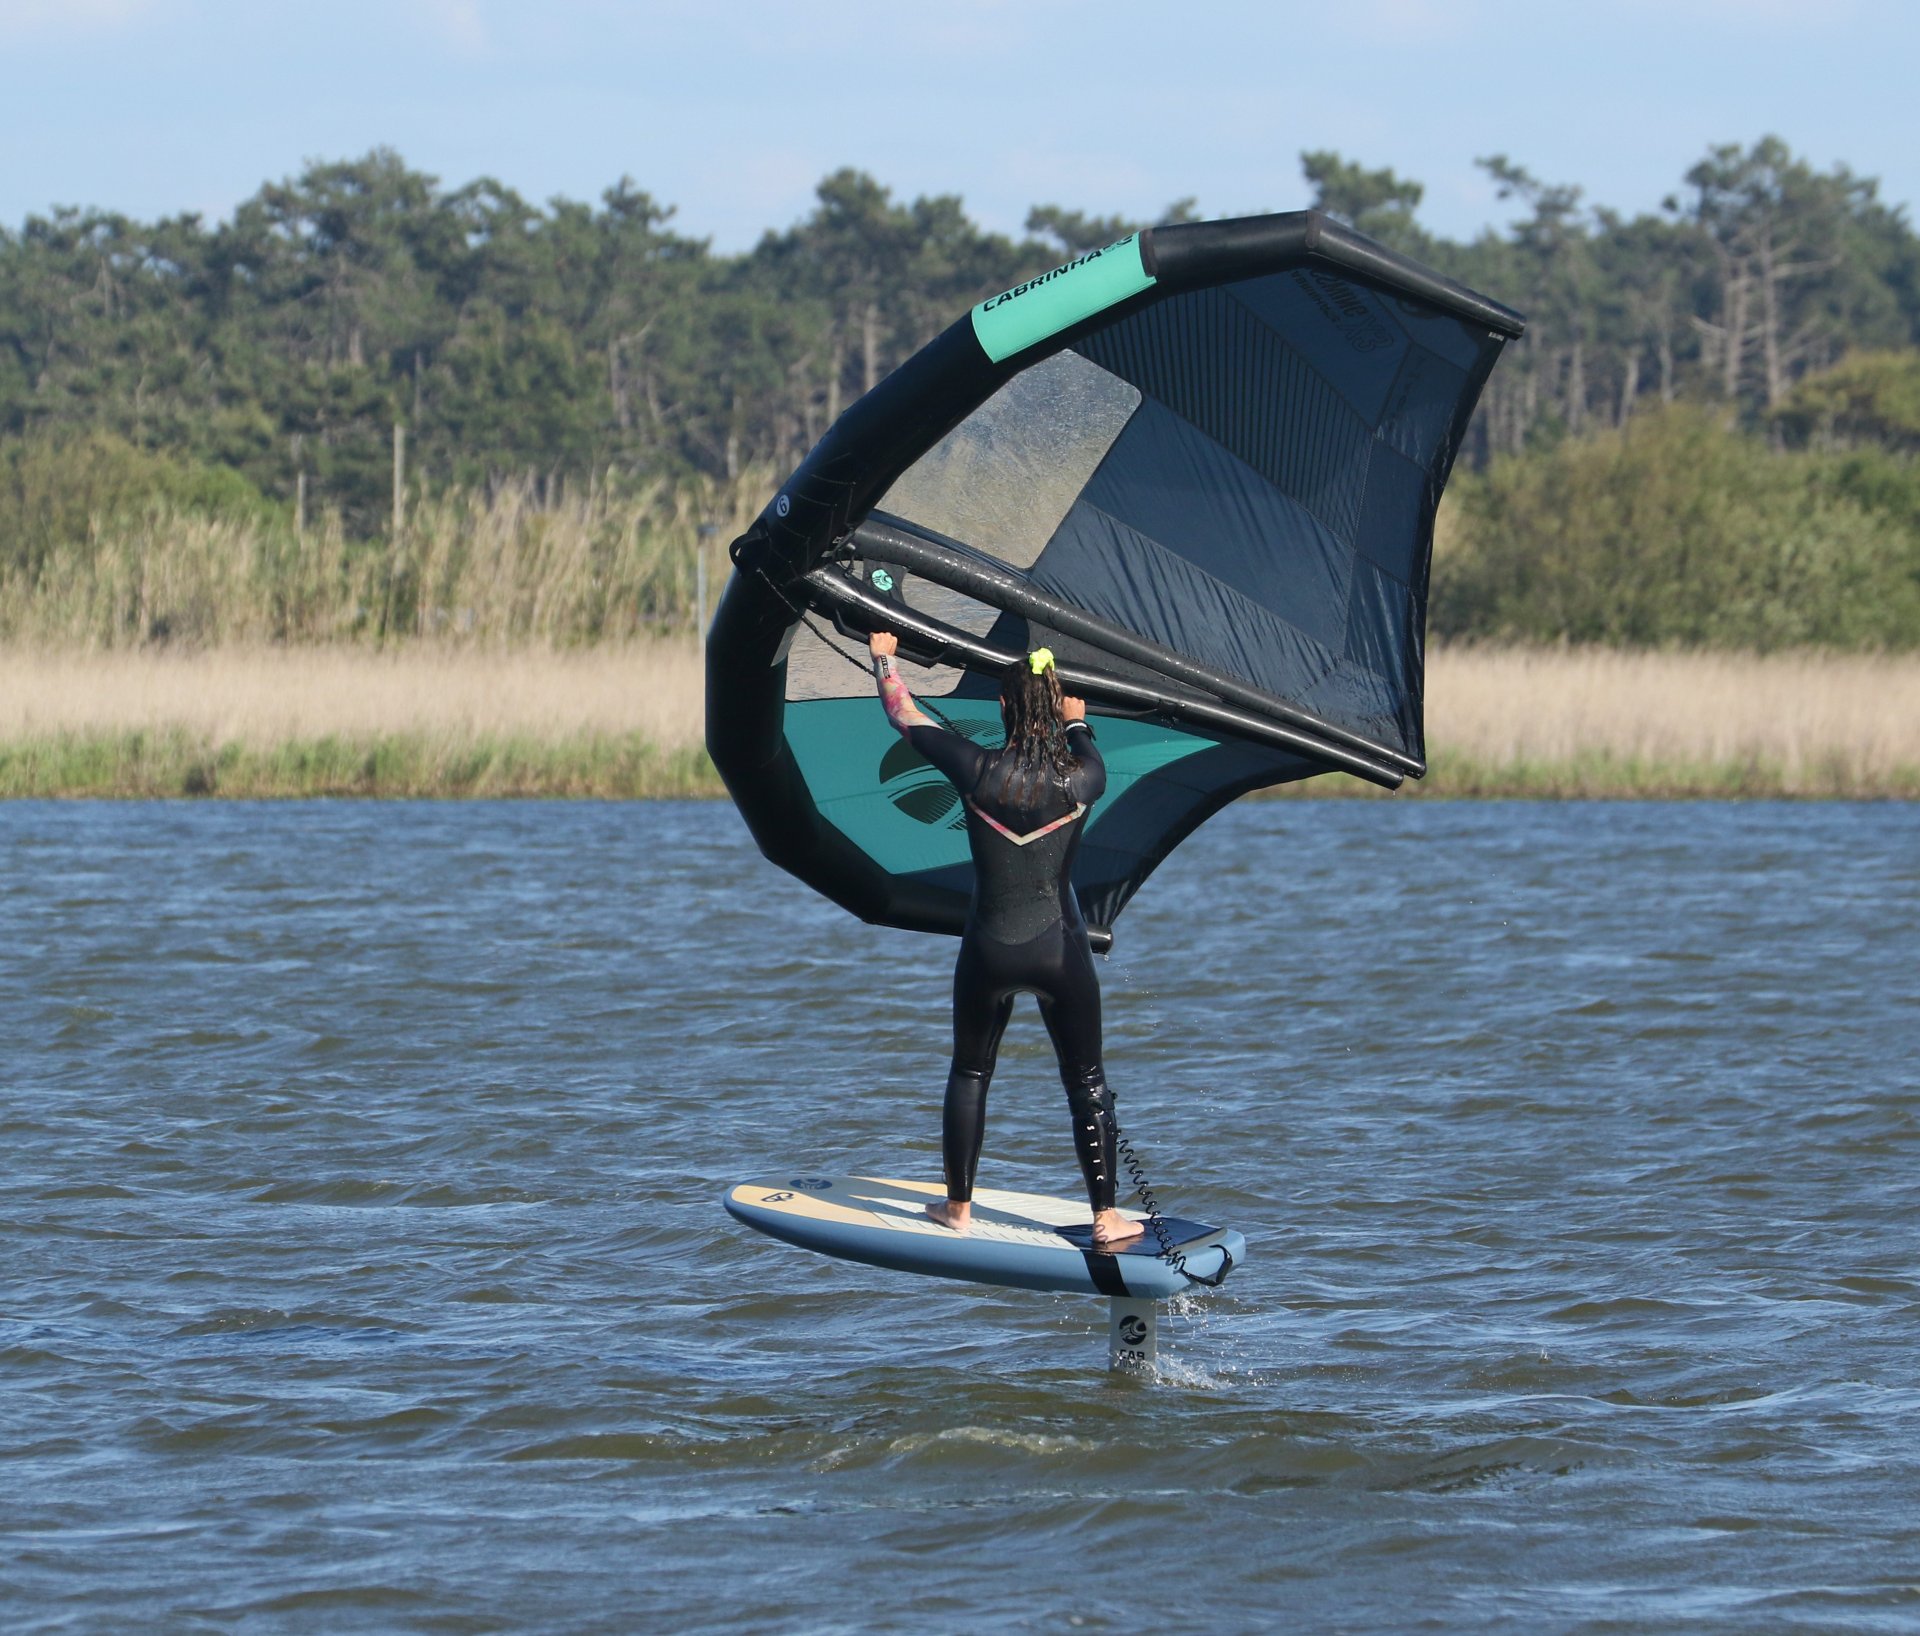
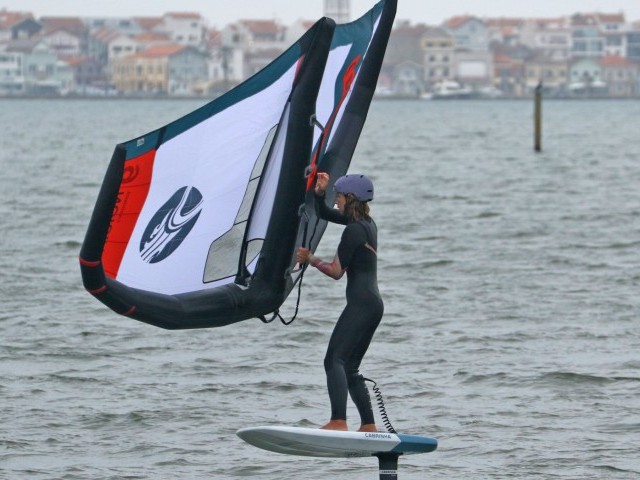
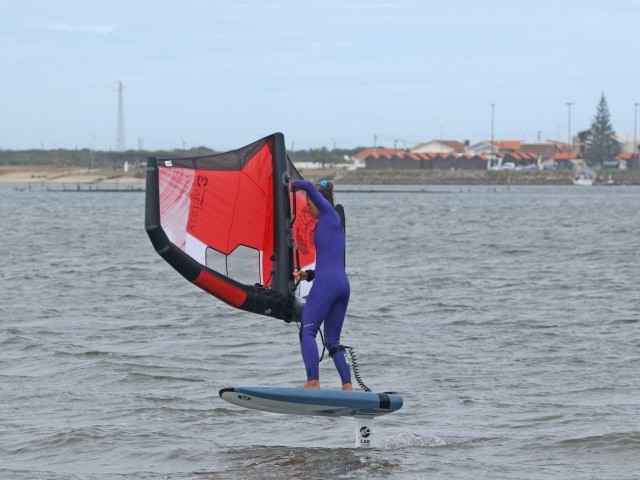
As you play around, experiment and learn you’ll get a feeling for more subtle changes. The most helpful is Wing position. Assuming that you’re not overpowered and can’t sheet in, you’ll find that once you’re riding close to the wind, sheeted in, that your Wing will be flying lower to the water and closer to you. Have a look at Pic G. You can see that Karine’s wing is lower, and it’s flying more vertically from tip to tip as she sheets in. Once you’re in this position you know that you’re riding upwind and then you can be more subtle with your movements so that you don’t turn too far up.
Once you’re happy turning upwind, keeping speed and staying up on the foil you’ll be able to make ground upwind, which stands you in excellent health to start charitably giving away some of you hard earned yards upwind.
Turning Off The Wind
Bearing away will feature heavily in your forthcoming gybe. Especially when learning to gybe, you’ll have a much better chance if your gybe starts from a broad reach. However, bearing away is a quirky term, as we use it to describe both turning the board so that it physically points away from the wind, such as on a broach reach, and also to turn the board away from an upwind position so that it points less and less into the wind! It describes the directional change from an upwind position all the way through the various points of sail until you’re pointing downwind. The easy bit is that it’ll have the same effect, you’ll accelerate. Which is exactly what you’re after if you’re slowing down, whether it be because you’ve turned to far upwind, the wind has shifted, or you just need a bit more zip to carry you through a gybe.
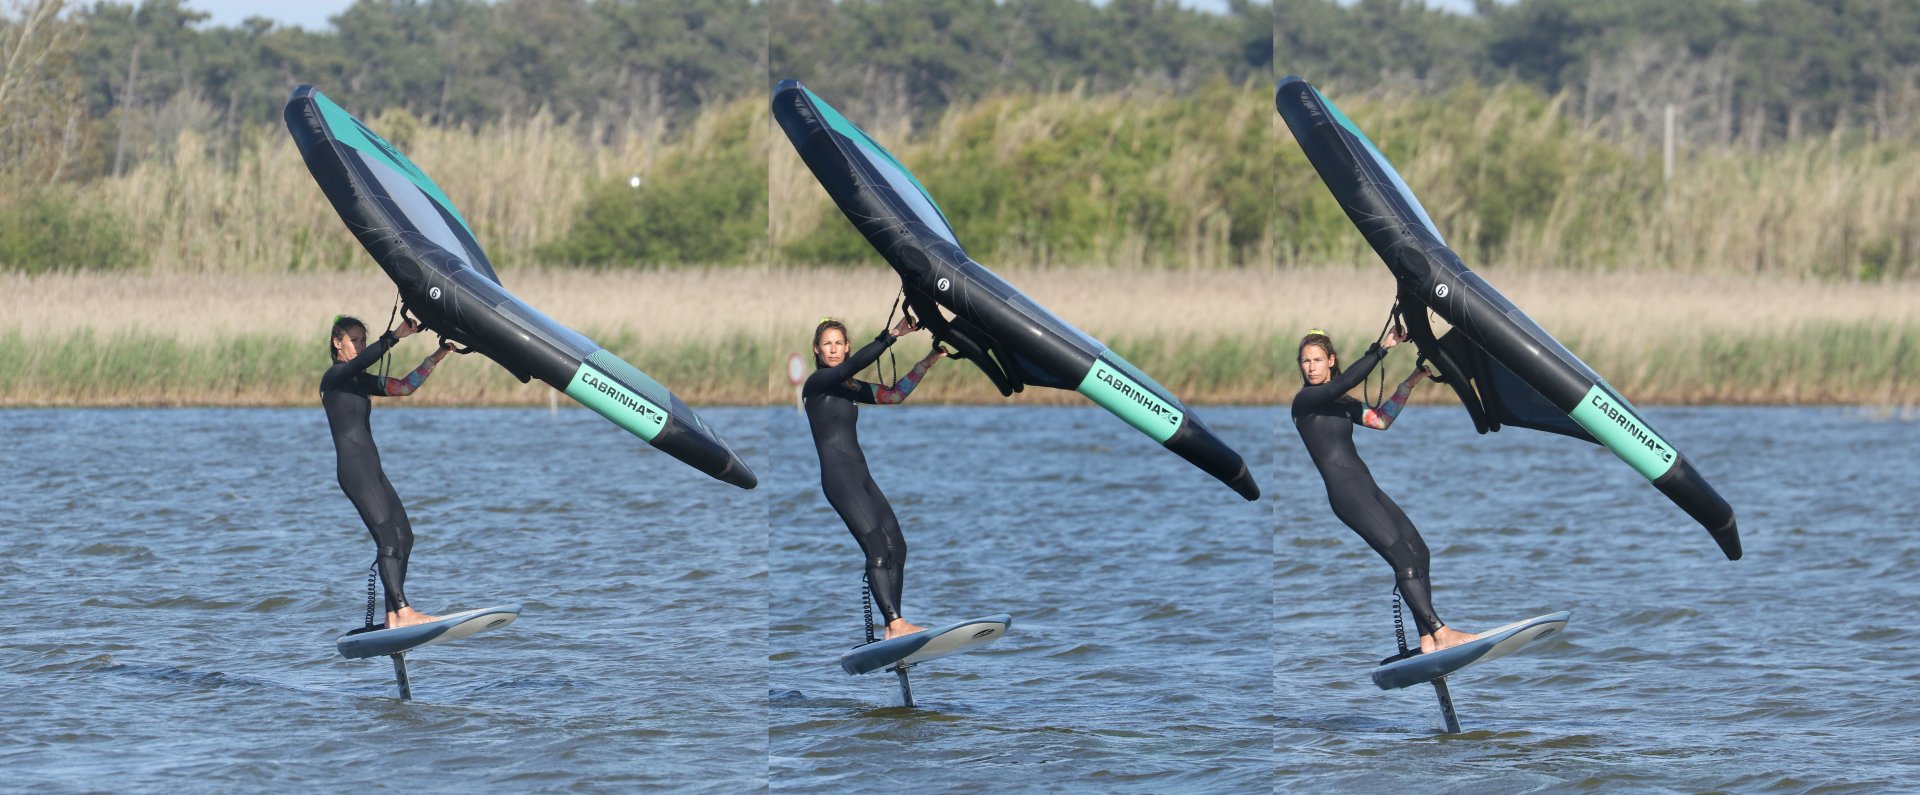
To bear away is once again very similar to what you will have done off the foil. Moving the wing forward towards the nose of your board, and therefore moving the centre of effort in your wing forwards. This will transfer the power through your front foot and make the nose of your board pivot away from the wind around the mast. Once again you can’t just leave your wing forwards as you’ll just keep turning and end up too far off the wind, so at some stage, once you’re pointing where you want to go you can even things up by moving your wing back to a neutral position where both feet are involved. If the wind is strong, you’ll need to sheet out before you can move the wing back. Sequence Pic H. clearly shows Karine extending her wing forward and steering the board away from the wind.
Now once you get out there and give steering a good go on your foil there’s one “other” hurdle which can take some getting used to. At times you’ll be leaning out against your wing. This is a result of turning up into the wind and sheeting in, particularly in slightly stronger breezes. As the wing starts to fly more vertically from tip to tip it’ll be closer to the board and as a result your bodyweight might be leaning out and not over the board. This can make it seem rather difficult to get back over the board and regain your balanced dynamic stance and is a problem that many wingers face when learning to gybe – how to turn off the wind when you’re not over the board.
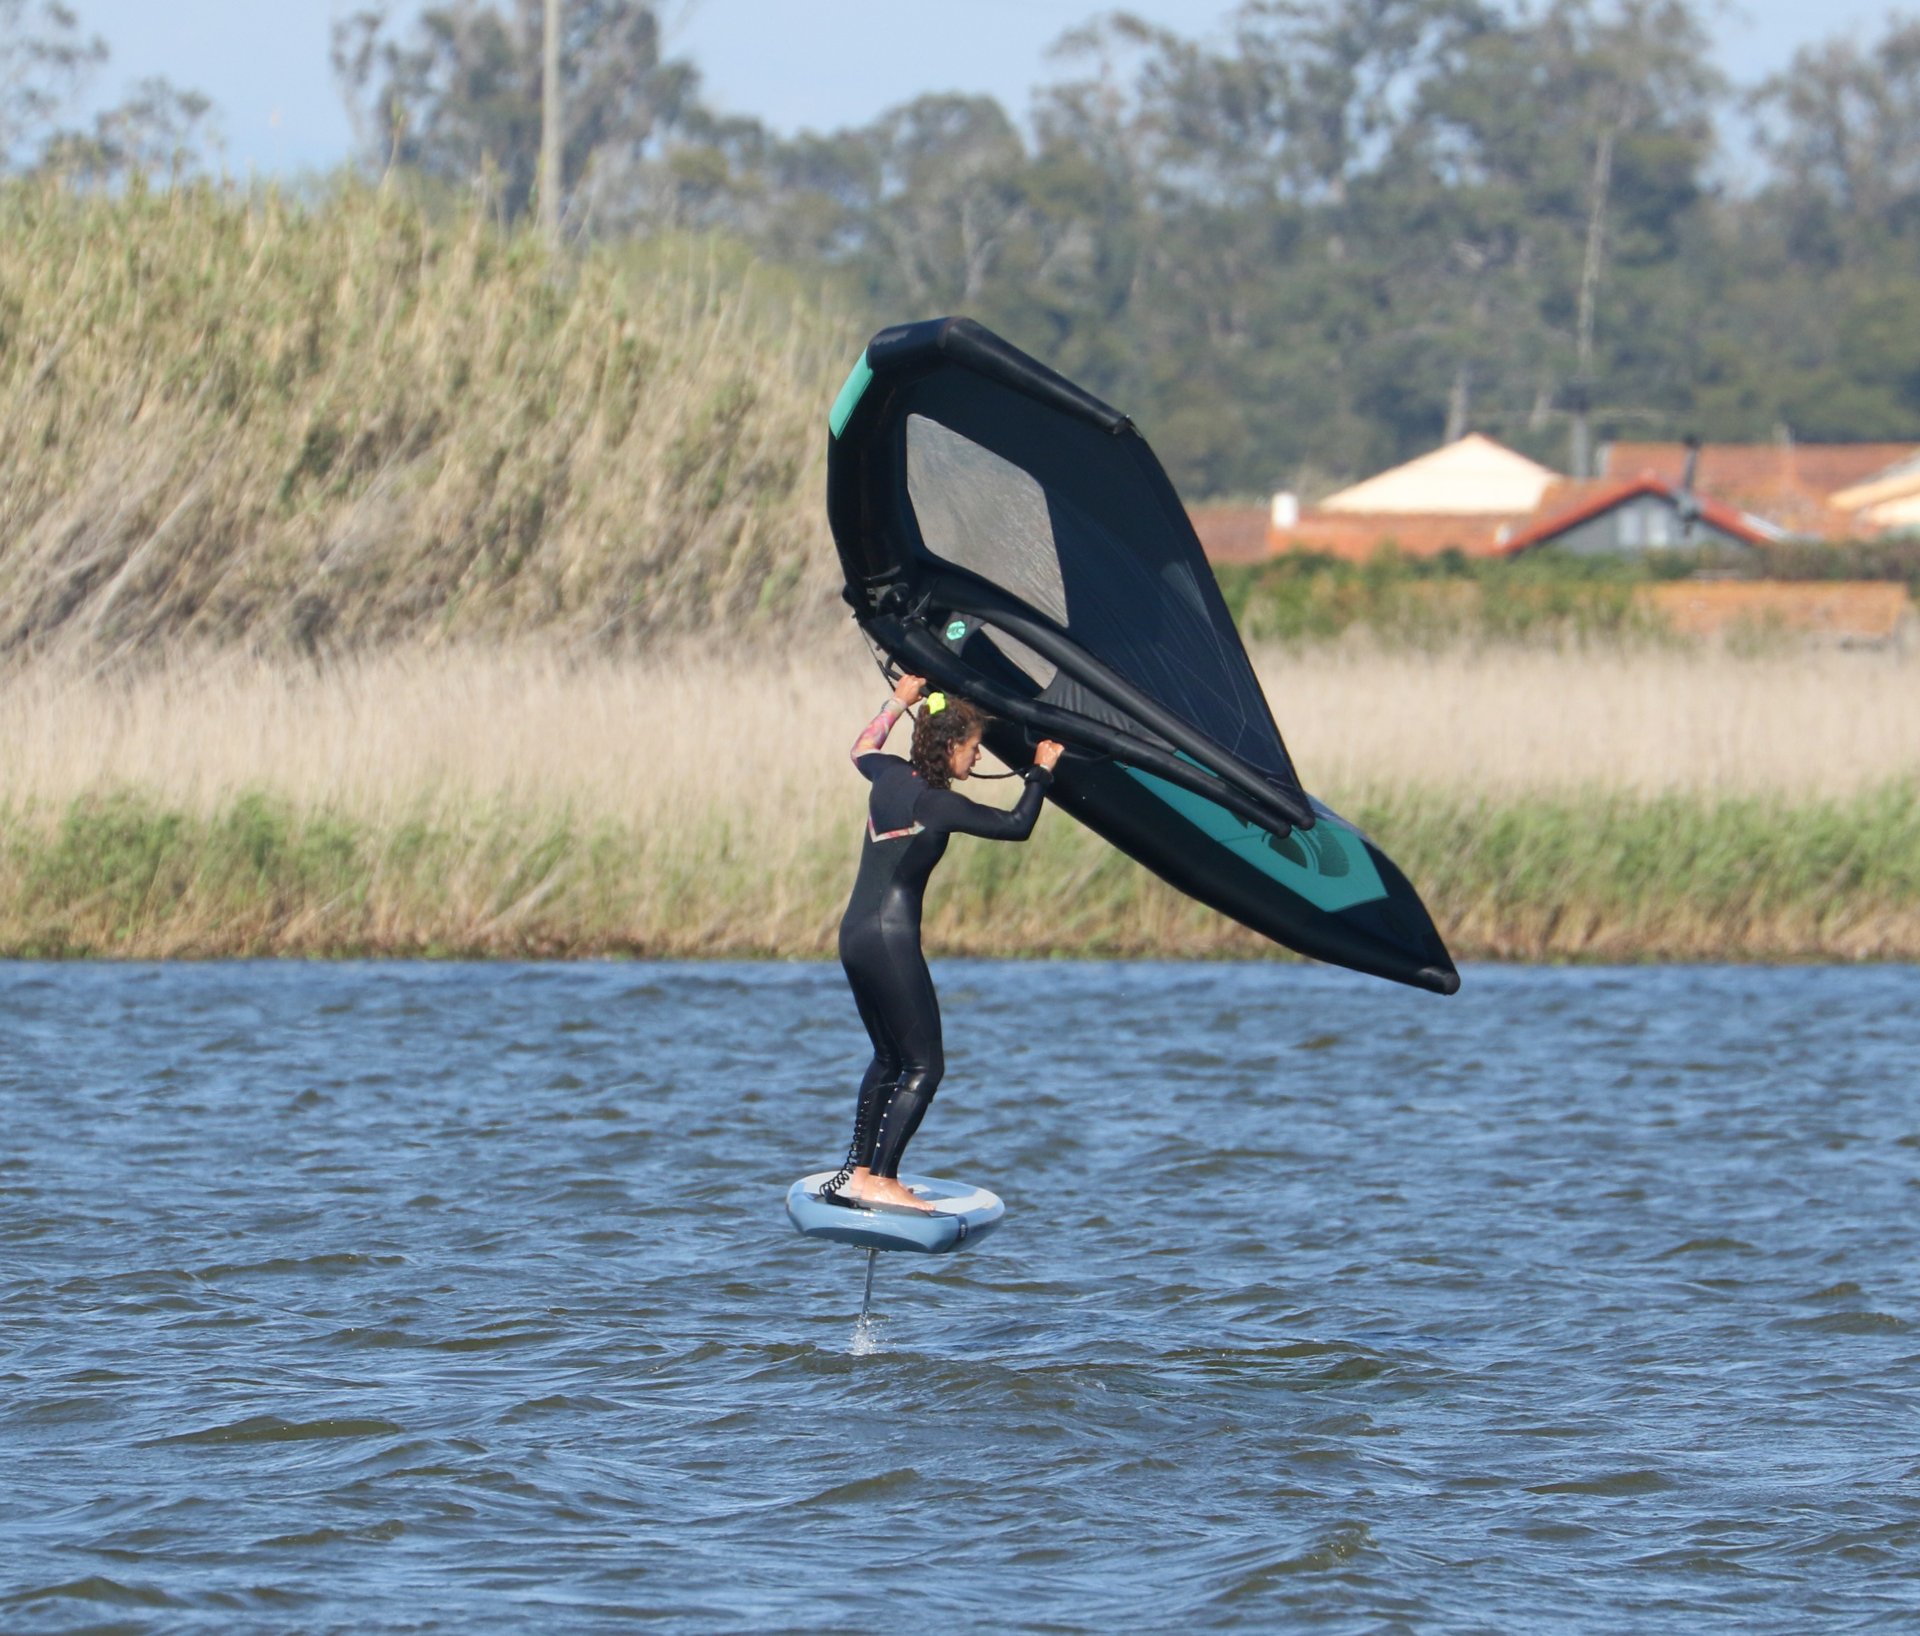
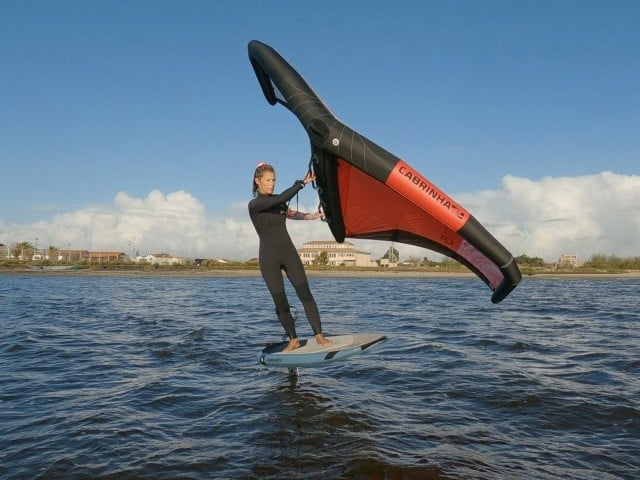
The answer is to use your wing to lift you back over your board as part of your bearing away. If you have a look at Sequence Pic I. Karine has leant into her turn upwind, almost carving the board. This means that her bodyweight is outboard. To bear away she first needs to lift herself back over the board. The first thing she does is fly the wing up, pushing down on her back hand whilst extending her front arm. This steers the wing up and as it rises it generates lift (much like a kite for you kiters out there). Karine uses this upward pull to lift herself back over the board. Once on the deck she can push her front hand down and swap the lift for drive which will encourage the board to turn away from the wind.

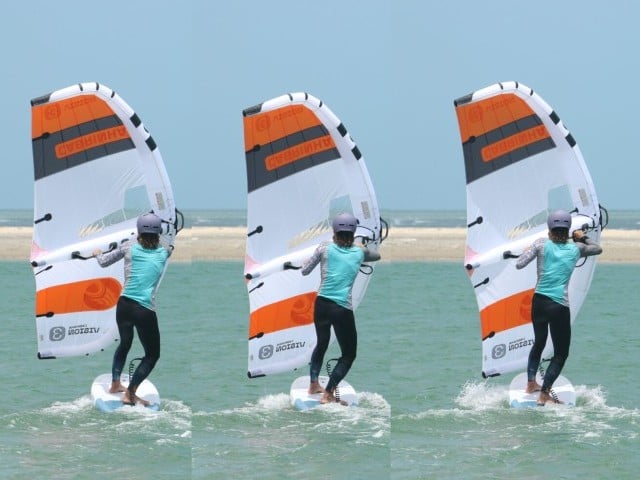
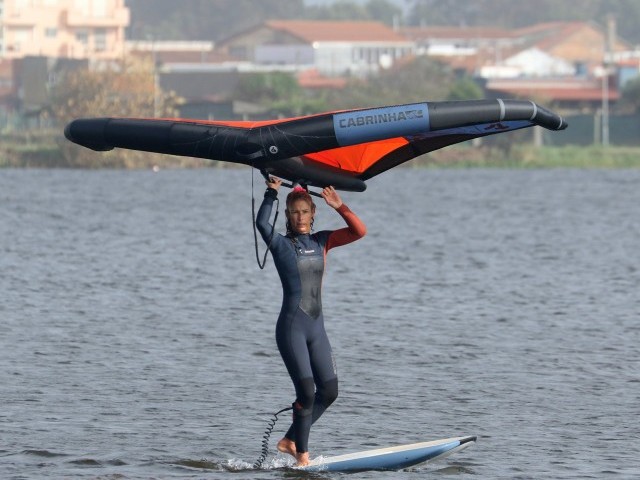
One final thought with bearing away which will impact your gybe, is keeping the power on with wind in the wing. This is fairly straight forward until you get across the wind, you keep the Wing sheeted in and you have power. However, as the board bears away from the across wind zone, you will have to keep the Wing at the same angle to the wind as the board and your body turn under it. If you imagine that you always want the wind blowing onto your back regardless of how far off the wind the board points, you’ll find it easier to present the wing to the wind. This will feel like you’re sheeting out, whereas you are actually keeping your upper body and wing still whilst your hips and legs rotate under you. You can clearly see this in Pic J. As Karine bears away from across the wind onto a broad reach, the wing’s sheeting angle stays the same whilst the board and her lower body turn underneath her.
Trim
A big part of steering with the wing and the resultant change of pressure between feet is the effect it has on your trim. Trim is an important detail as you want to stay up on the foil without coming down, stalling or even breaching (when your foil gets too close to the surface, sucks in air and drops like a camel taking a rest). This is again part of your discovery time as so many factors determine what is and isn’t possible. However, it’s safe to assume that as you put more pressure on your back foot it may encourage the nose to rise, and when you put more pressure on your front foot the nose will drop. The reason that you hopefully won’t be dolphining around is that the pressure you’re using from the wind should be directed across the board horizontally, as opposed to down on the board vertically. Bear in mind that this is what encourages the board to pivot around the mast.
Next Step
Once you’re comfortable and find your bearings without losing control you can add a little oomph, increasing the pressure as you turn upwind or bear away.
When turning upwind you can drop your weight onto your heels which will roll the board. Just beware that as you roll the board the wing will lose lift more quickly and you weight will drop further away from the balance point over the board. As such you’ll require a bigger and more dynamic movement to stop turning if you go too far. Pic K.
When turning off the wind you can bear away with the wing, but add some dynamism by flexing your ankles and knees. Nothing too radical but you can get a feel for turning the board by rolling over it. Don’t do this when the board is pointing hard upwind, rather try from a balanced position over the board. Pic L.
Becoming more dynamic will get you ready for your first gybe attempts.
There you have it, plenty to practice, and your motivating tasty carrot is that you’ll find the gybe more intuitive and you’ll be able to get back up wind in between your attempts too:)
This technique article was in Issue 12 of Tonic Mag.
Related
By Christian and Karine
