
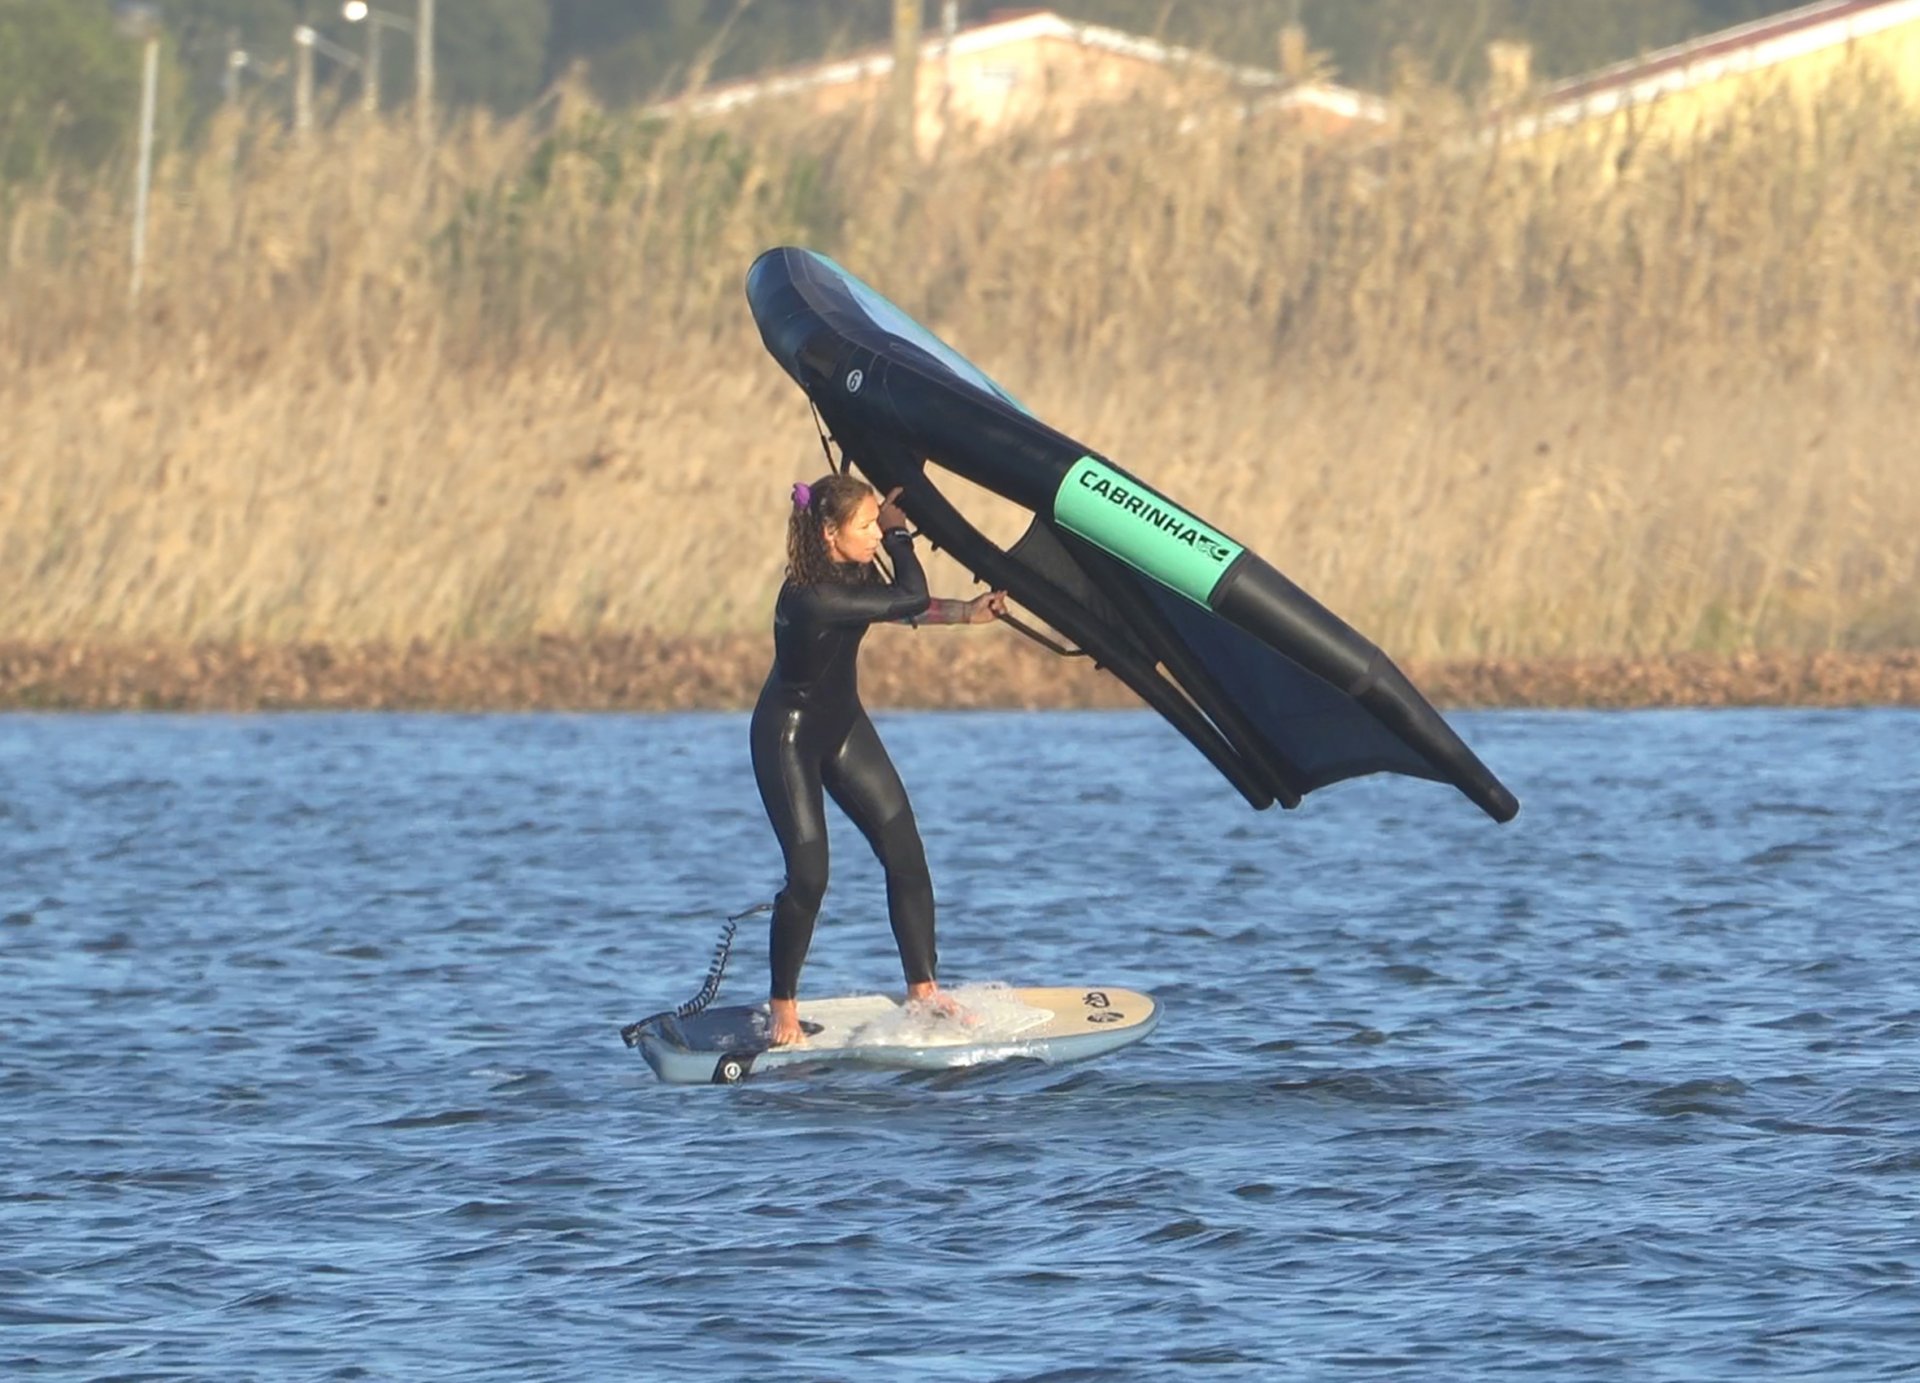
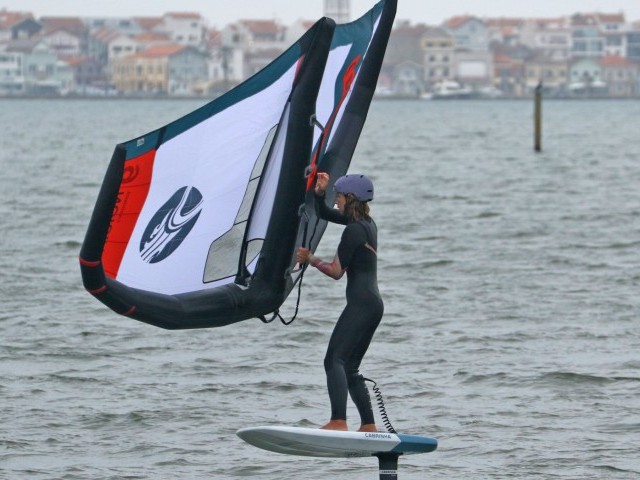
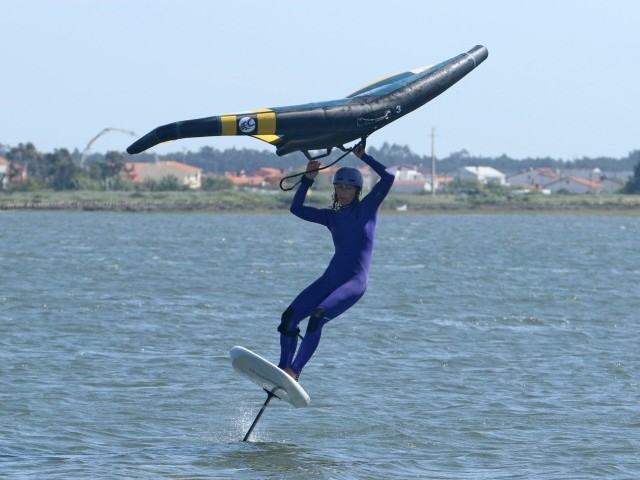
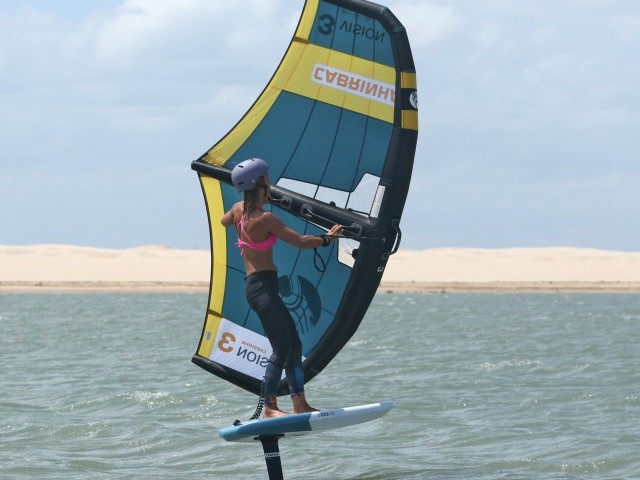
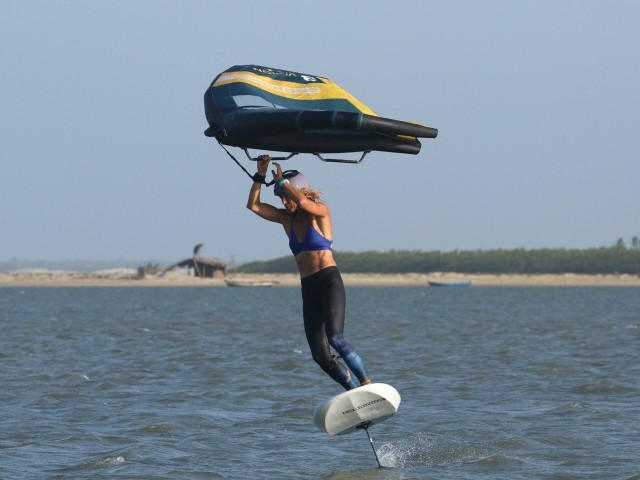
Wing Foil Gybe Part 3 – Foiling Heel to Toe Gybe
Technique / Wing Foil

Introduction
It’s on ladies and gents, it’s on! If you’ve been following this Wing Foil series and the videos on the Tonic channel, your prep for the foiling gybe is done, the foundations are laid, you’ve never been more ready:) We write this with utter conviction because you’ve got a feeling for wind direction, a solid first position, a balanced dynamic stance, you can bear away with confidence, and you’re well versed in your wing flip. If the woffing gybe teased you with the carrot, now there’s no more stick, just a bowl of humous to enjoy it with. You’ve even nailed your steering upwind toe side off the foil along with a cheeky foot change. In the grand scheme of things, the skills you’ll be concentrating on this time around are carving your board and emulating your toe side on the foil, even if momentarily.
There are of course a few points to ponder, which will put your minds to rest, before we dive into the full blown how to.
1. Carving. The word itself can strike fear into your mind. However, your carving here will be more akin to gentle foot steering. Banish any thoughts of throwing spray, torquing through a radical arc, being on edge. If anything, you’re after the opposite, being gentle with your foil, keeping your flow and remaining balanced over your board. We’ll stick with the word carving over steering because as you progress you can be more and more positive with your action.
2. Gybing. When we talk about the gybe, we’re talking about turning around going through down wind, just like we did when woffing. Another point to consider is that although the gybe encompasses the entire movement from preparation upwind, bearing away, carving, flipping, to completion going back the other way toe side, the carve part is from one broad reach to another. Consider it a 90 degree carve, from broad reach on heels, to broad reach on toes. This is why there is no need for anything too rad but equally why learning to bear away, balanced and over the board as per last issue is so unbelievably vital.
There’s plenty more to ponder, however, we’ll gradually mix in the rest as we proceed with what you need to be getting on with. As always stay tuned for the video which will be out very soon…
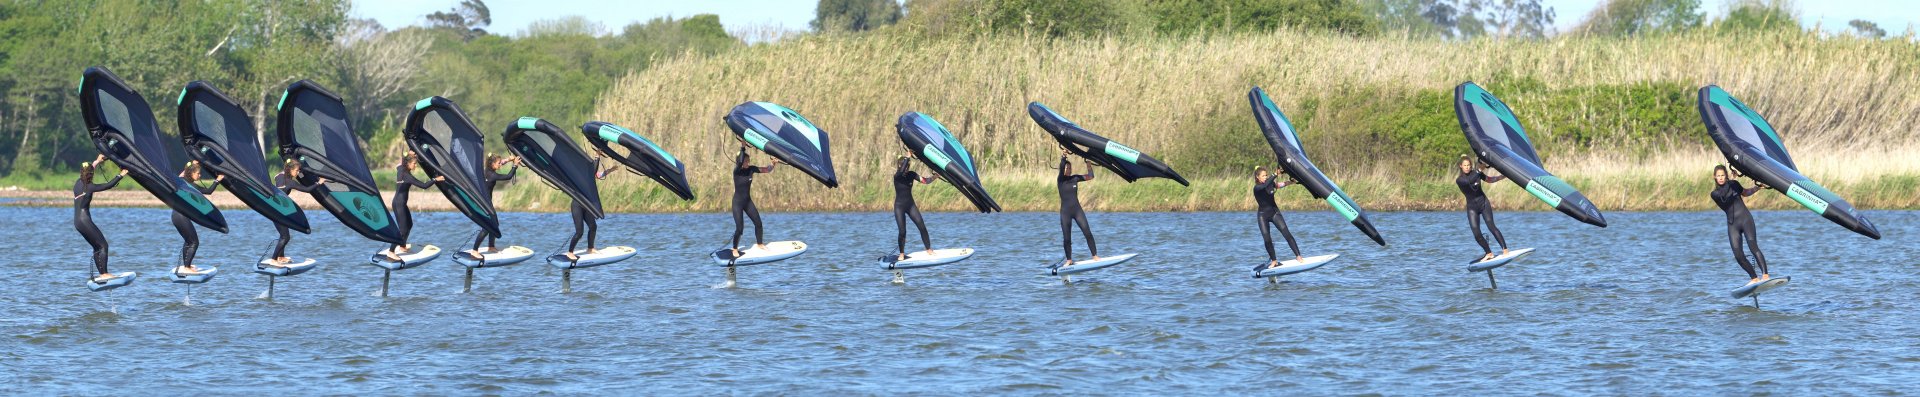
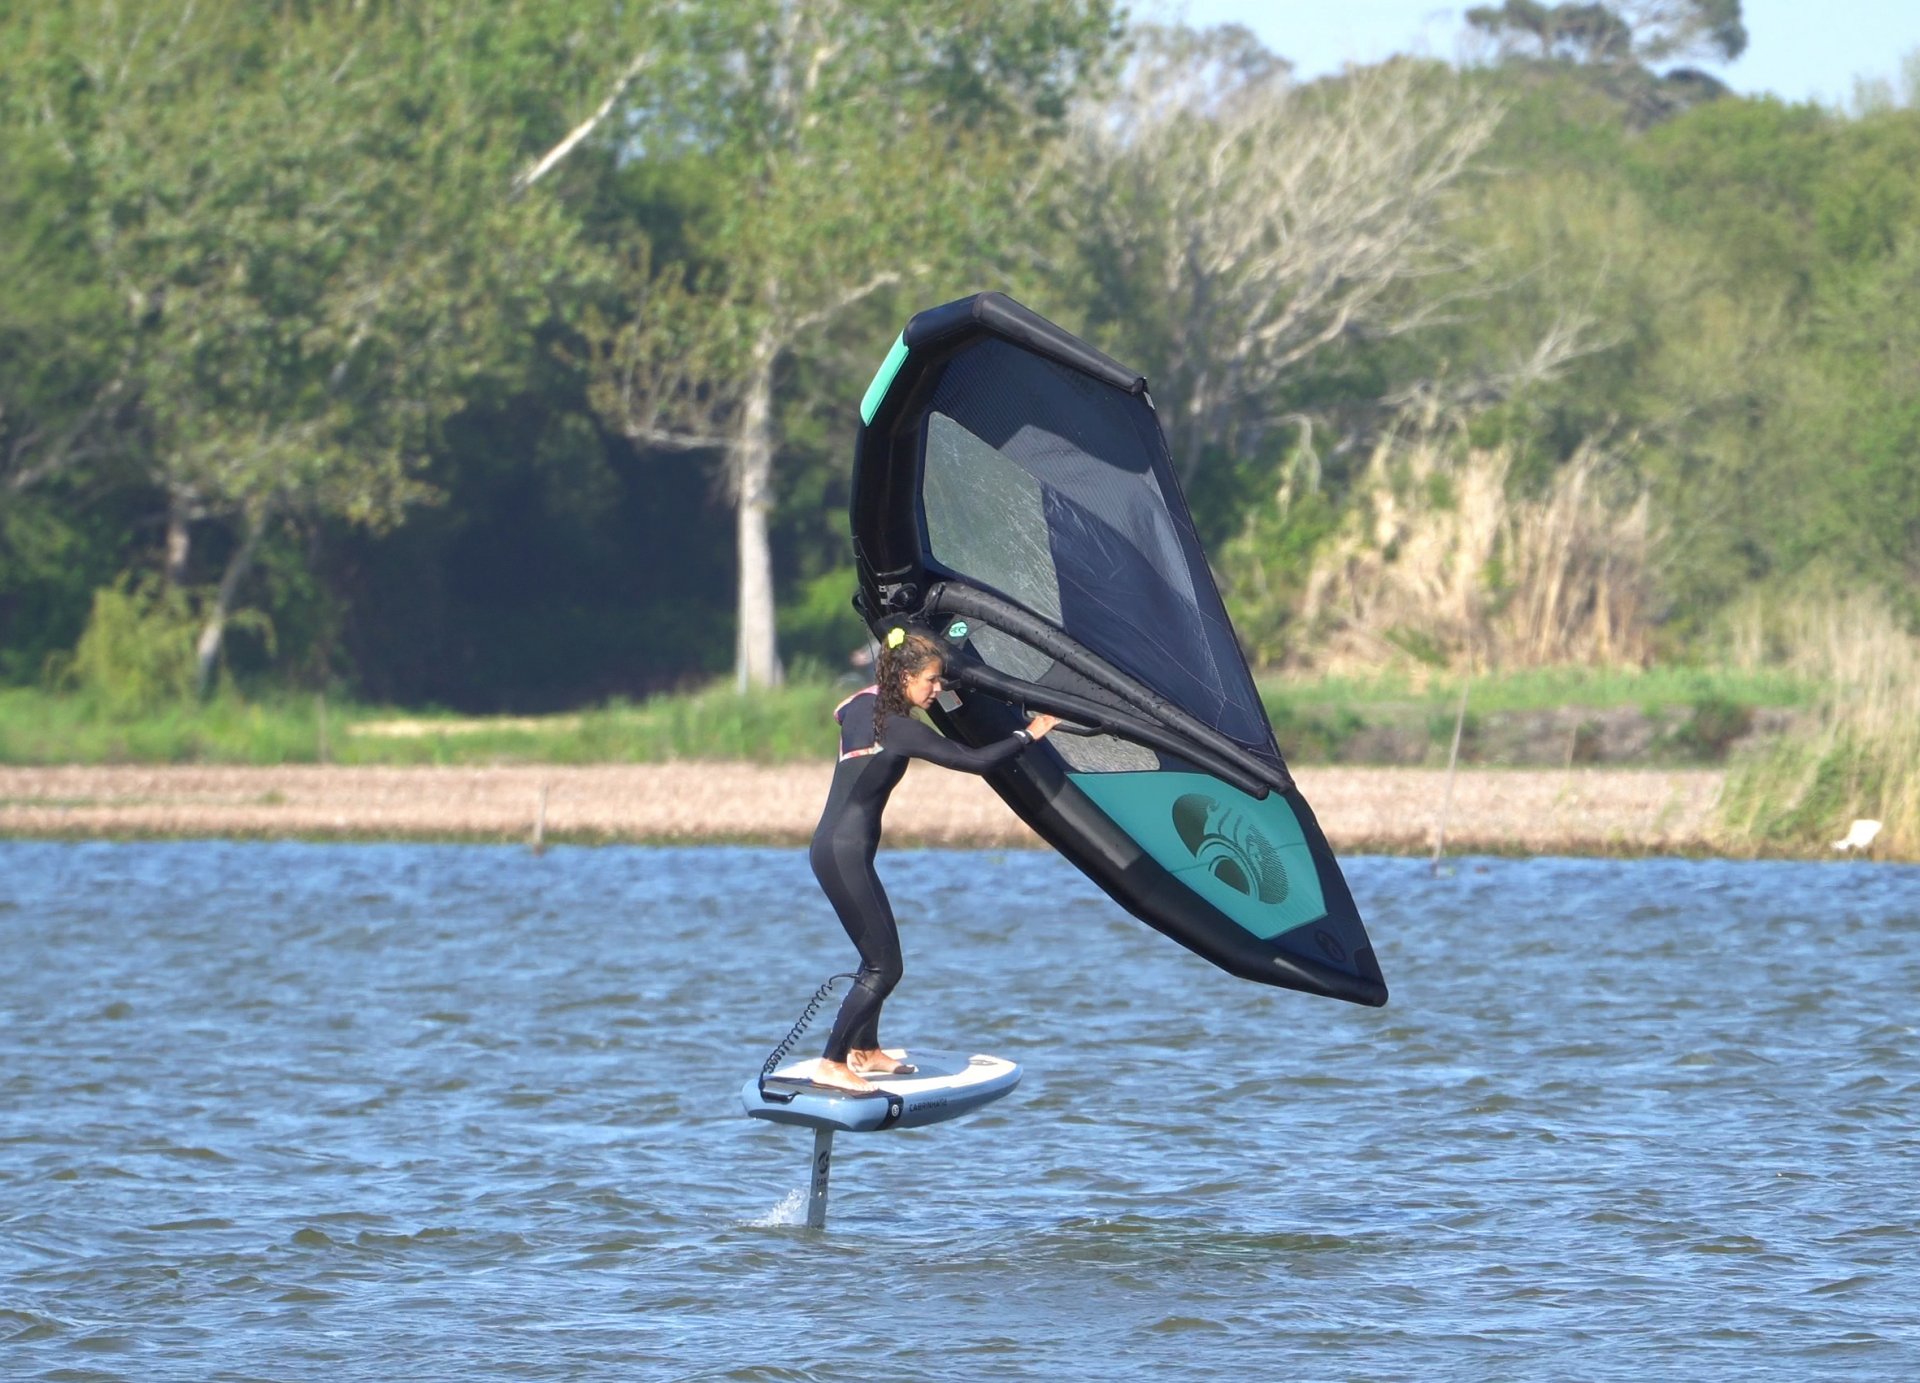
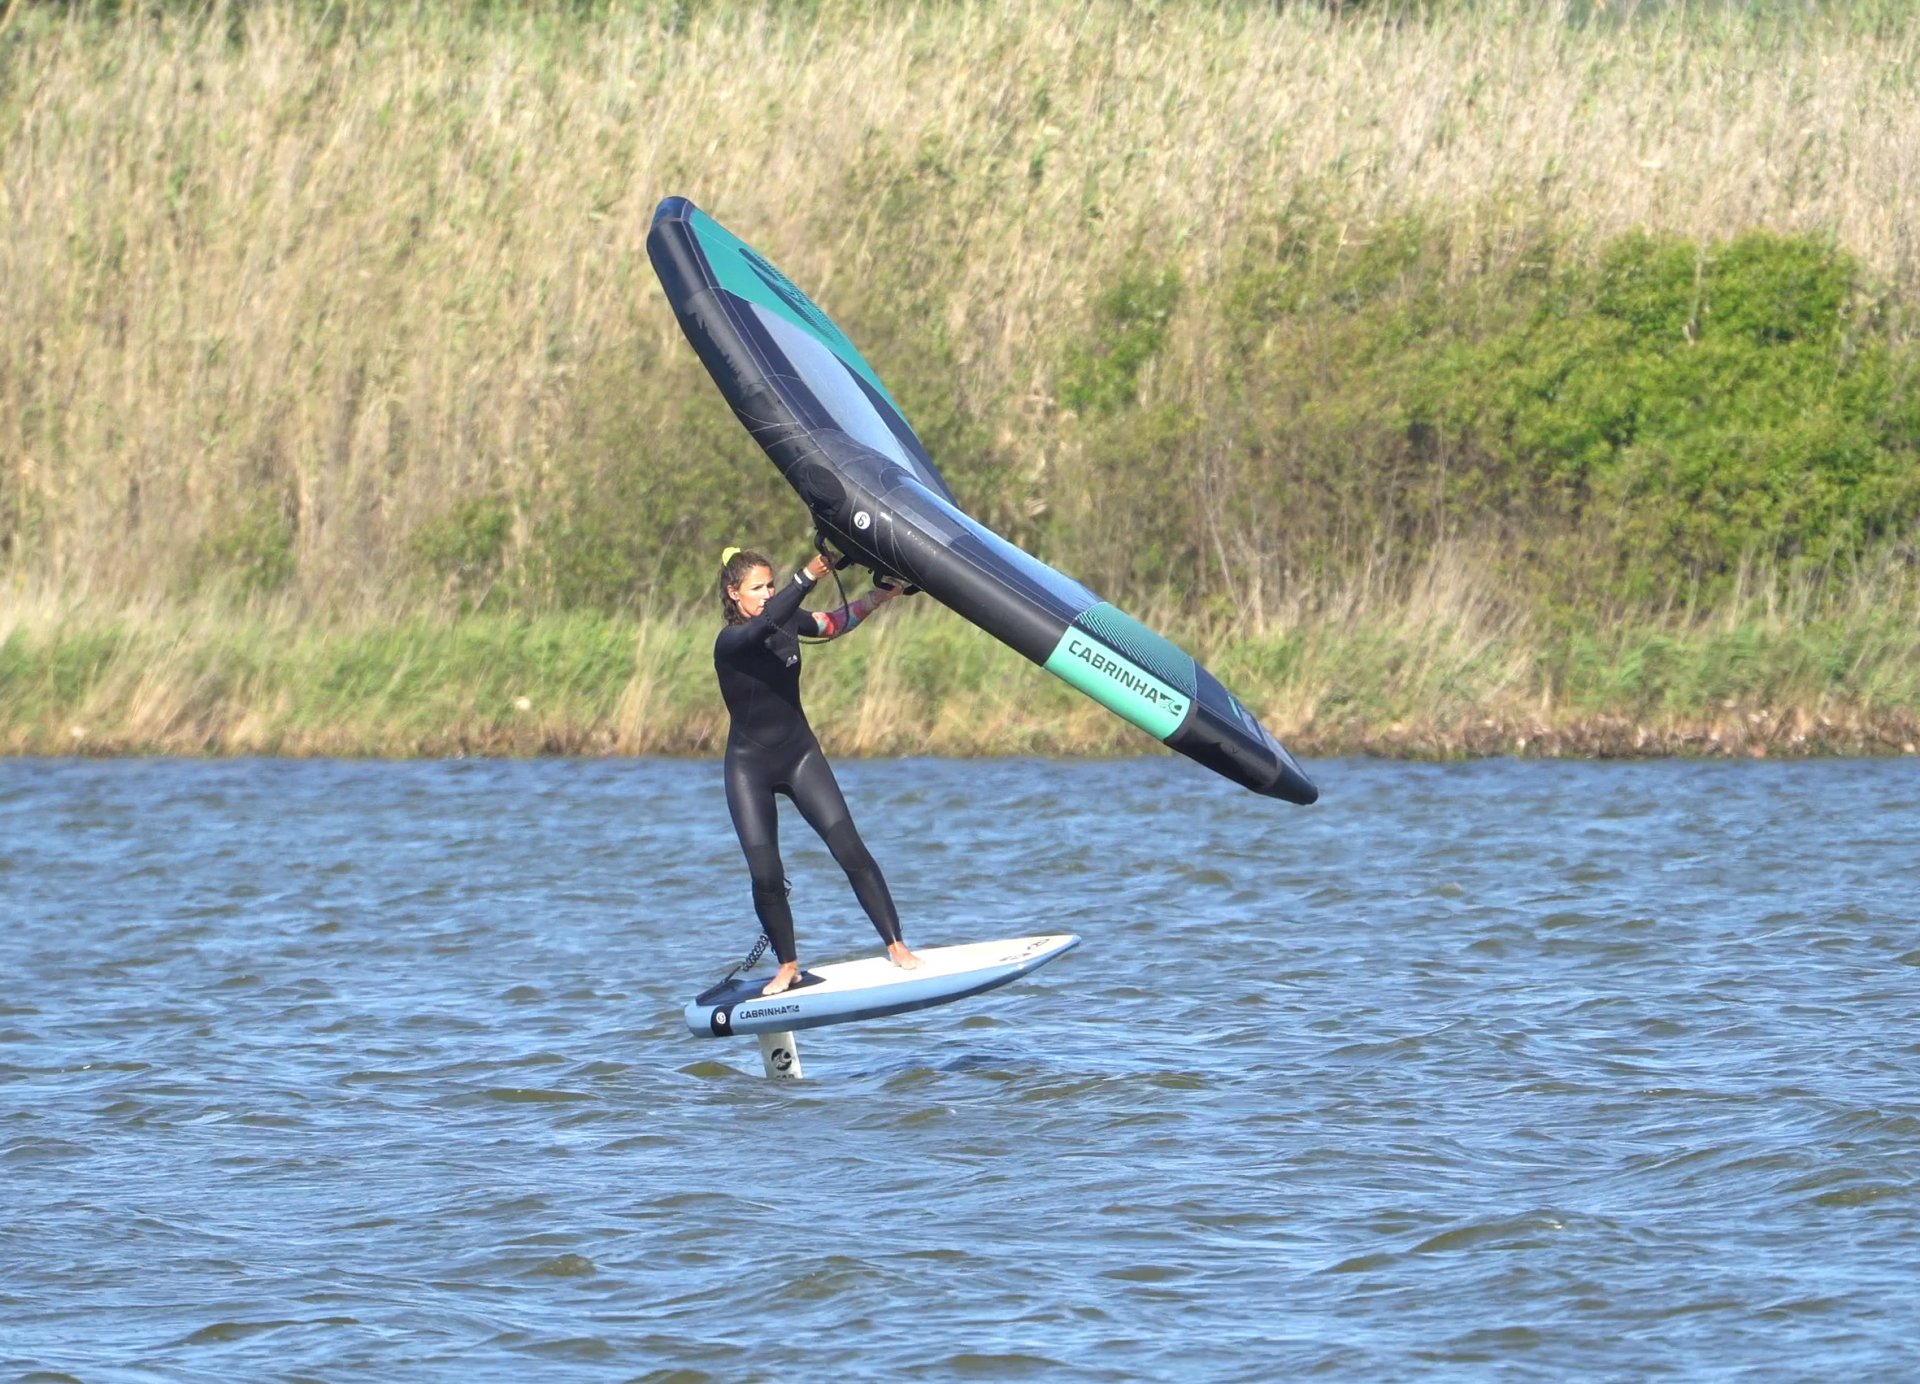
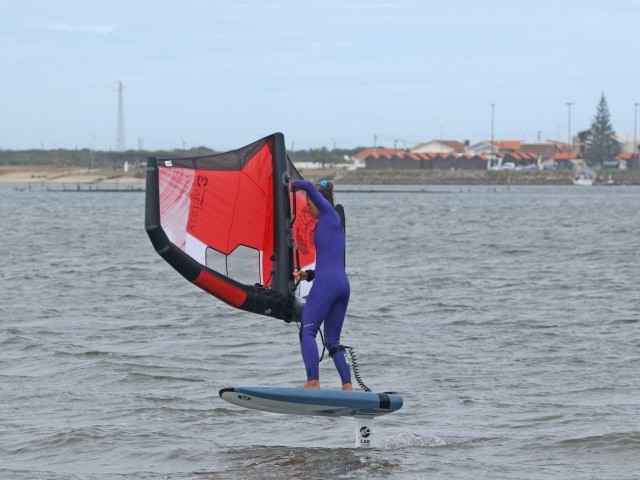
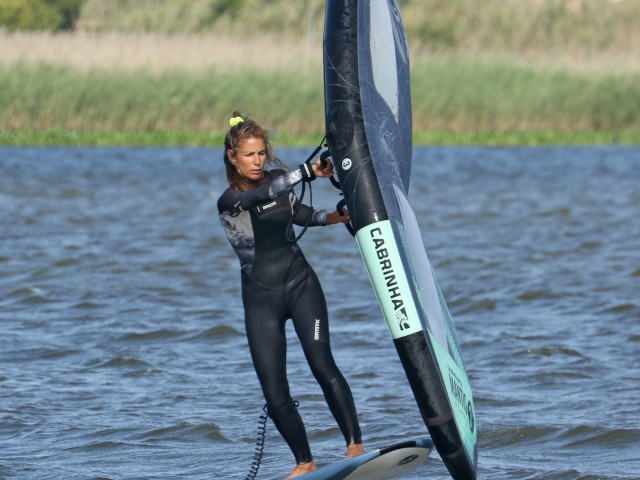
First Position Pic A.
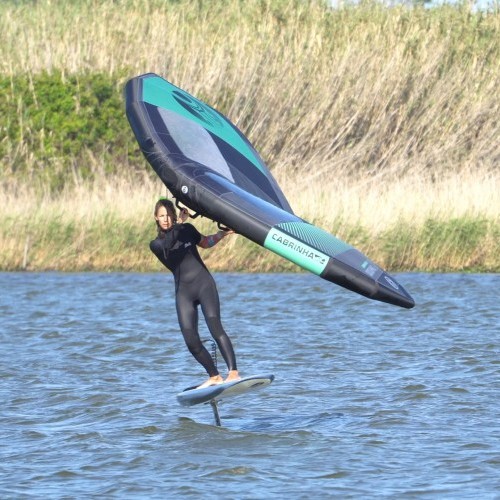
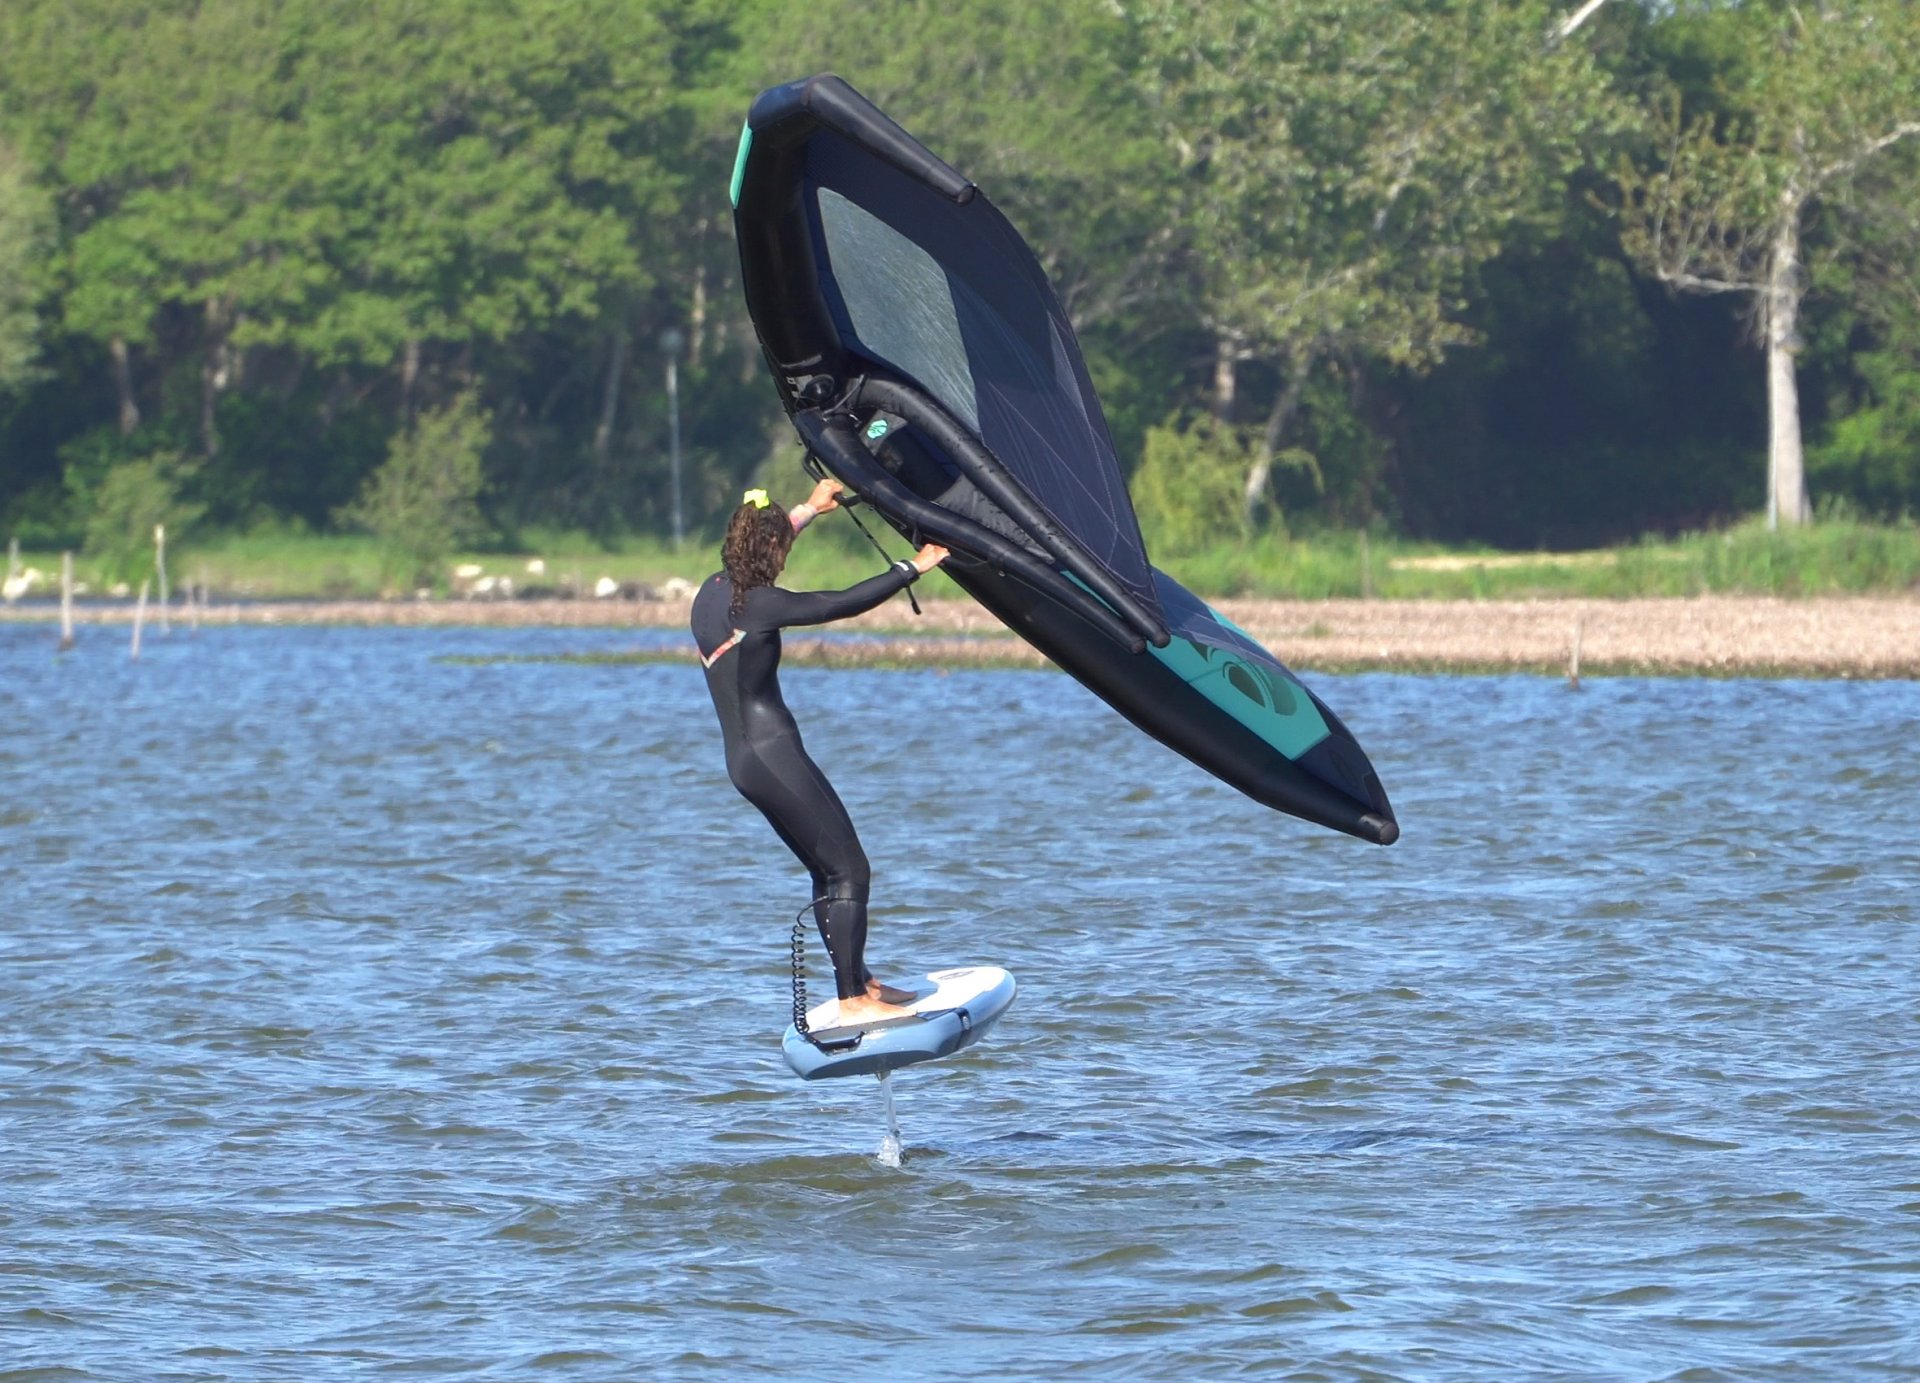
Getting yourself ready before starting your gybe gives you the maximum chance of success. It means that you’re always starting from a similar position, which means that you can build and develop on each and every attempt. So, make sure that you’re riding upwind, making ground and aware of your position. Once you’re ready, lift and look. You need space, so make sure the coast is clear. Second, check your feet. Your aim is to make it round to toe side, and to make this possible your feet need to be ready. You’ve practiced this off the foil, and it’s the same here. You’ll probably want to wiggle your front foot slightly more across the centre line and a touch more forward, whilst your back foot will also need to slide a bit further across and it can help to have it pointing ever so slightly forward. Not only will this set you up for toe side, but it’ll also get you in position for your carve. Here Karine knows where abouts she is in relation to the wind, she moves her feet into their prospective toe side/carve positions and checks her mirrors. Game on.
Bear Away Pic B.
This should by now be second nature. It’s an absolutely critical part of your gybe and has the potential to make a world of difference. By bearing away you’ll lift yourself up and over the board, which equals balance. You’ll accelerate, gaining momentum which will help you glide through the move. It turns your board and foil off the wind, giving you the opportunity to trim and balance yourself before your carve. As the board bears away allow your lower body and board to twist under your torso so that they can turn whilst you keep the power on. Looking at karine you can see that she’s pushed her wing forwards, her board is flattening as she is pulled up over the board.
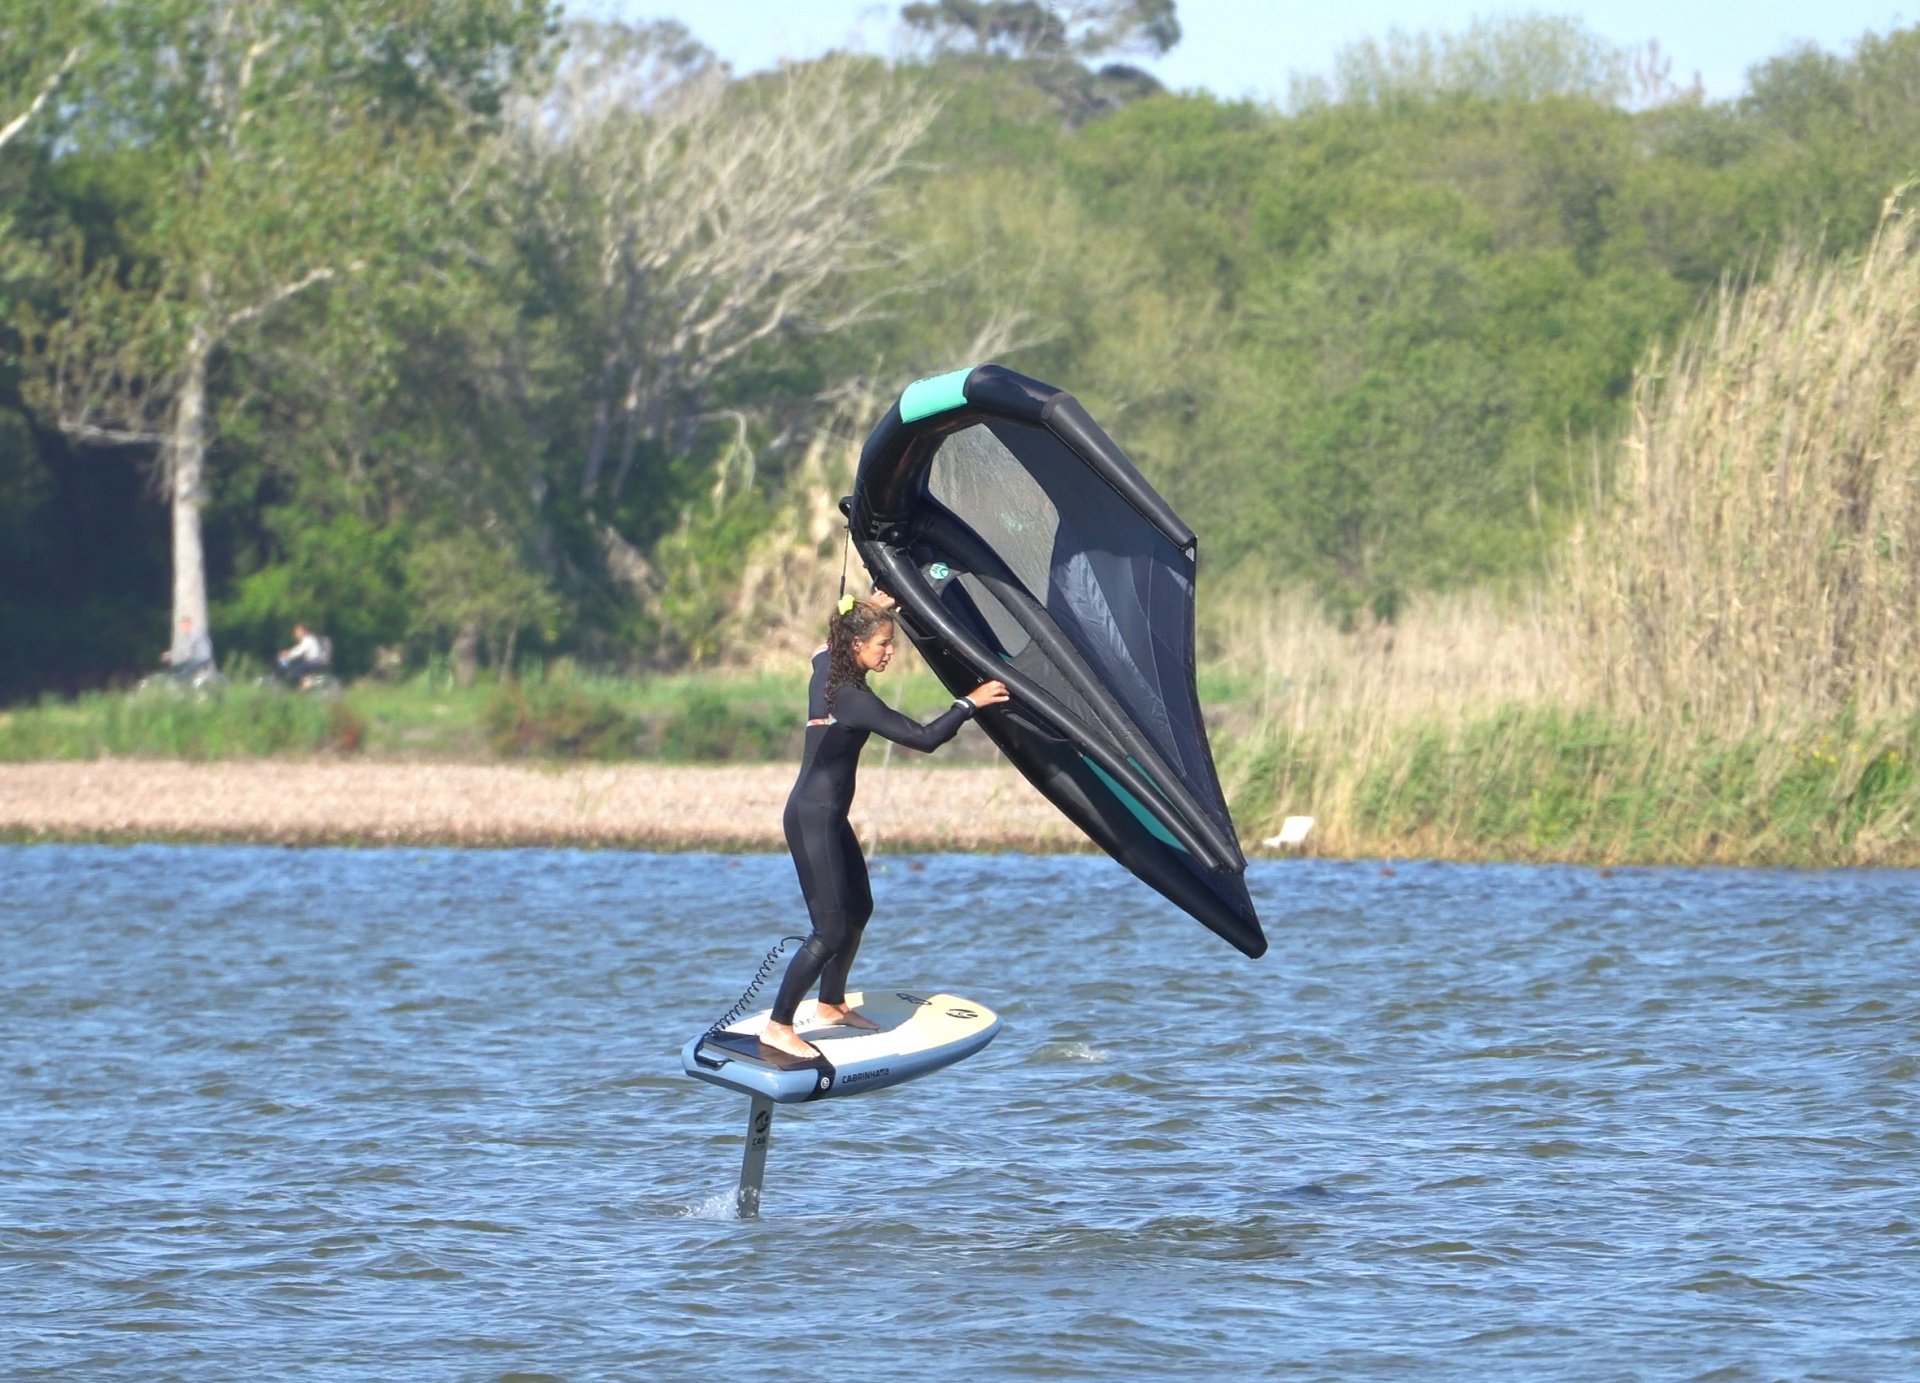
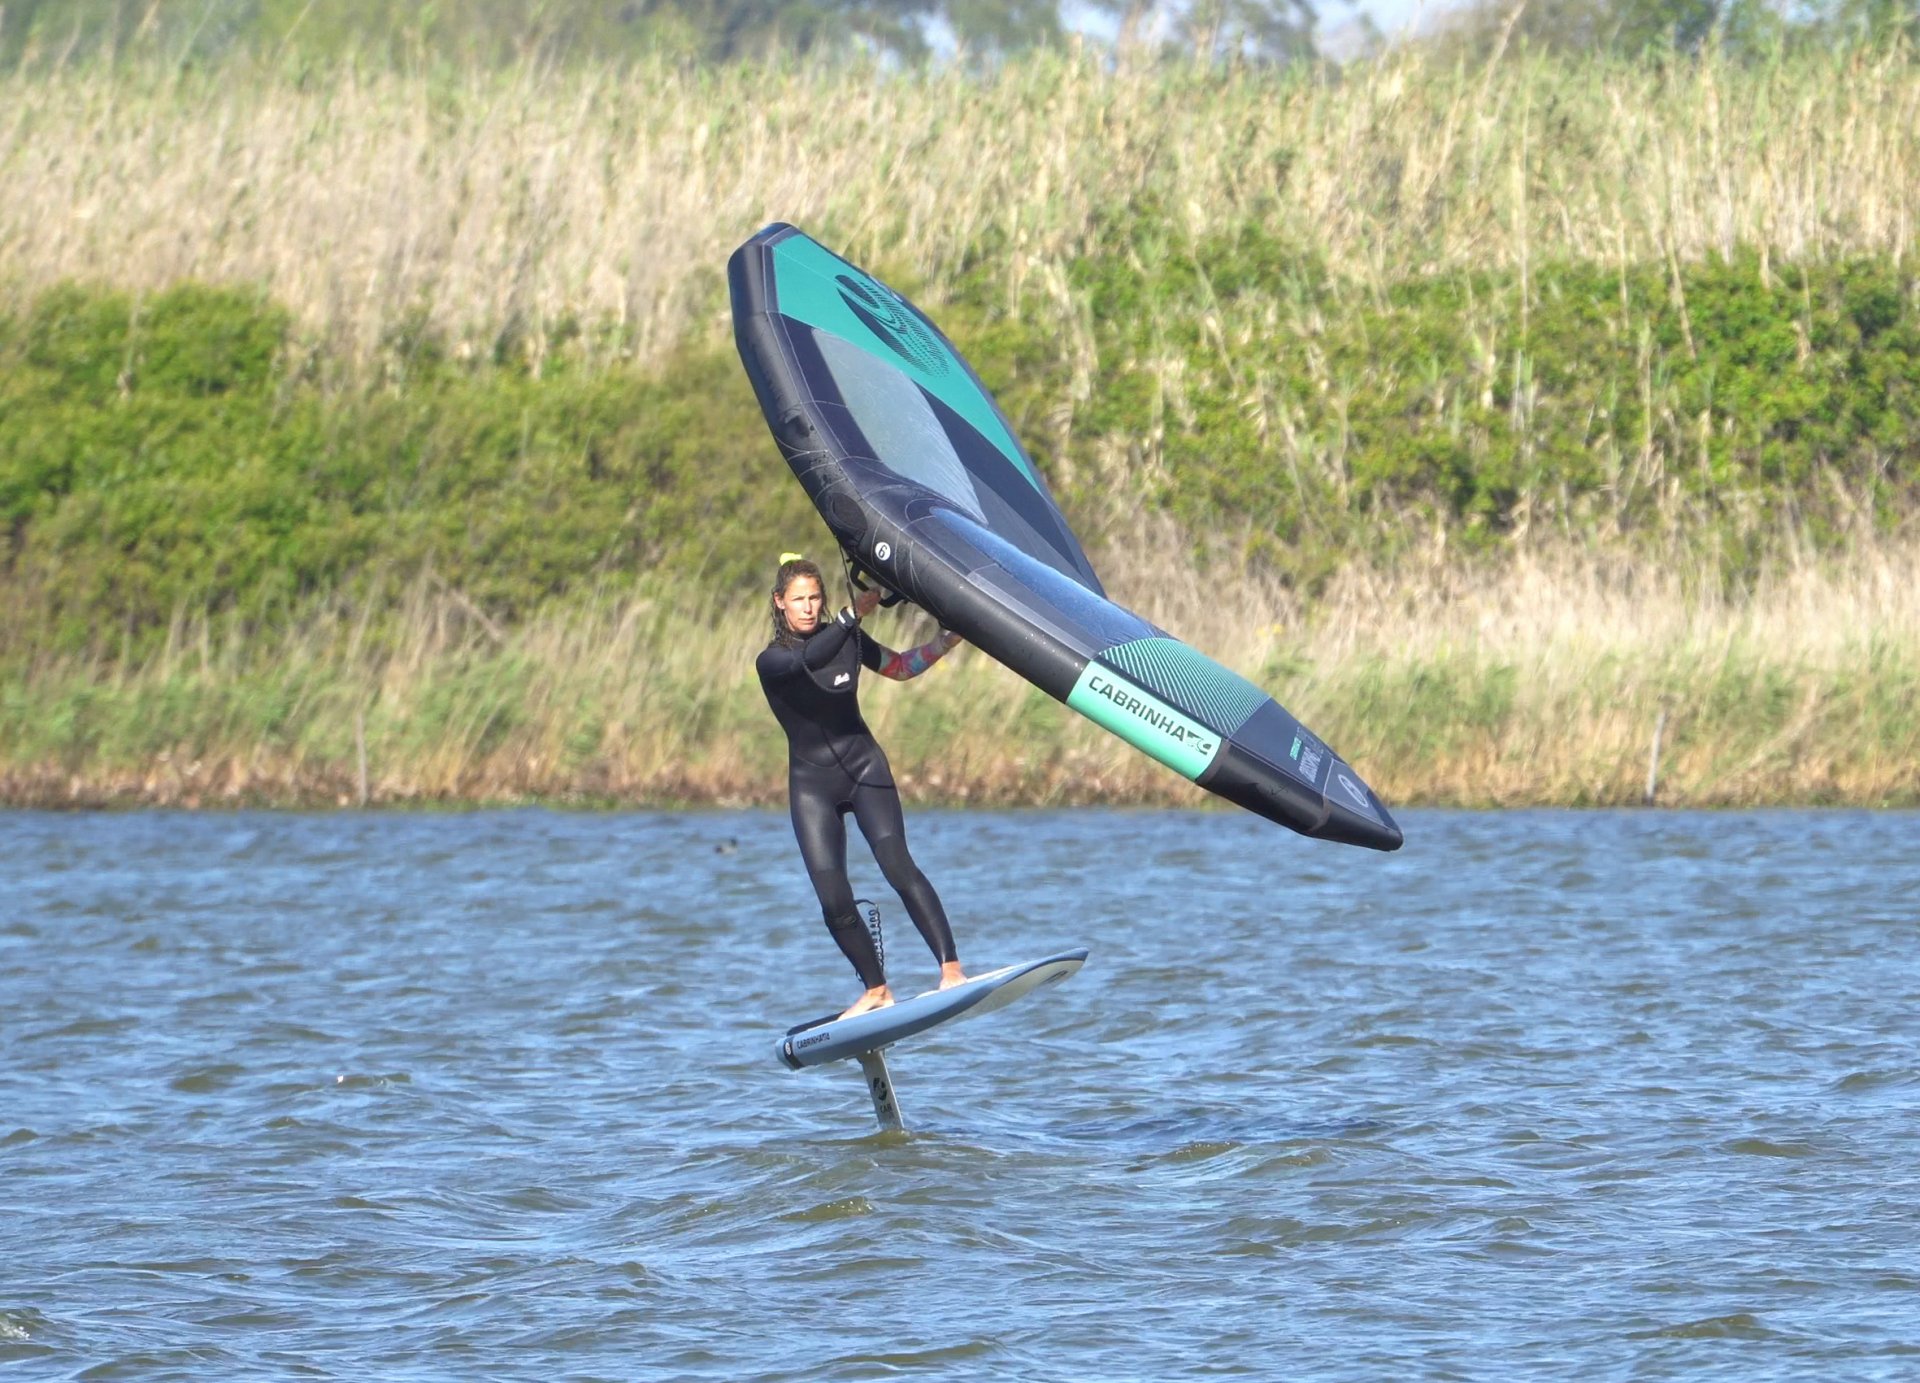
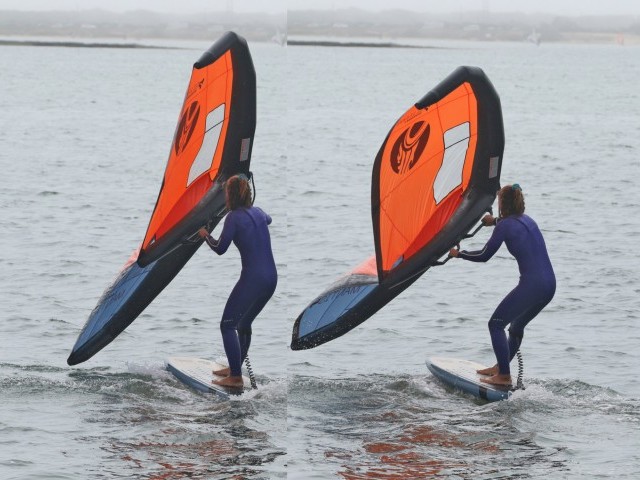
The Carve Pic C.
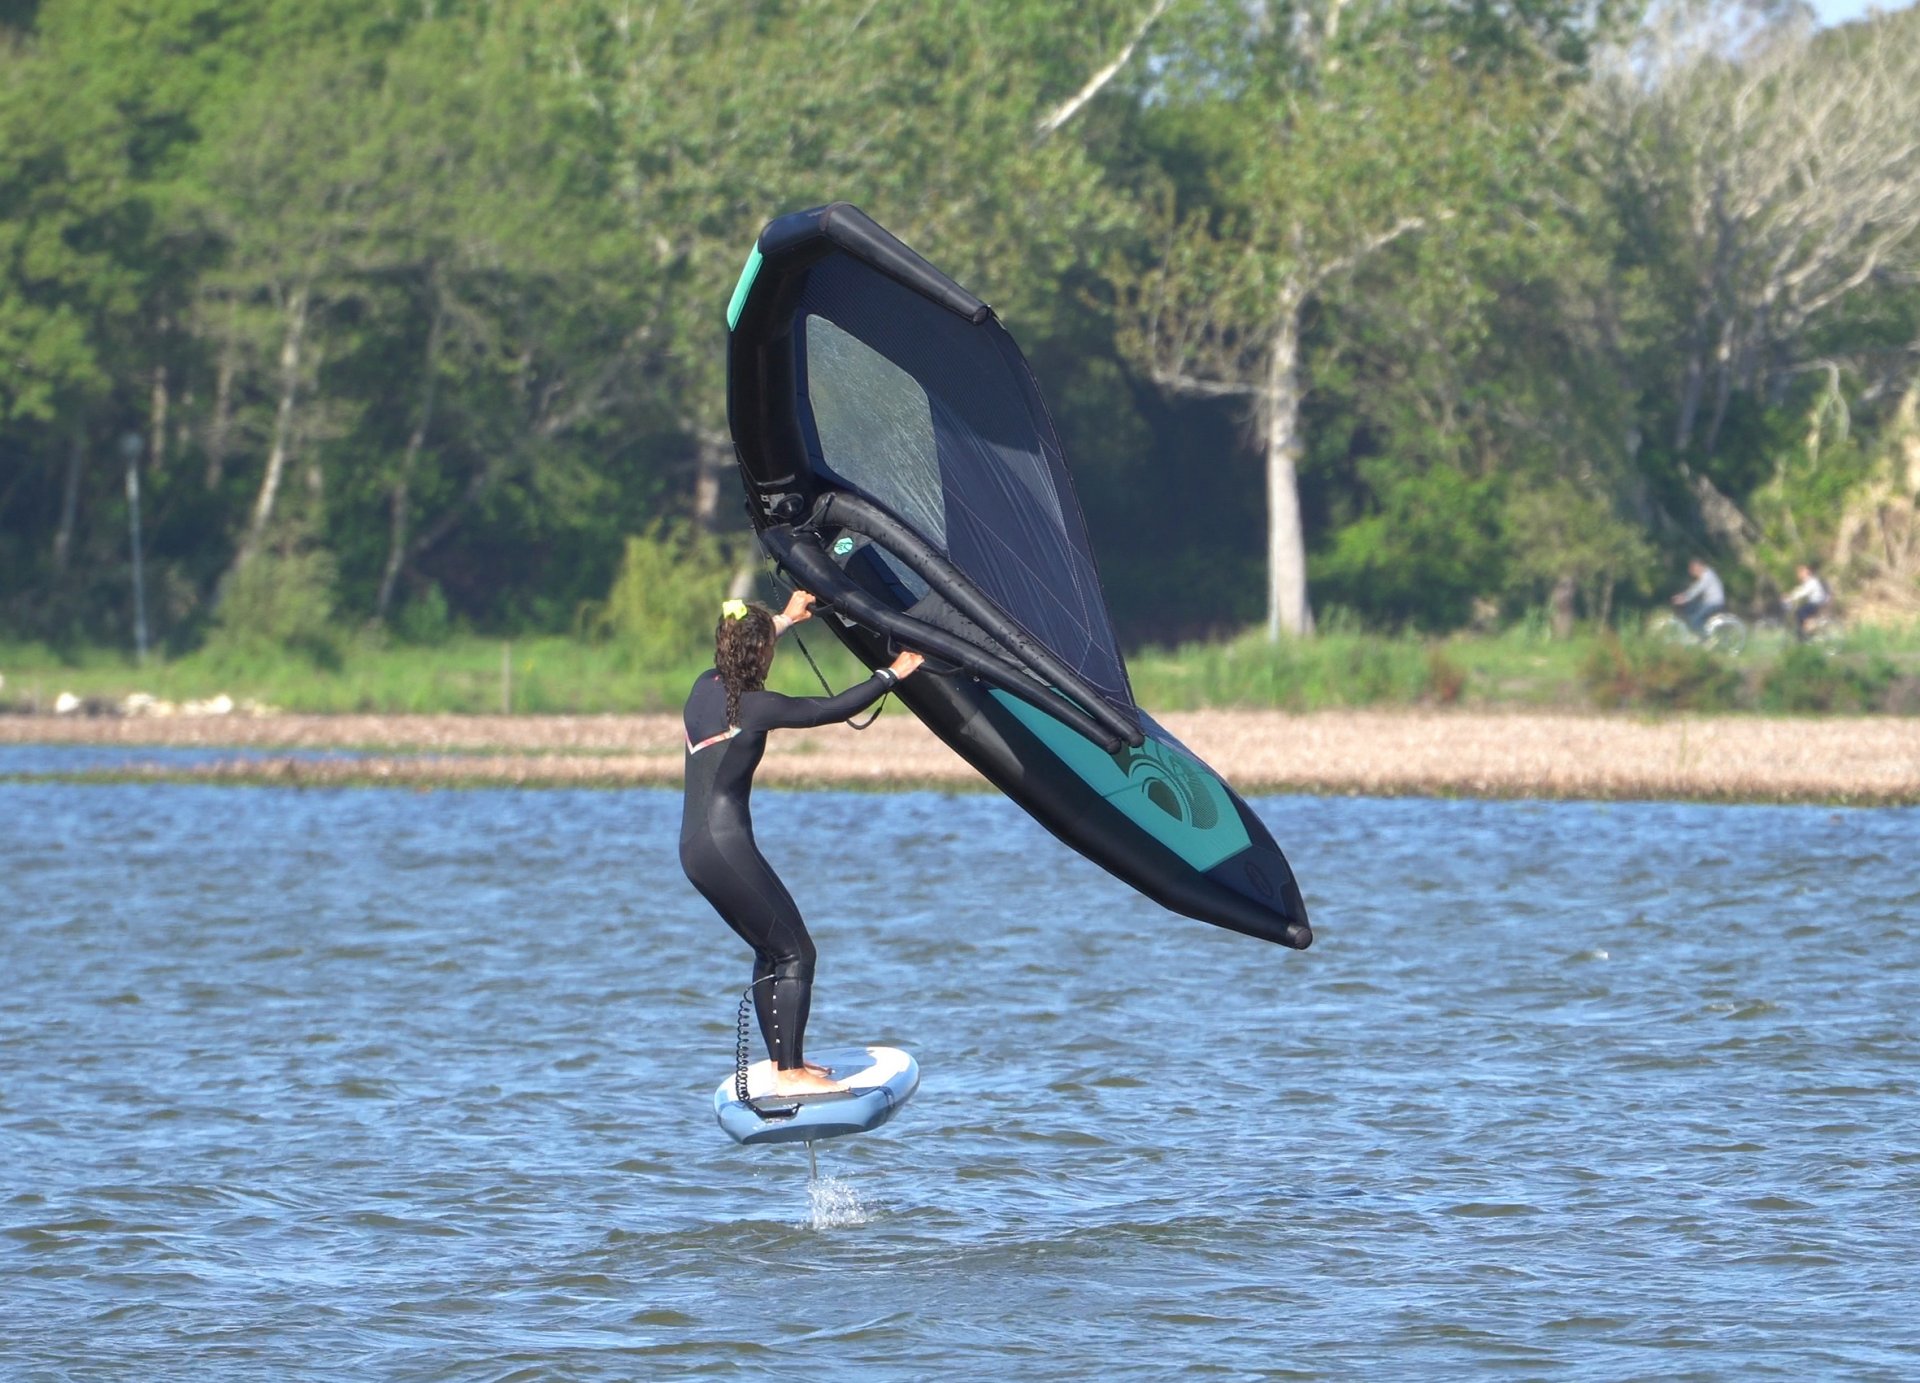
Fear ye not! We’re actually going to look at Karine and talk through what’s going on here. First off you can see that her board has already turned off the wind from bearing away, so she’s balanced, comfortable on the foil and has allowed the wing to pull her forwards whilst she’s transferred the power through her front leg. From this broad reach position, she can now transition into the carving part. Her (and your) intention is steer the board and foil be getting pressure onto the balls of her feet. The way to do this is similar to your woffing toe side. Flex your ankles and drop your weight, pushing your knees across the board whilst keeping your head and shoulders up. Drop your elbows and put some pressure down onto your rear handle. This should transfer your weight across onto the balls of your feet, stretching your Achilles tendons whilst your heels remain on the board. By doing this you will be able to keep the board trimmed from nose to tail as you roll it from rail to rail. As Karine pushes her knees across, she maintains power in the wing and keeps it pointing forward. You can see how the board is banked gently over, just enough to make things happen. Karine has turned her head to look downwind, where she’s going. This encourages her to commit her weight across the board without breaking at the waist. She’s supporting herself and holding the wing, not being supported. Final point, wing position. Her wing is still pointing like an arrow, which keeps it slightly to the outside of your arc. This has two advantages. Firstly, as the board turns underneath you, you’ll end up with one arm each side, which helps you stay balanced over the board. Secondly when you come to flip the wing, it won’t be backwinding in your face, but rather away from you.
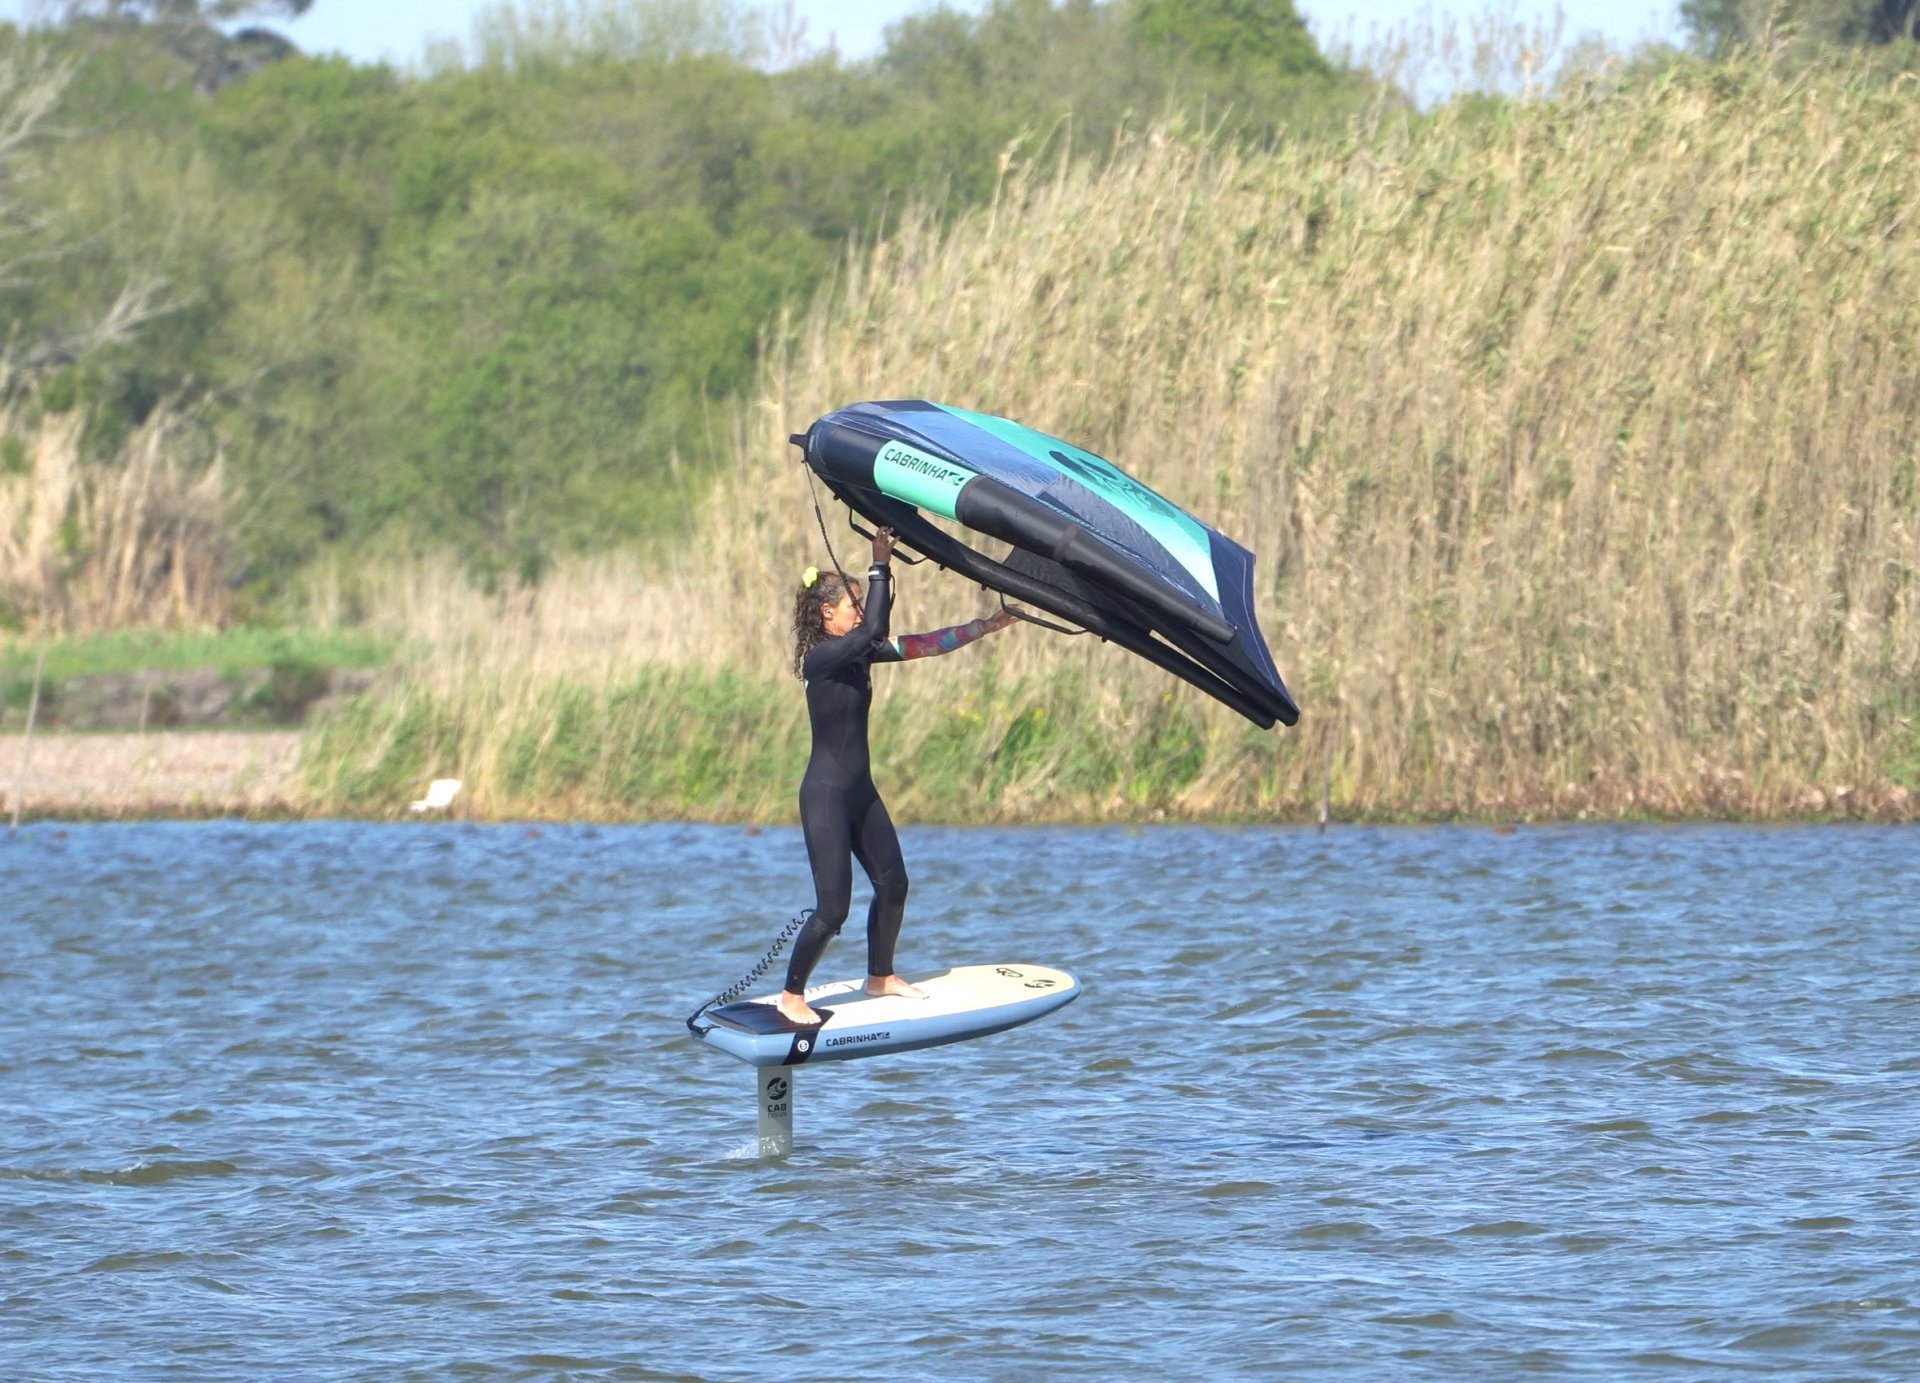
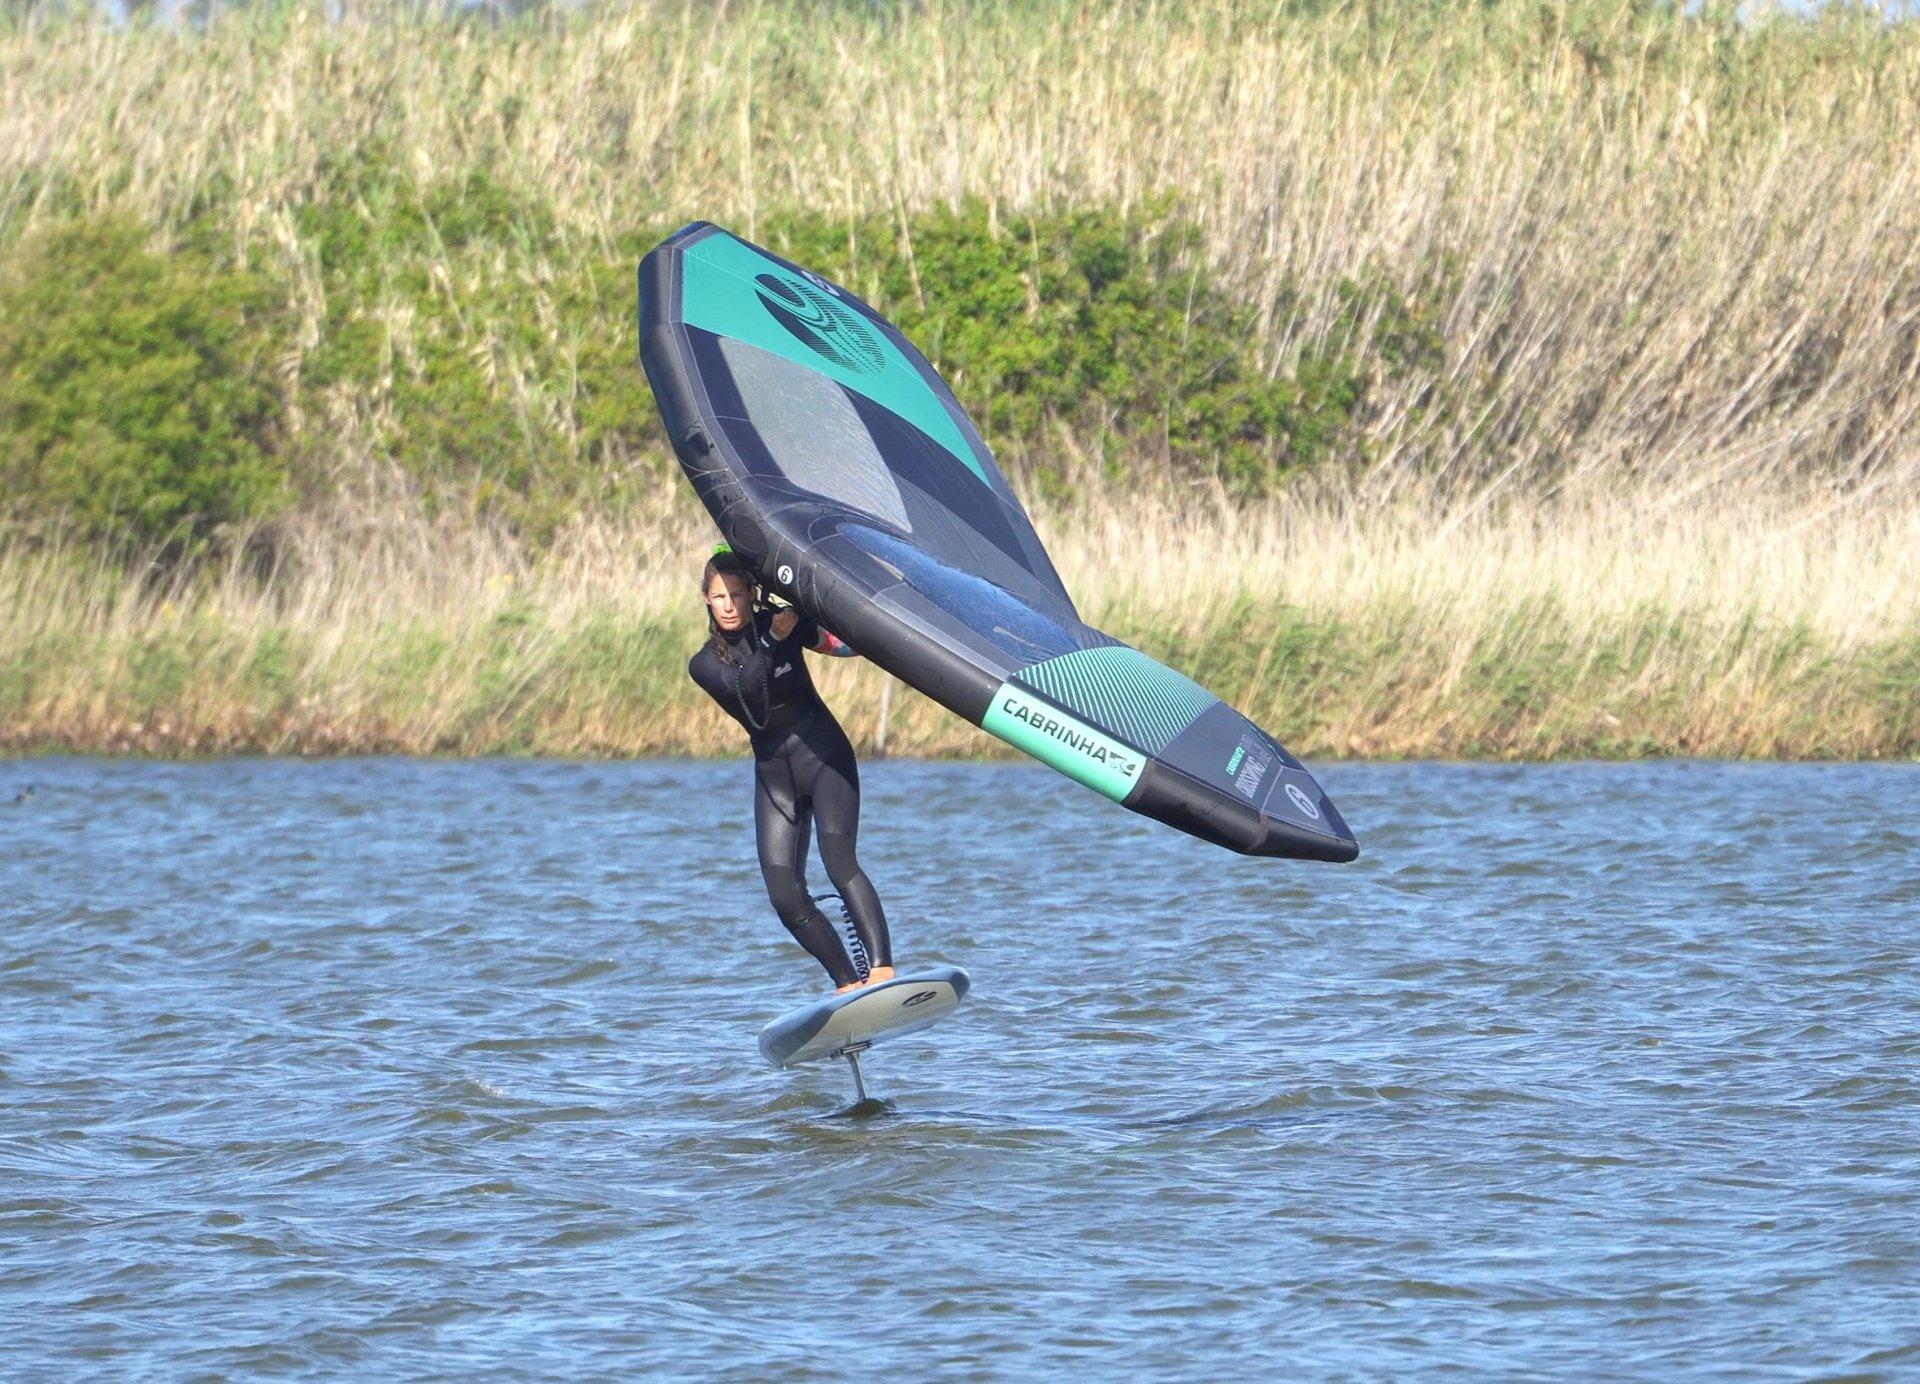
The Flip Pic D.
The action of flipping your wing should hopefully be in the bag. However now that you’re moving with speed you will have a few things to concentrate on! Before we concern ourselves with the wing, we should make one thing crystal clear – no matter what your priority is to keep your ankles flexed and the board carving. To do this your body is almost frozen into its carve position whilst your arms and hands are free to fiddle with your wing. The timing of your flip, when you actually release, doesn’t have to be spot on, but you want it happening around downwind. Realistically once you start carving and are balanced you can go for it. As long as you did bear away onto a broad reach, you’ll have glide and time. However, too early and you might not have enough speed, and too late you may lose balance. What is more important is where the wing is pre flip, and this is also related to how much power you have. If you have the wing too low in front of you you’ll put too much weight on your front foot and likely push the nose down when you flip. As such it’s better to fly your wing up slightly. However, be aware that if you have a lot of power this can then lift you, which has the potential to take your weight off the board, stop you carving and at worse breach your foil. In short as you go to flip your wing push down on your back hand to help the flip, but be sure to sheet out as you do so. You can see that Karine is pushing down on her back hand, whilst keeping her carve on.
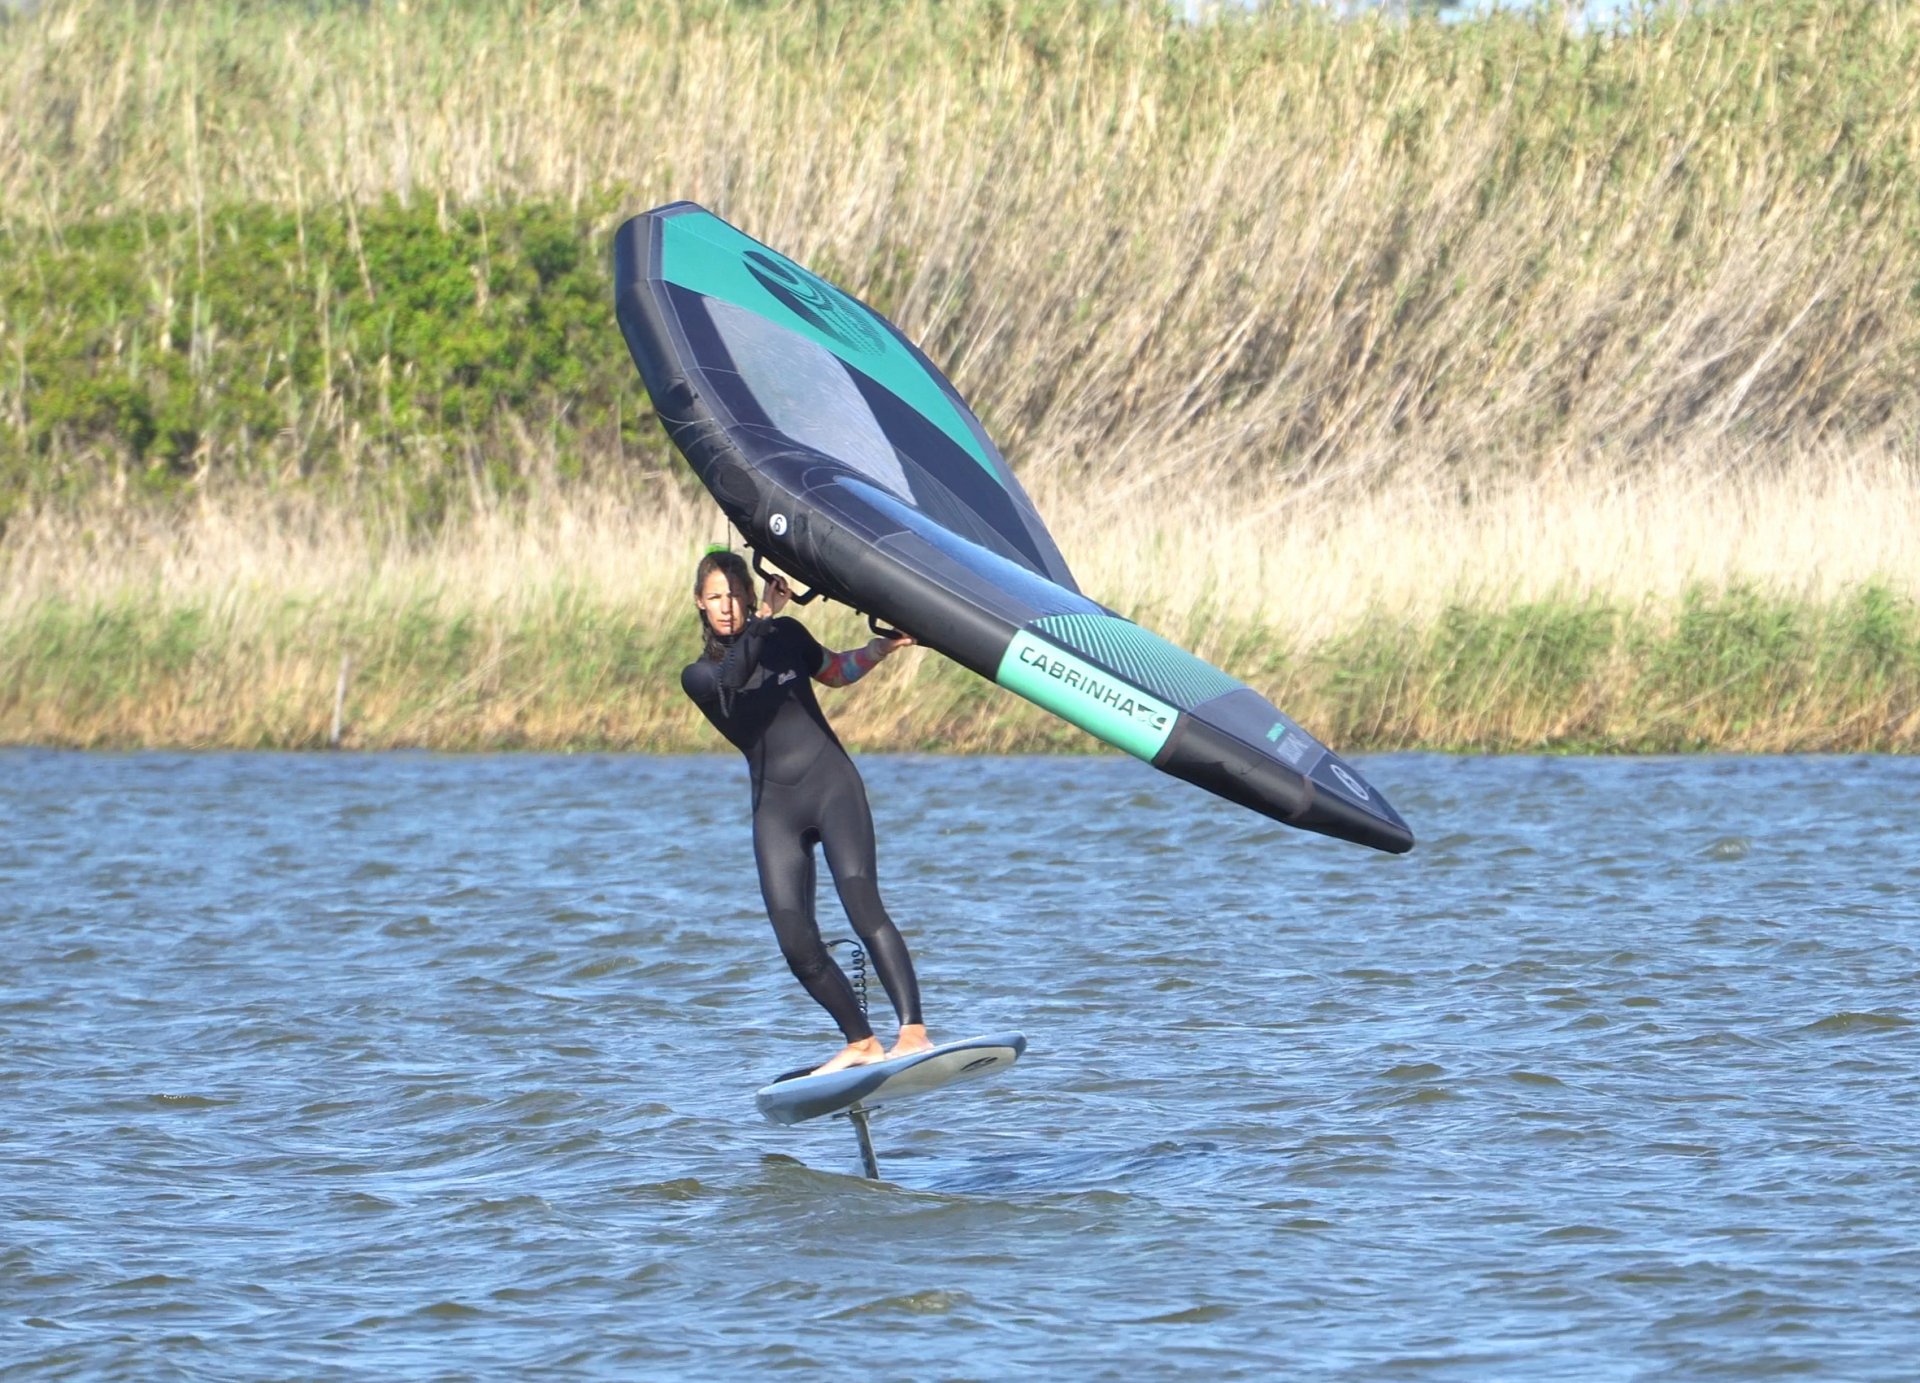
Hand Swap Pic E.
We’re having a look at this part for one reason. You’ll be super keen to get you back hand back onto your wing, but bear in mind your wing’s position. It’s still high. If you sheet in now, it’ll lift you. Same results, you’ll stop carving and you might breach. Get you back hand on by all means, but resist the overwhelming temptation to pull it in. Even if it doesn’t lift you, it’ll just pull you downwind and prevent you carving around onto your switch side.
Rig Forward Pic F.
Instead, your goal is to get your wing pointing forward. What you can do is use your back hand as an anchor point, holding it steady whilst you push your front hand down, so that you can force the leading edge down. This way you won’t get pulled off your carve and you can concentrate on turning using the momentum that you have. You can see that Karine’s back hand is still at shoulder height, the same place as the last photo. She just used it to hold the handle and has pushed the wing down using her front arm. This way there’s no power yet and you’re able to keep carving. If you can get through downwind and onto a broad reach, you’re onto a winner…
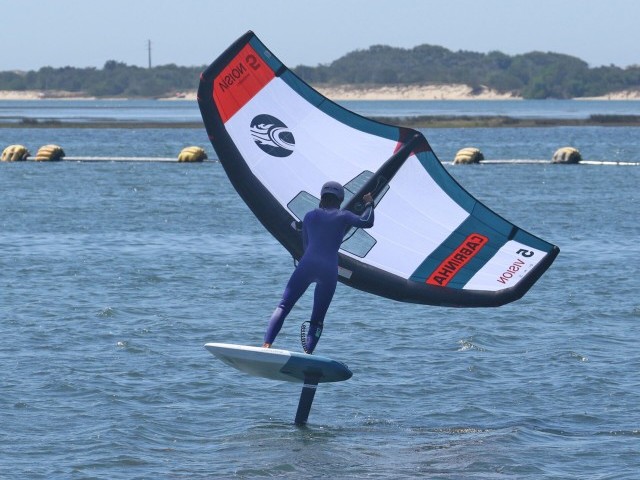
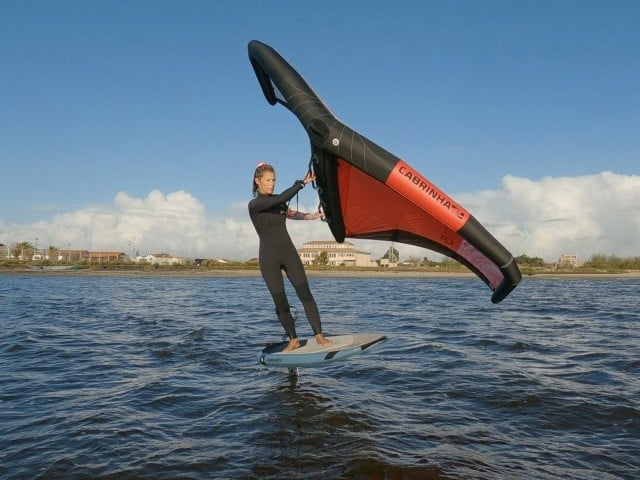
Power On Pig G.
Once you’ve carved through the wind, it no longer matters if you can keep your carve on or not. From a broad reach on toe side, you can steer the board up. You do however need power to do this. And you want to be balanced and over the board. To get to this point you’ve carved round into a position where you and the wing are ready. Now is the perfect time to sheet in. Keep your front hand down and away from you towards the nose of your board and sheet the wing in by pulling you back hand in towards your shoulder. This will keep the wing pointing forward and give you some oomph. You can see that Karine is looking forwards where she’s going, front hand is at eye level and she’s sheeted her back hand in at shoulder height, so any power from her wing is directed forwards.

Finishing your Turn Pic H.
To finish your turn, you’re going to steer the board up from your broad reach until it’s across the wind and with practice until you’re riding upwind. You may be on the foil, but the principle is the same as when you were woffing - the muscle memory is there. You may need to sheet out slightly to reduce the power in the wing. Now pull your back foot under you so that you can drive against it whilst you bring the wing closer to your body, moving it back by bending your arms. This should direct the power through your back foot, twisting the nose of your board up. You can see how Karine’s front arm is bent because she’s moved her wing back to turn the board and finish her turn.
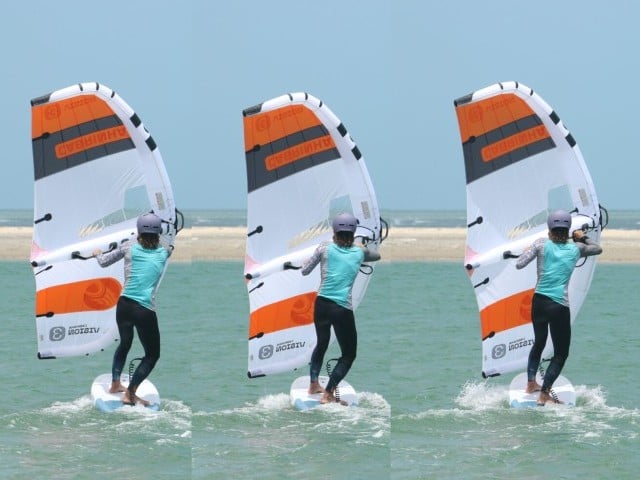
Toe side Stance Pic I.
Happy days, it’s much the same as your woffing. Turn your hips and shoulders so that your chest faces forwards and aim to get your weight centred between your feet so that you can be dynamic if needed. It’s comforting to drop your bum back towards the tail of the board against the pull of the wing, but avoid this as it’ll weight your back foot and lift the nose. With your weight centred you’re free to hold the wing forwards to help keep the nose down. Keep your ankles flexed and knees across the centre line. Foot position is key, so if you’re uncomfortable try and wiggle or slide your feet until you feel balanced and trim is restored. Toe side will take some practice and as such we will devote some extra technique to it in an upcoming issue:)
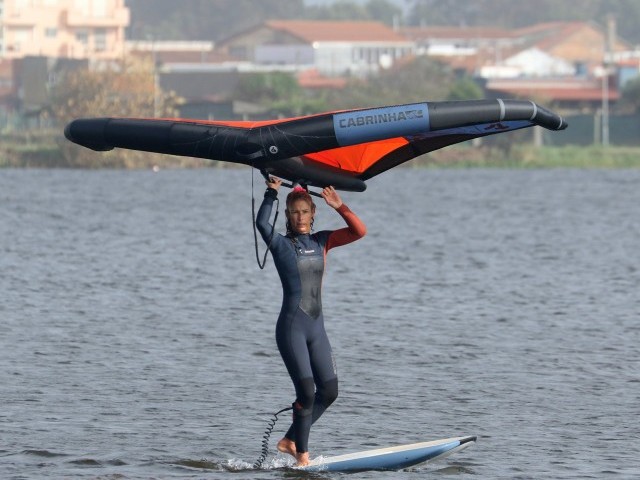
Been There, Done That Pic J.
Before we wrap this gybe up, we should have a quick shout out to the inevitable. You will touch down. If you can stay upright and balanced, touching down is not the end of the world and realistically a damn good place to be getting to. More good news, you’ve nailed your woffing gybe and you can even change your feet off the foil. This means that your better equipped than a superhero to deal with such adversity. Once you touch down, just make sure that you’re balanced, have the wing flying and then you can change your feet, ready to get back on the foil, hack upwind and give it another go.
Top Tips
You will naturally prefer this gybe with your stronger foot forwards as you’ll end up switch/ toe side the way that feels more natural. Think of regular and goofy in other board sports, here’s the same to start with.
For your first attempts don’t worry about your wing, but concentrate on your carve. Bear away, let go with your back hand and try to carve whilst keeping your balance.
Once you’re getting through downwind and working on staying up on the foil toe side,
use your wing to keep the nose down by pushing it forwards. And it’s more than acceptable to move your back foot up and narrow your stance once you come round.
Now have a good butchers at the sequence for a step by step walk through, and keep your eyes open for the video that will be dropping as soon as possible.
This technique article was in Issue 13 of Tonic Mag.
Related
By Christian and Karine
