

The Carving 360
Technique / Wing Foil
Oh boy, do we have something high on the fun stakes for you today. The carving 360! If you fancy yourself as a bit of an artisan carver, then look no further than this peach for a way to express yourself truly. If you’re of a more modest persuasion, but still hold a candle to carving, this is also for you. It’s a great challenge that will reward you with a happy, tingly, warm sensation once you crack one. Oh, and it looks rather snazzy too.
So, what is a carving 360? Unusually for wind sports, the name sums it up. You aim to carve into a gybe, but rather than flip your wing, you’ll keep it neutral and continue to carve until you’re riding in the same direction again, having completed a full 360 degrees. What on earth could be difficult about that:) The idea of a carving 360 is that you use your speed, balance, finesse and glide to get you around. You won’t be calling on the wing for assistance until you’re back to heel side!
Your prerequisite for this humdinger of a move is the heel-to-toe Duck Gybe that we covered back in TONICMAG issue 20. If you’ve got the Duck Gybe nailed, it will help more than you can imagine. You’ll be calling on it for your approach, entry and most importantly, the initial wing action. For the carving 360, you’ll need to get your wing pointing down and to the inside of your turn to enable you to carve around it.

A quick word on carving before we get into the fun stuff. Carving is your aim, so with that in mind, you need to get yourself ready to carve further than you ever thought possible. This means that you’ll need to be able to stay balanced over your board, whilst keeping your foil carving and happy. By “happy,” we mean that you need to keep your foil trimmed from front to rear for maximum efficiency, even though you’ll be banking it over. You don’t want to touch down, you don’t want to breach, and you don’t want to stall! Bringing your rear foot a touch forward and making sure you move it slightly further across the centre line will help.
As is our want and responsibility, please remind us that you will need to check your mirrors to make sure that the coast is clear, and you have ample space to give this a go.
OK, here we go.

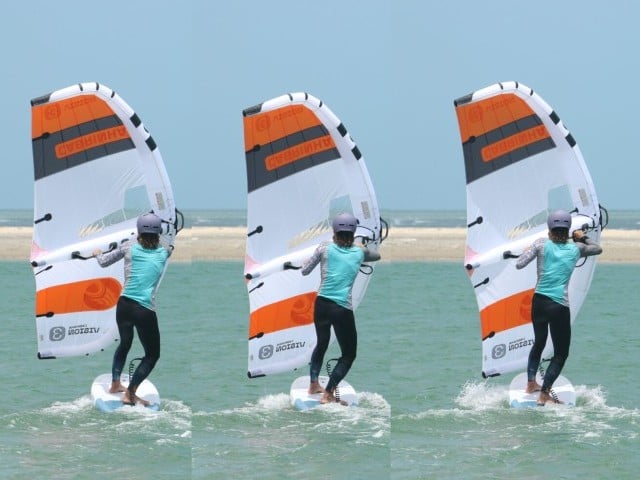
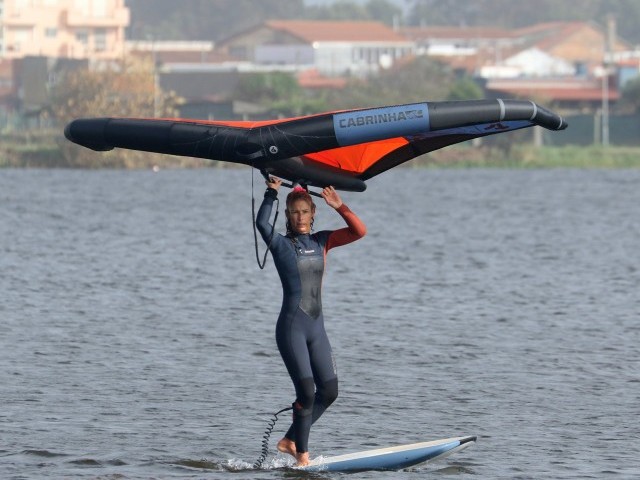
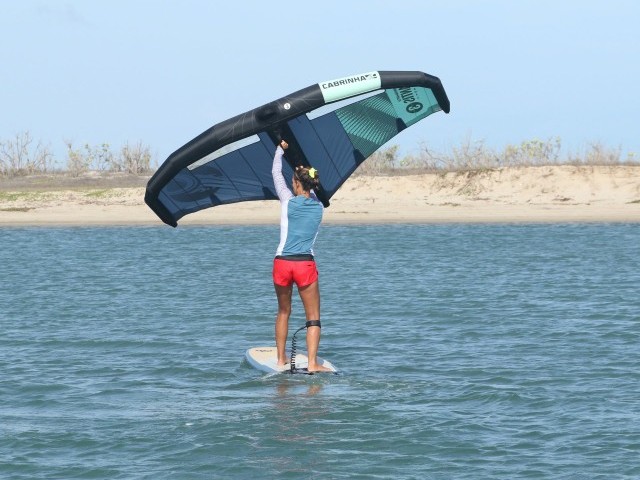
Set Up & Approach Pic A.
You want to approach on an upwind course so that you get your bearings and have the option to bear away and accelerate to help you get around. As you approach, bring your rear foot forward and a touch further across towards the downwind rail of your board. Sheet in and get your wing pointing forward so that it’s powering you along. Check that the coast is clear. Karine has moved her back foot, she’s had a good look around, has sheeted her wing in to gain speed upwind and has decided that it’s 360 time!

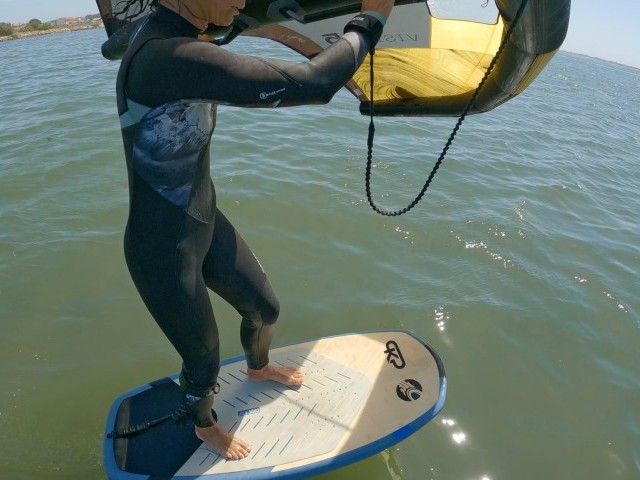
Bear Away Pic B.
Push your wing forward to bear away a touch. This will bring you over the board, so that you can get balanced and ready to carve. As you bear away, you will accelerate, which is a good thing. Holding the wing forward and having your rear foot further forward will help compensate for the extra lift created by your accelerating. How much you bear away, and for how long, will depend on power and wind strength. The windier it is and the more powered you are, the faster you need to go to generate enough apparent wind so that you can manhandle the wing. Suppose you’re in comfy conditions just long enough to get over the board and balanced enough to carve. Here Karine has borne away, so she’s now over the board and balanced whilst gaining speed.
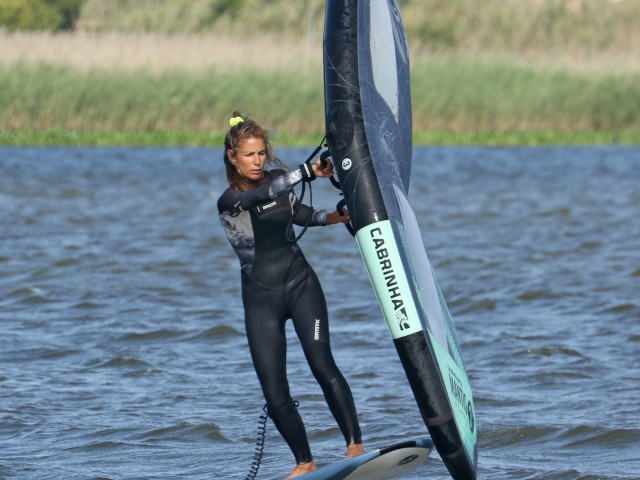
Carve Pic C.
Time to get your carve on. You should be well-versed in this. Keeping the wing sheeted to the wind so that you still have power, flex your ankles and drive your knees forward and across the board to set your carve, whilst looking just ahead to guide yourself and keep an open carving stance. Keep weight on both feet as you carve so that you can maintain the same height. Looking at Karine, you can see that she’s keeping wind in her wing, she’s flexed her ankles and knees, driving across the board and banking it over, whilst keeping her upper body upright and balanced.

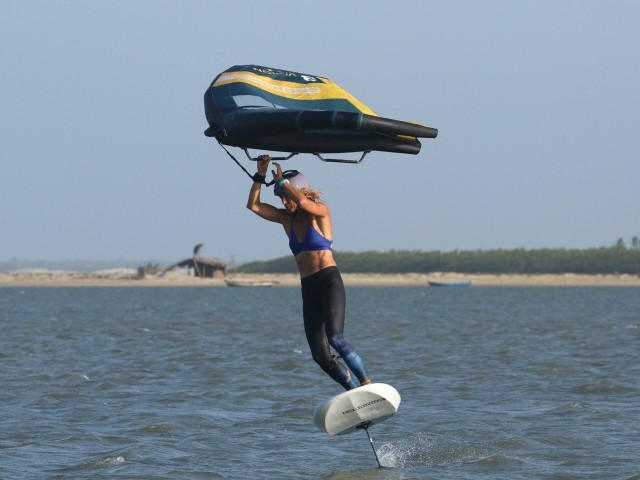
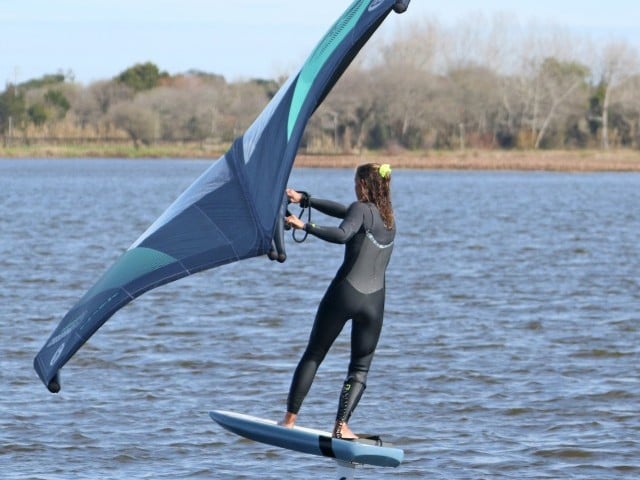
Wing Down Pic D
You’re looking for that point where the wing goes slightly lighter so that you can sheet it in more. As with your Duck Gybe, this will be around the downwind zone. You want to get the wing pointing down. Turn your shoulders into the turn, whilst pushing your front hand down and pull your rear arm in to sheet in. Whilst all this is going on, you must keep your carve on, keeping your weight balanced over both feet, driving through the balls of your feet. Here, Karine is approaching the downwind zone; her wing feels lighter, so she pushes her front hand down and sheets in with her rear arm.
Keep Carving Pic E.
A brave new world! This is where it all changes. Back to its origin, from here on in it’s all about staying up on the foil while carving far enough around your 360 until you can get the power back on. As you go through, push your front hand across the board to the inside of the turn and sheet right in so that no wind can fill your wing. With your wing neutral, you can continue to carve. Karine has her wing to the inside of her carve, and her leading edge is pretty much parallel to her board. There’s no chance of wind getting in it, and there’s no chance of her getting backwinded by her induced wind:)
Keep Neutral Pic F
As you continue to carve past downwind and onto what would be a broad reach heading back, you still need to keep the wind out of your wing. However, this time the wind will be coming from the other side of your wing, so it’s the true wind that can push against your wing, and if it does, it’ll push you onto your heels and stop you carving. There is a backwinding 360 variation, which we’ll cover in a later issue, but for now, avoid it like the plague! To prevent the wind from pushing against you, gently push your front hand and the leading edge up, while pulling the back handle right in towards your rear shoulder. You’re aiming to let the wind blow underneath, rather than push against you. Looking at Karine, she’s feeling her wing up by pushing her front hand further away, both forward and up, whilst sheeting her back hand in as much as possible.

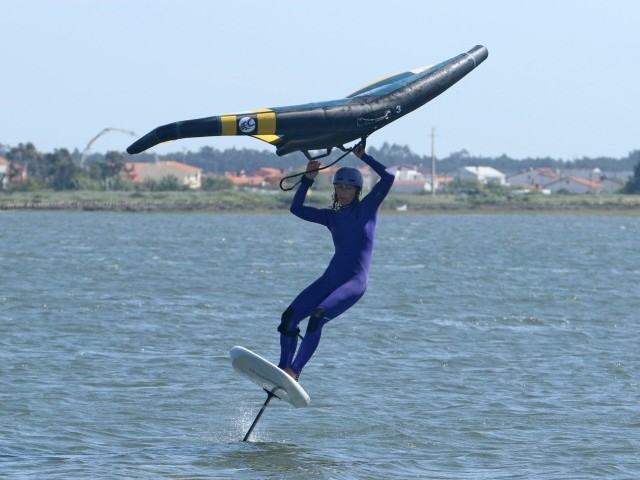
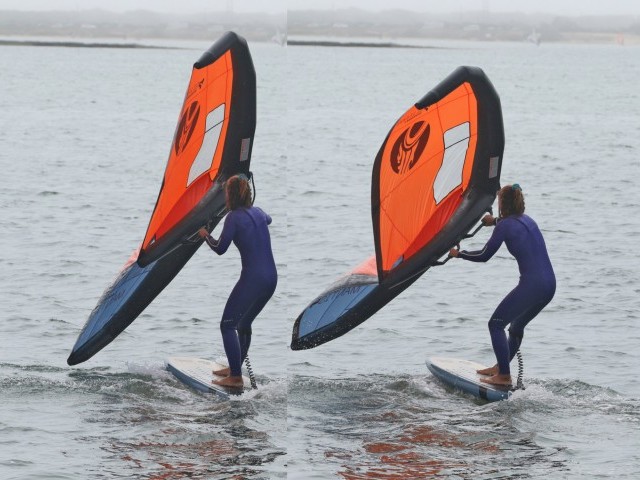
Wing Lift Pic G.
Carving with a neutral wing is still the name of the game. However, now that you’ve started to carve back upwind, you need to get the wing up and ready, still without backwinding yourself. As you carve, push your front hand up and upwind. Looking at the mini sequence, Karine is still carving hard, her board is banked, and her foil is trimmed. You can see that she’s lifting her front hand and pushing it forward, aiming the leading edge of her wing up into the wind. As she does this, the wing is happily floating, not powered or backwinded. This is your aim. This action is all from your front arm. Resist the temptation to lift the wing by pulling on the back hand, as this will pull your weight back and stall the foil! The movement is very much like the wing lift in a duck gybe, but you haven’t swapped hands!!
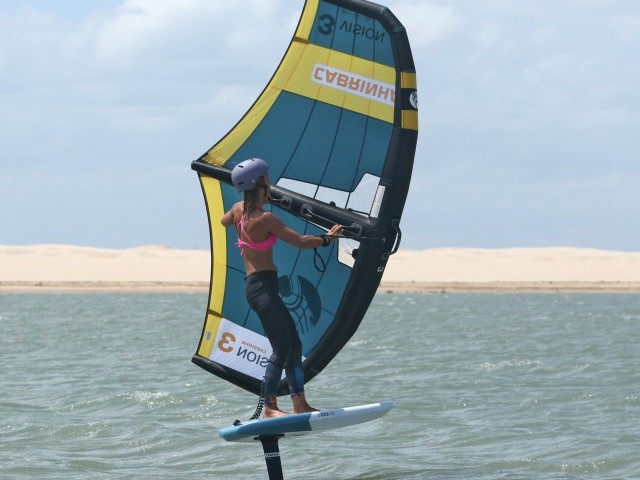
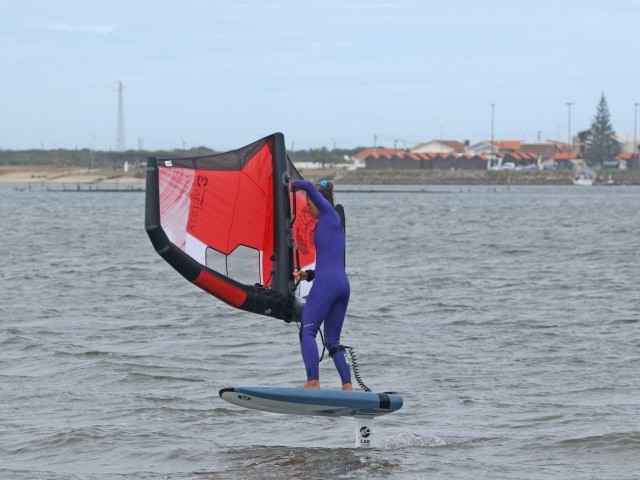
Follow Your Wing Pic H.
Now that your wing is upwind and neutral, you have the perfect axis point around which to keep carving. Once again, resist all the cells in your body screaming for you to sleep in and get some power; it’s too early. What you can do is keep your wing forward, neutral and follow it. Leading with your wing will help with carving that last little bit, and by holding it forward, you’ll keep your weight centred on both feet and your foil stays happy! Karine’s wing is floating with no power pulled into it. By holding it forward, Karine follows her wing upwind around the final part of her carve.
Push Pic I.
It’s worth understanding that as you come around onto an upwind course, you’re unlikely to power out of this upwind. You need to bear away. Keeping your front hand forward, push it across the board and downwind as you sheet in. This will push the nose off the wind, using the mast as a pivot point. You need to keep your foil and board trimmed, as this is when you’ll be slowing massively. If the nose comes up just a fraction, you’ll stall instantly. Keeping the wing forward will help prevent your nose from coming up as you sheet in. Karine sheets in, keeping her wing forward whilst also pushing it away from her. She pushes this power through her front leg to push the nose of her board off the wind.

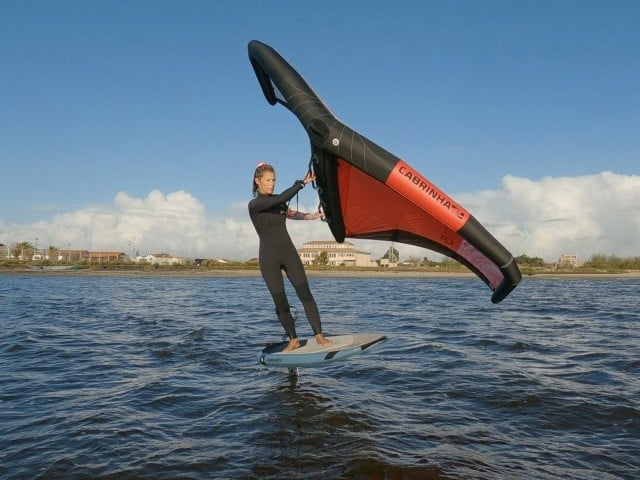
Claim It Pic J.
With the nose pointing slightly off the wind, you’ll likely be pretty low on your foil now. To avoid a touchdown, you’ve got two get-out-of-jail cards. Firstly, if you are accelerating, push down quickly with your rear foot, tapping the tail down to lift the nose. Secondly, sheet out a touch so that your wing is sheeted to the wind. This will allow it to catch more of the breeze, and you’ll accelerate and climb more easily. To finish off, Karine has tapped her tail and is sheeting her wing out to find more oomph!
Top Tips
For your first attempt, we recommend that you don’t have too much power. This way you’ll be comfy, confident and balanced. With less wind, it can make the exit harder, but at least you can concentrate on the meat of the move, getting 85% nailed, before getting the exit dialled. If you have too much power, it’ll be much harder to push your wing down, keep it neutral and stay carving.
As you come around onto an upwind course, it is the moment when you’re most likely to touch down. This isn’t a problem; if you’ve made it this far, the hard work has been done, and you’ve successfully carved. It’s then a matter of time and practice, and maybe a little more power.

Common Problems
As a result of wanting to carve harder or quicker to get around, it’s tempting to hold your wing further back down the board as you push it down. It also feels less intimidating to do this, as it can’t then push against you if it’s not neutral. The problem is that if you do this, your wing will pull your weight back onto your rear foot, and you’ll either breach or stall your foil.
It’s also really tempting to lean onto your wing in anticipation of the wind coming from the wrong side. The problem with this is you won’t be balanced over your board, and you are much more likely to lose balance and fall to the inside. In preference, work on lifting your front hand to neutralise the wing and let any breeze pass underneath it.
Both of these problems are more easily avoided if you don’t have too much power.

Excellent. Now it’s your turn to give it a go….


This technique article was in Issue 25 of Tonic Mag.
Related
By Christian and Karine
